PostgreSQL is a powerful, open-source object-relational database system. It runs on all major operating systems, including Linux, UNIX (AIX, BSD, HP-UX, SGI IRIX, Mac OS, Solaris, Tru64), and Windows OS. In this handy tutorial, let us see how to install PostgreSQL on Debian 7 ‘Wheezy’.
Install PostgreSQL
Switch to root user using the command:
$ su
Install it with following command:
# apt-get install postgresql postgresql-client postgresql-contrib
Access PostgreSQL
The default database name and database user are called postgres. Switch to postgres user to perform postgresql related operations:
# su - postgres
To login to postgresql, enter the command:
$ psql
psql (9.1.9)
Type "help" for help.
postgres=#
To exit from posgresql, type \q.
Set “postgres” password
Login to postgresql and set postgres password with following command:
postgres=# \password postgres
Enter new password:
Enter it again:
postgres=# \q
To install PostgreSQL Adminpack, enter the command in postgresql prompt:
postgres=# CREATE EXTENSION adminpack;
CREATE EXTENSION
Create New User and Database
First create a regular system user from your Terminal. For example, here I create a new user called “kumar” with password “debian” and database called “mydb”.
First create a user called “kumar” as regular system user. To do this, enter the following command from your terminal:
# adduser kumar
Switch to postgres user with command:
# su - postgres
Enter the following commands to create user “kumar”:
$ createuser
Enter name of role to add: kumar
Shall the new role be a superuser? (y/n) y
Login to postresql command prompt:
$ psql
Enter the following command to set password for user “kumar”:
postgres=# \password kumar
Enter new password:
Enter it again:
Exit form postgresql prompt and switch to the newly created user “kumar”:
$ su - kumar
Password:
Enter the command to create database called mydb:
$ createdb -O kumar mydb
Now the user “kumar” and database “mydb” are created.
Connect to newly created database “mydb” using the following command:
$ psql mydb
psql (9.1.9)
Type "help" for help.
mydb=#
Delete Users and Databases
To delete the database, switch to postgres user:
# su - postgres
Enter command:
$ dropdb <database-name>
To delete a user, enter the following command:
$ dropuser <user-name>
Configure PostgreSQL-MD5 Authentication
By default, Posgresql uses ident authentication, so that the local system users can be granted access to databases own by them. If you want to set MD5 authentication to require users to enter passwords.
Open up the /etc/postgresql/9.1/main/pg_hba.conf file:
# nano /etc/postgresql/9.1/main/pg_hba.conf
Find the following line:
local all all ident
Change to:
local all all md5
Restart postgresql to apply the changes:
# /etc/init.d/postgresql restart
Now you will be asked password every time while connecting to databases.
Configure PostgreSQL-Configure TCP/IP
By default, TCP/IP connection is disabled, so that the users from another computers can’t access postgresql. To allow to connect users from another computers, open the file /etc/postgresql/9.1/main/postgresql.conf:
# nano /etc/postgresql/9.1/main/postgresql.conf
Find the line:
#listen_addresses = 'localhost'
Uncomment and set the IP address of your postgresql server as shown below:
listen_addresses = '192.168.1.200'
And find the line:
#password_encryption = on
Uncomment it by removing the # symbol to look like below:
password_encryption = on
Restart postgresql service to save changes:
# /etc/init.d/postgresql restart
Manage PostgreSQL with phpPgAdmin
phpPgAdmin is a web-based administration utility written in PHP for managing PosgreSQL.
To install phpPgAdmin, enter the following command:
# apt-get install phppgadmin
By default, you can access phppgadmin using http://localhost/phppgadmin from your local system only. To access remotely, do the following,
Open up the file /etc/apache2/conf.d/phppgadmin:
# nano /etc/apache2/conf.d/phppgadmin
Find the line:
#allow from all
Uncomment it by removing the # symbol and make it look like below:
allow from all
Restart Apache service:
# /etc/init.d/apache2 restart
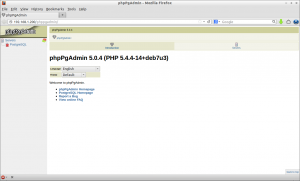
Now open your browser and navigate to http://ip-address/phppgadmin. You will be pleased when you see the following screen.

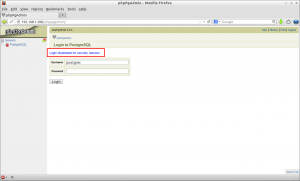
Login disallowed for security reasons.

# nano /usr/share/phppgadmin/conf/config.inc.php
Find the following line:
$conf['servers'][0]['host'] = 'localhost';
And remove localhost to make it look like below:
$conf['servers'][0]['host'] = '';
And find the line:
$conf['extra_login_security'] = true;
Change the value to false:
$conf['extra_login_security'] = false;
Save and close the file. Restart postgresql service and Apache service:
# /etc/init.d/postgresql restart
# /etc/init.d/apache2 restart
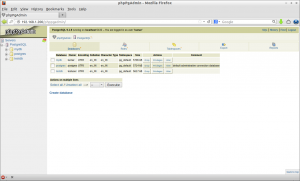
Now you will be able to login to phpPgAdmin.


