
Introduction
OpenGTS is first open source web based GPS based tracking system.It is used worldwide in more then 110 countries and used in thousands of vehicles. It is used for entry level fleet and equally for high level tracking systems.
Features
Web based authentication
Each account support multiple users, each user can have its own login and password. User can access their account settings.
Customizable web interface
Look and feel of tracking website and be modified as per requirement of the user.
Operating System independent
It is an entirely java based application with used Apache tomcat for web services and mysql as database, it can be installed and configured with Linux, Mac, FreeBSD or Microsoft based Operating systems.
Reports customization
It used XML base internal reporting engine which help to generate any tracking history as and when required.
Customizable zeozones
Customized zeo forced area can be set up to provide arrival and departure reports. Each zeozone can be assign with a different name.
For more details: http://opengts.sourceforge.net/
Install OpenGTS
Prerequisites
We will use mint Linux 17 for demo purpose, minimum 2 GB RAM, 5 GB storage with a dual core process will be sufficient.
Update system:
# sudo apt-get update
Install required software packages:
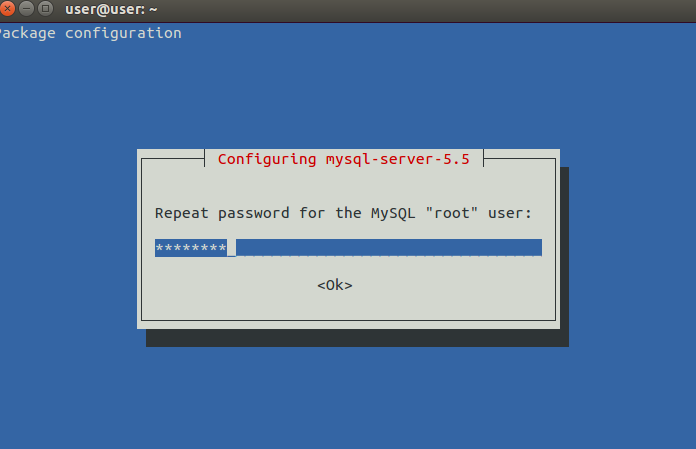
$ sudo apt-get install apache2 php5 mysql-server libmysql-java wget curl unzip ant
Provide mysql password during installation.
Start Mysql and apache2 services:
 $ sudo /etc/init.d/mysql start
 $ sudo /etc/init.d/apache2 start
Install openjdk:
$ sudo apt-get install openjdk-7-jdk
Download and install Apache Tomcat version 7-x-x.
$ wget -c http://apache.mirror.uber.com.au/tomcat/tomcat-7/v7.0.65/bin/apache-tomcat-7.0.65.zip
Extract tomcat package and copy everything to /usr/local/ directory.
$ sudo  unzip apache-tomcat-7.0.65.zip
$ sudo cp -av  apache-tomcat-7.0.65 /usr/local/
Define CATALINA_HOME environment and run the startup script.
$ export CATALINA_HOME=/usr/local/apache-tomcat-7.0.65/
$ cd /usr/local
$ sudo ln -s $CATALINA_HOME tomcat
$ cd /usr/local/apache-tomcat-7.0.65/bin
$ chmod a+x *.sh
$ ./startup.sh
$ sudo  ln -s $CATALINA_HOME /usr/local/tomcat

Define JAVA_HOME environment:
 $ export JAVA_HOME=/usr/lib/jvm/java-7-openjdk-amd64
 $ echo "export JAVA_HOME=/usr/lib/jvm/java-7-openjdk-amd64" >> ~/.bashrc
 $ sudo  ln -s $JAVA_HOME /usr/local/java
Configure JAVA mail setup and Java Connector:
First Download and setup mysql Java connector, extract package and copy mysql java connector to $JAVA_HOME/jre/lib/ext folder
$ cd /tmp/ && wget http://cdn.mysql.com//Downloads/Connector-J/mysql-connector-java-5.1.37.tar.gz
$ tar -xvf mysql-connector-java-5.1.37.tar.gz
$ cd  mysql-connector-java-5.1.37
$ sudo  cp mysql-connector-java-5.1.37-bin.jar $JAVA_HOME/jre/lib/ext
Now download and configure Java mail setup and copy that downloaded .jar file to $JAVA_HOME/jre/lib/ext folder.
$ cd /tmp/ && wget https://maven.java.net/content/repositories/releases/com/sun/mail/javax.mail/1.5.4/javax.mail-1.5.4.jar
$ sudo cp javax.mail-1.5.4.jar $JAVA_HOME/jre/lib/ext/
Rename javax.mail-1.5.4.jar to javax.mail.jar:
$ mv $JAVA_HOME/jre/lib/ext/javax.mail-1.5.2.jar $JAVA_HOME/jre/lib/ext/javax.mail.jar
Download OpenGTS:
$ cd /tmp && wget http://ncu.dl.sourceforge.net/project/opengts/server-base/2.6.0/OpenGTS_2.6.0.zip
Extract package to /usr/local folder:
$ sudo unzip OpenGTS_2.6.0.zip -d /usr/local/
Set up GTS_HOME environment:
$ export GTS_HOME=/usr/local/OpenGTS_2.6.0/
$ echo "export GTS_HOME=/usr/local/OpenGTS_2.6.0" >> ~/.bashrc
$ sudo  ln -s $GTS_HOME /usr/local/gts
Change ownership for user currently logged in before running next command:
$ sudo chown -R unixmen:sudo /usr/local/OpenGTS_2.6.0/
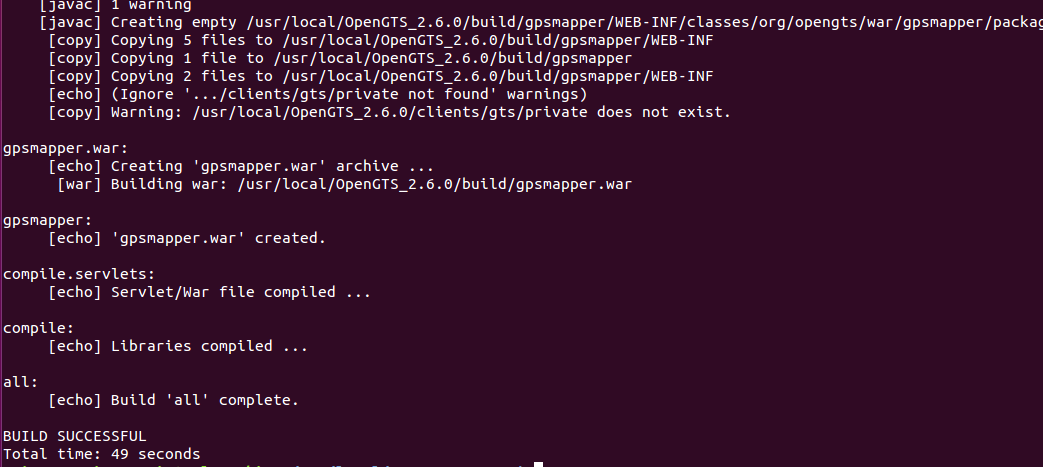
Now change directory to $GTS_HOME and run following command:
&& ant all
If everything goes smooth, output will be something like below.
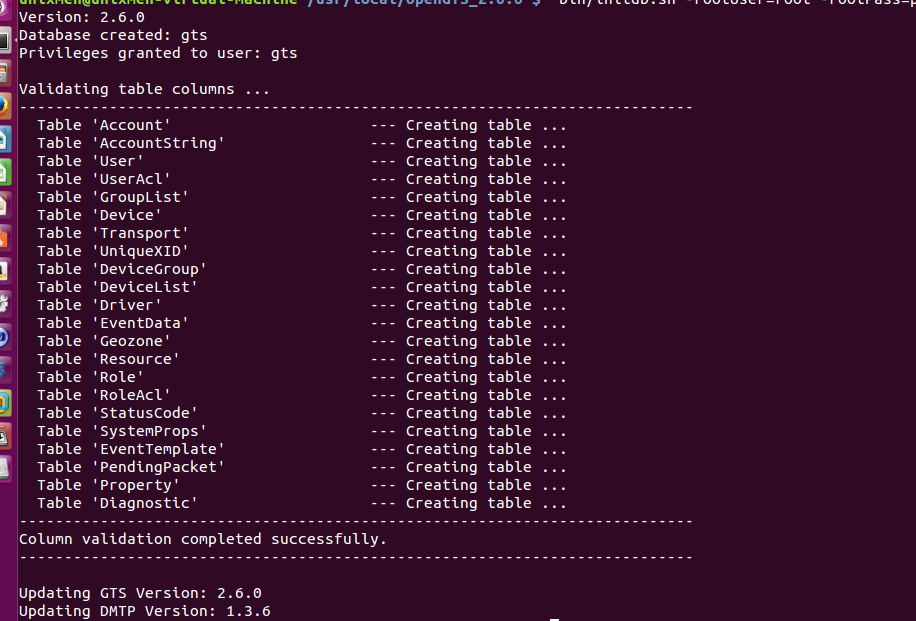
Define database user name and password (Note that we are still in $GTS_HOME).
$ bin/initdb.sh -rootUser=root -rootPass=password
Sample output:
Run ant track command which will create a file named track.war, we have to copy that file to $CATALINA_HOME/webapps folder.
$ ant track
Sample output:
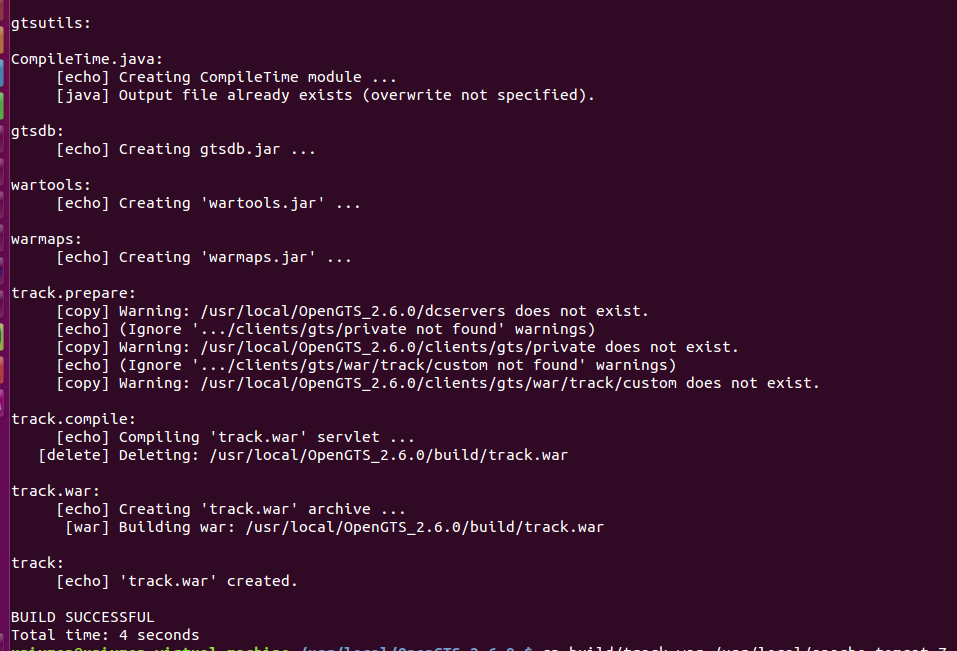
$ cp $GTS_HOME/build/track.war /usr/local/apache-tomcat-7.0.65/webapps/
Before moving ahead stop and restart apache tomcat again
$ $CATALINA_HOME/bin/startup.sh
$ $CATALINA_HOME/bin/startup.sh
Open browser and type http://<ip_address>:8080/track/Track
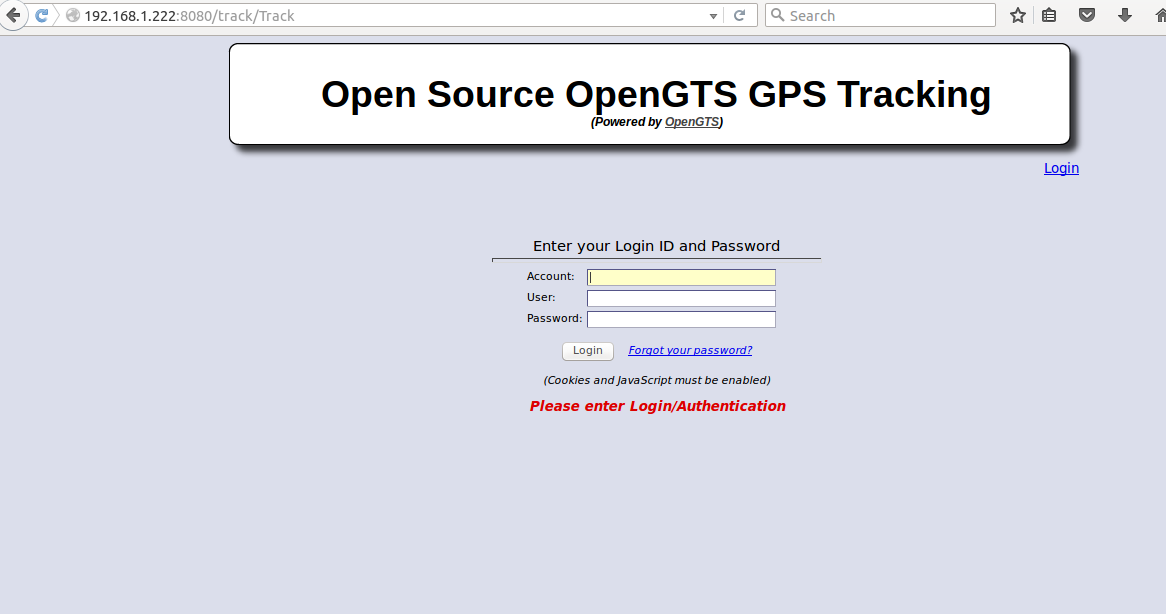
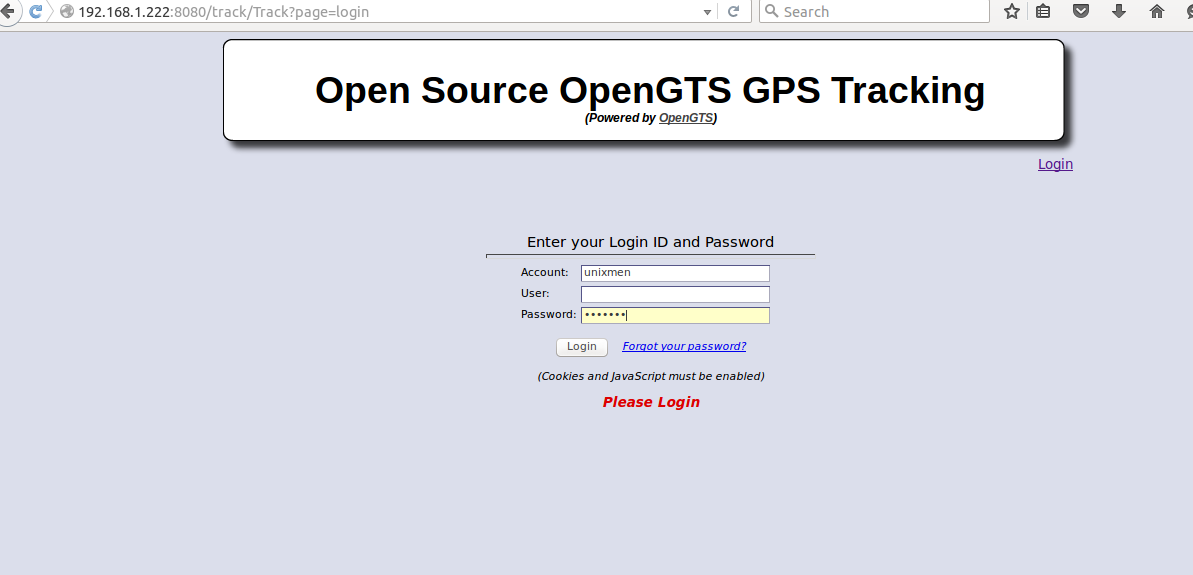
Oops, we have not create a sysadmin account required to login the server, let us create it first.
$ cd $GTS_HOME/bin
$ ./admin.sh Account -account=unixmen -pass=unixmen -create
Sample output

Now Provide these credentials and login
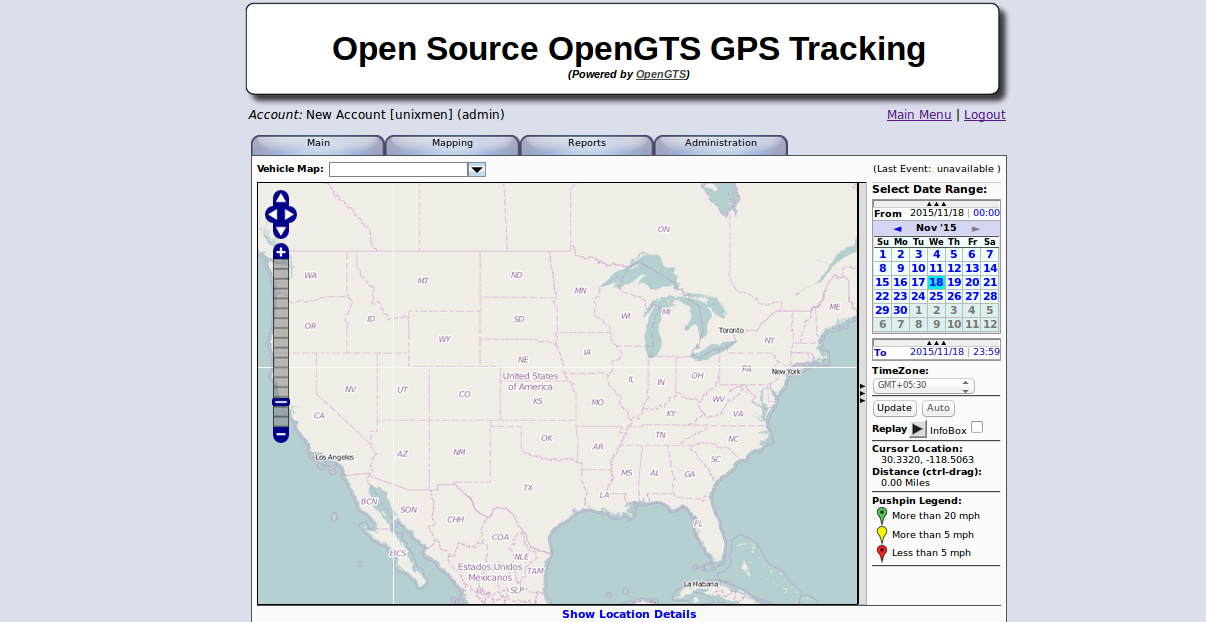
A welcome screen will appear:
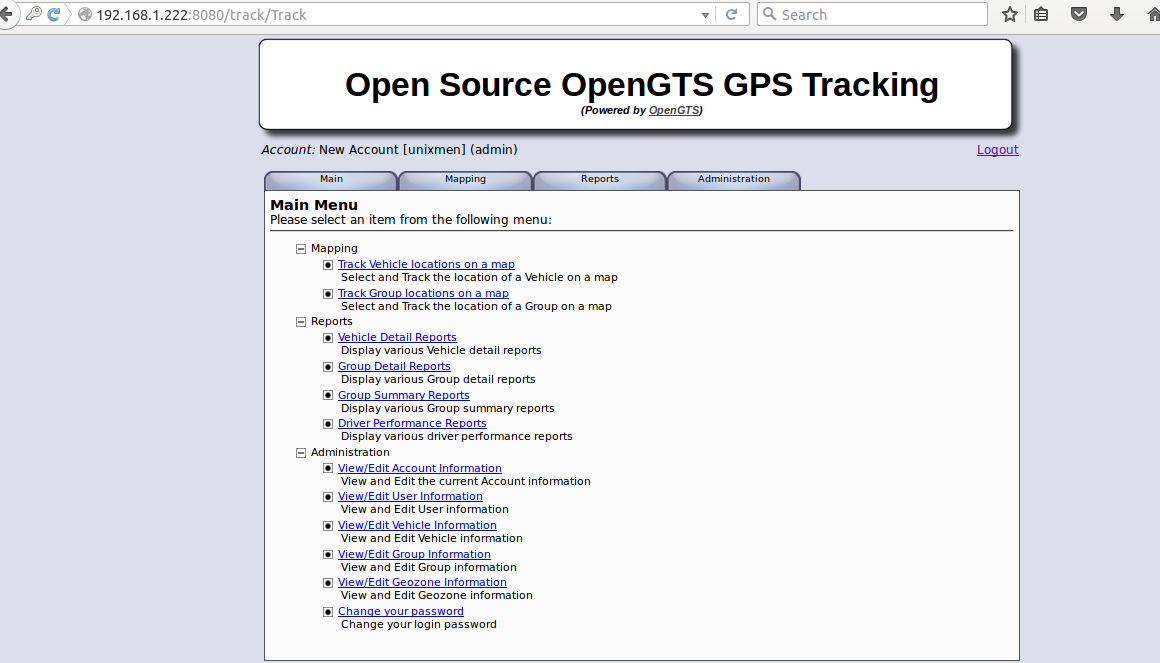
Now installation and configuration part is over at this stage, configure your GPS tracking devices and you can use them with Open GTS.
Conclusion
As per my knowledge very fewer documentations related to OpenGTS installation are available, but official documentation will be sufficient to configure it. One problem which was faced by me during installation process is that OpenGTS show error when it was configured with latest version of Apache Tomcat.

It is recommended that you should use Apache tomcat version 7.0.x for that purpose. Although this practical guide was tested in Mint Linux 17, but I believe that it will also work with Ubuntu 14.04/15.10.
Have fun!!


