Introduction
ClearOS is a CentOS based Firewall Operating system. It is a less complicated and robust, modular speedy but cost effective Internet and Network Management Software. This Firewall/Proxy system is an award winning Operating System, very easy to install, easy to manage and easy to learn.
Features
- Web based management Interface.
- SNORT based intrusion detection system.
- Content Filtering
- Anti virus
- Email Services
- OpenVPN, IP SEC
- DHCP Services.
- Multiple WAN support for Fail over tolerance.
- MRTG based in built report generation.
Install ClearOS
Prerequisites:
As per my personal experience with this firewall, 40-80 GB HDD, for a 20-25 user environment a Dual Core System with 4 GB RAM will be sufficient, but for a 50+ user environment a minimum of 8 GB RAM with minimum corei5 configuration is required. However in official documentation there may be some different hardware related instruction, but as per experience, above mentioned configuration will work smoothly. Minimum 2 LAN Cars (1 LAN, 1 WAN).
Download the latest stable version of Community edition of ClearOS from this link. As of writing this article, latest available version was ClearOS 6.6.
Burn ISO image to DVD or Create a bootable USB for Installation purpose.
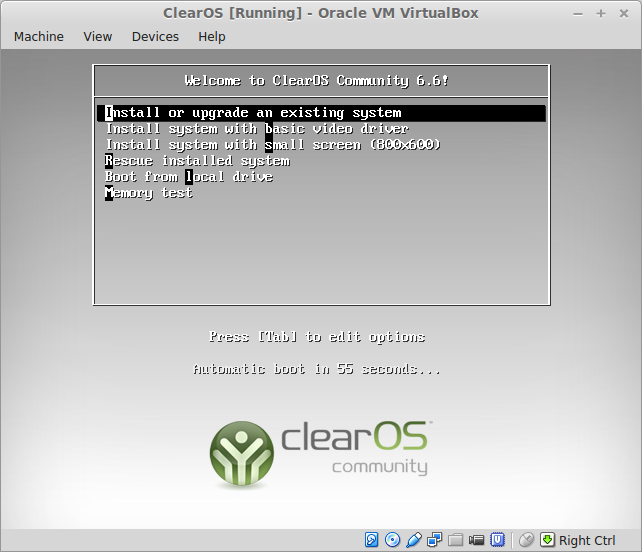
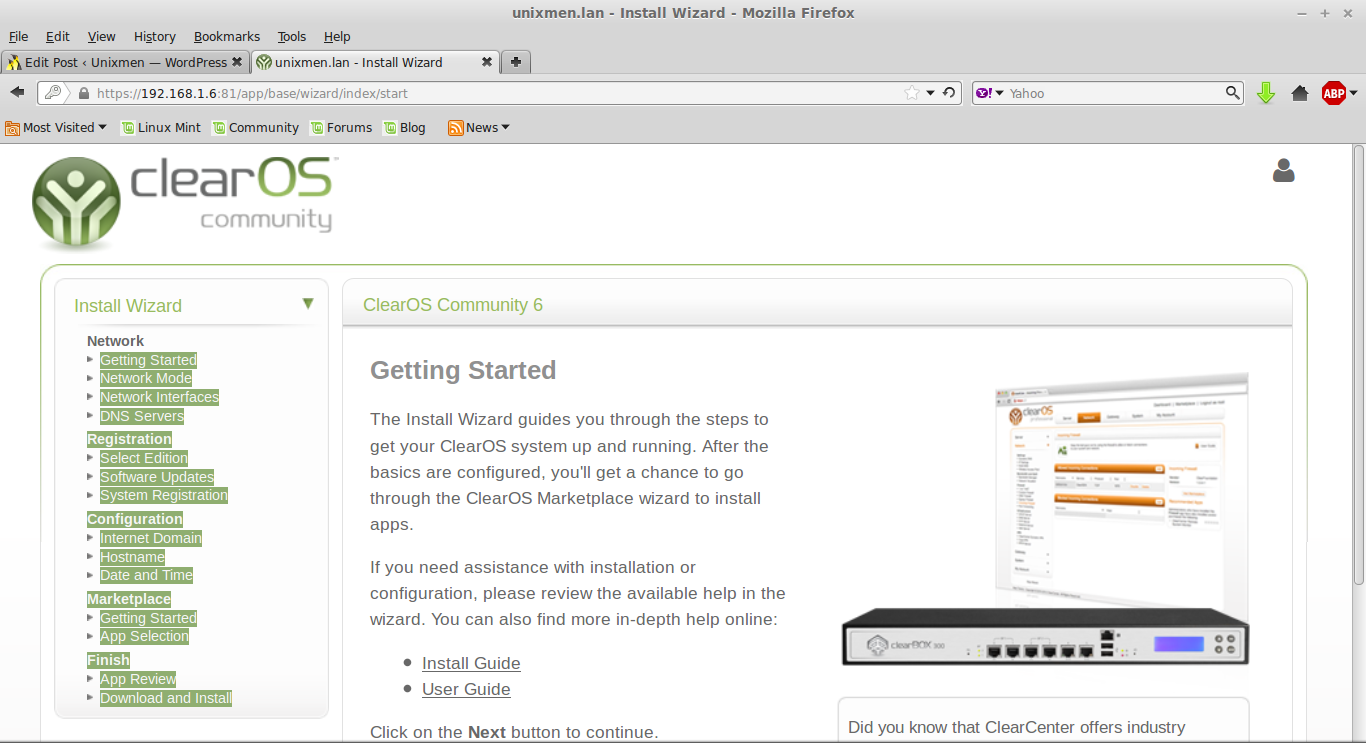
Boot the System. The installation method of ClearOS firewall is very similar to the installation of CentOS.
Select the default first option.
Skip the Disk checking option, select skip
![ClearOS [Running] - Oracle VM VirtualBox_002](http://unixmen.com/wp-content/uploads/2015/06/ClearOS-Running-Oracle-VM-VirtualBox_002.png)
A clearOS Community screen will appear, click next.
![ClearOS [Running] - Oracle VM VirtualBox_003](http://unixmen.com/wp-content/uploads/2015/06/ClearOS-Running-Oracle-VM-VirtualBox_003.png)
Select your default language, click next.
![ClearOS [Running] - Oracle VM VirtualBox_004](http://unixmen.com/wp-content/uploads/2015/06/ClearOS-Running-Oracle-VM-VirtualBox_004.png)
Select the disk formatting option, select basic and click next.
![ClearOS [Running] - Oracle VM VirtualBox_006](http://unixmen.com/wp-content/uploads/2015/06/ClearOS-Running-Oracle-VM-VirtualBox_006.png)
Assign Hostname as per you desire and click next.
![ClearOS [Running] - Oracle VM VirtualBox_008](http://unixmen.com/wp-content/uploads/2015/06/ClearOS-Running-Oracle-VM-VirtualBox_008.png)
Select your default time zone, mine is Asia/Calcutta
![ClearOS [Running] - Oracle VM VirtualBox_009](http://unixmen.com/wp-content/uploads/2015/06/ClearOS-Running-Oracle-VM-VirtualBox_009.png)
Assign a root password and click next. The username root and password for root will be default web UI login id and password.
![ClearOS [Running] - Oracle VM VirtualBox_010](http://unixmen.com/wp-content/uploads/2015/06/ClearOS-Running-Oracle-VM-VirtualBox_010.png)
Select the default installation option and move ahead.
![ClearOS [Running] - Oracle VM VirtualBox_011](http://unixmen.com/wp-content/uploads/2015/06/ClearOS-Running-Oracle-VM-VirtualBox_011.png)
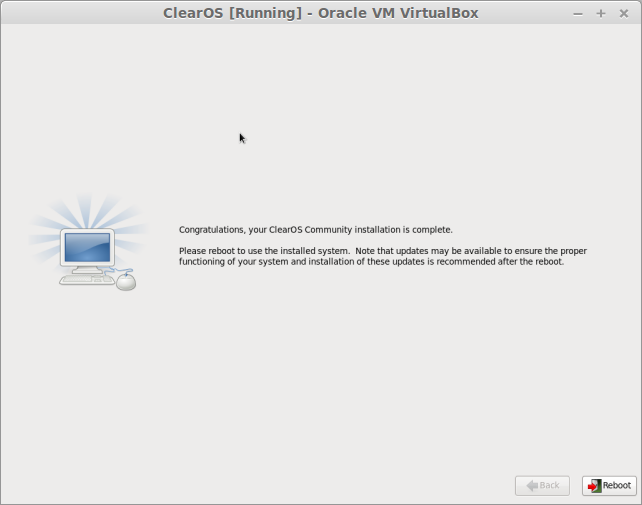
Click next, the instillation process will start, the installation will get finished very quickly.
![ClearOS [Running] - Oracle VM VirtualBox_012](http://unixmen.com/wp-content/uploads/2015/06/ClearOS-Running-Oracle-VM-VirtualBox_012.png)
When Installation is over, reboot the system.
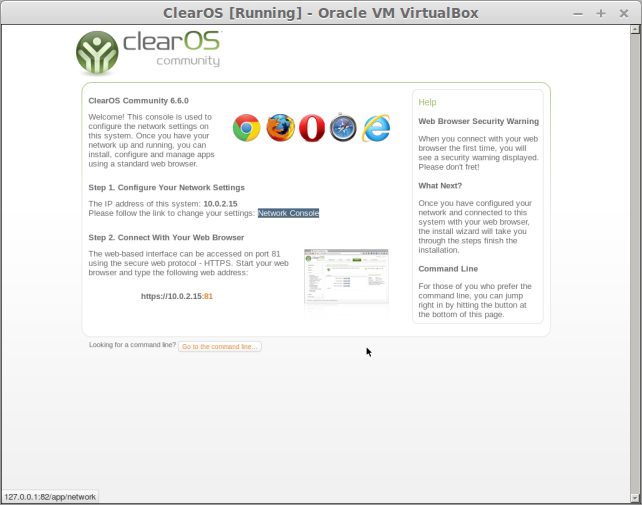
After reboot, the firewall will be prompted with a GUI screen, it will opt an automatically generated ip address, so edit network settings and assign IP ADDRESS as per your need, click to the network console.
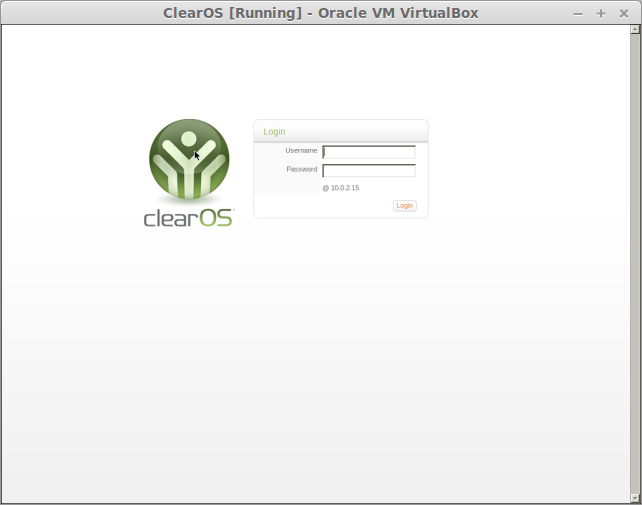
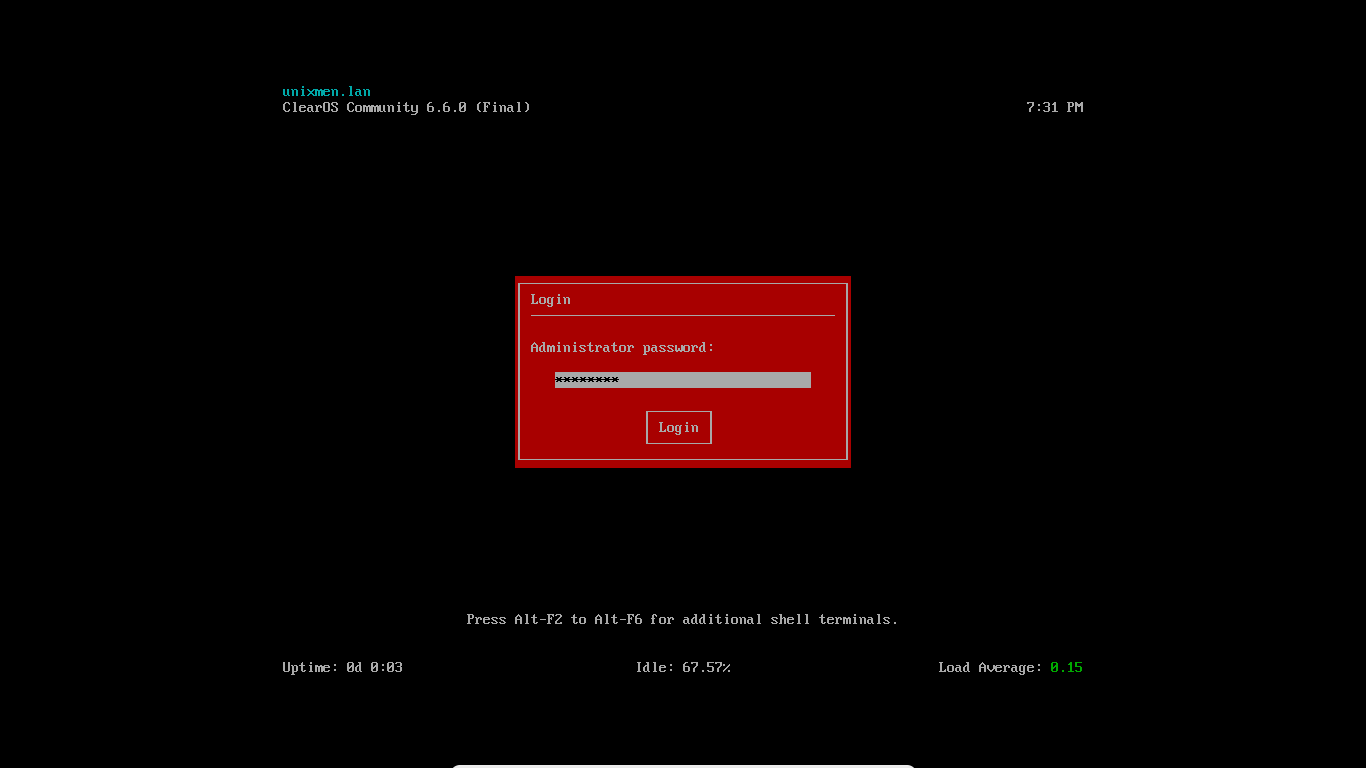
Login with username root, and password of root.
Assign IP ADDR as per your need, we will be using 192.168.1.6/24
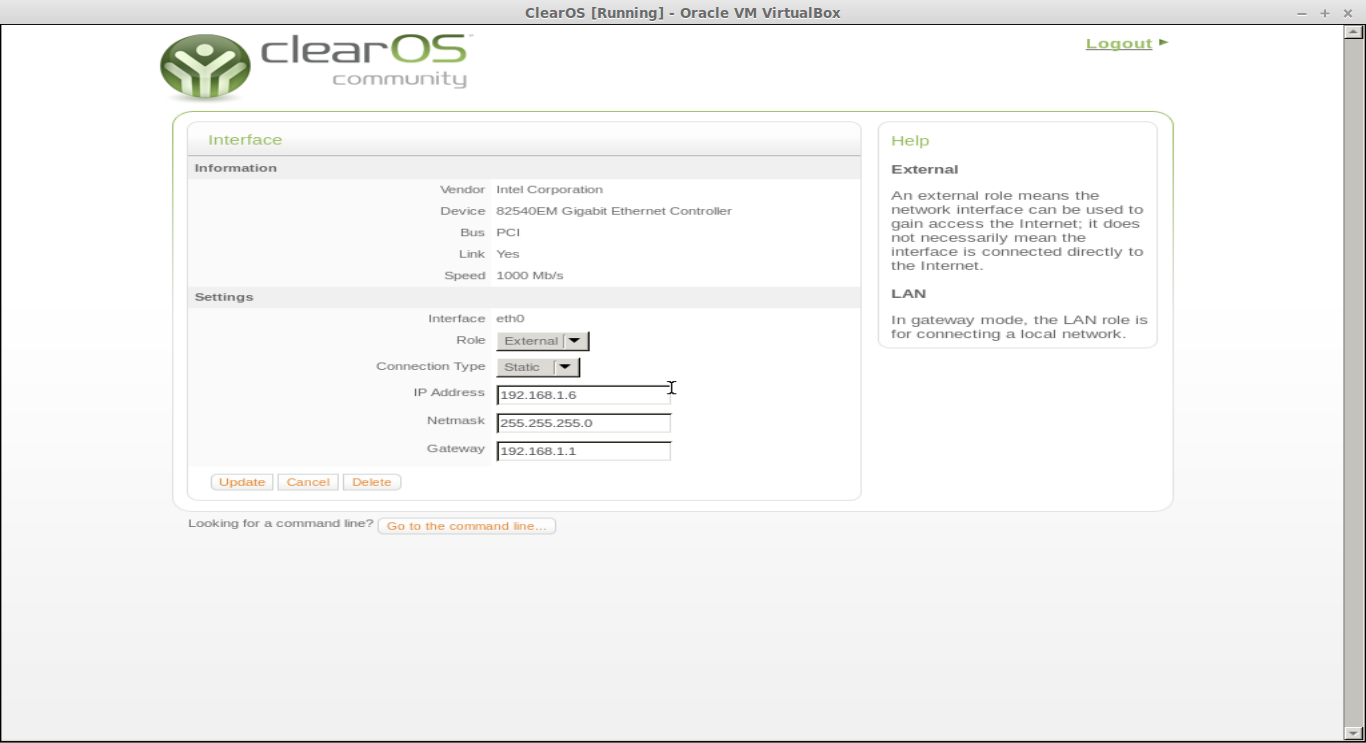
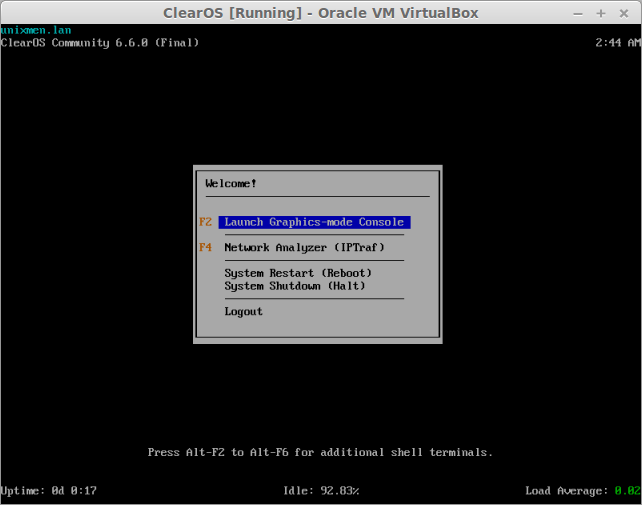
Similarly assign the dns address for your network. You can go to the command line by clicking on the command line console link, login with root password.
There are few option is command line mode, you can explore them. Go back to GUI console by pressing f2 key.
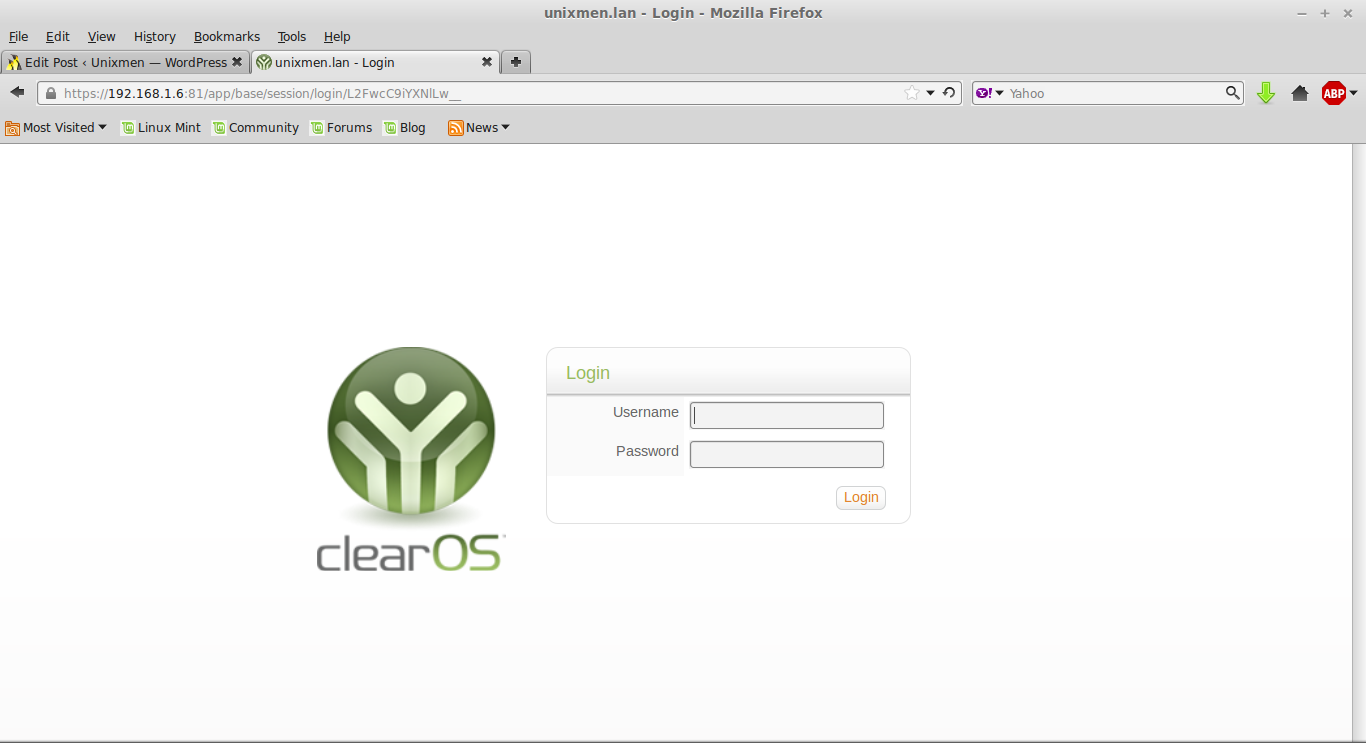
It is enough for installation, lets log in to the server.
Open browser on another system with the ip address smiler to the range of Server IP, port no. is 81.
- https://192.168.1.6:81
After login a detailed menu of services is visible in the form of list at left hand side. An Admin guide is also provided.
Click the next button as select configuration mode as per your environment, it will ask for IP Address, dns address, then final screen will appear.
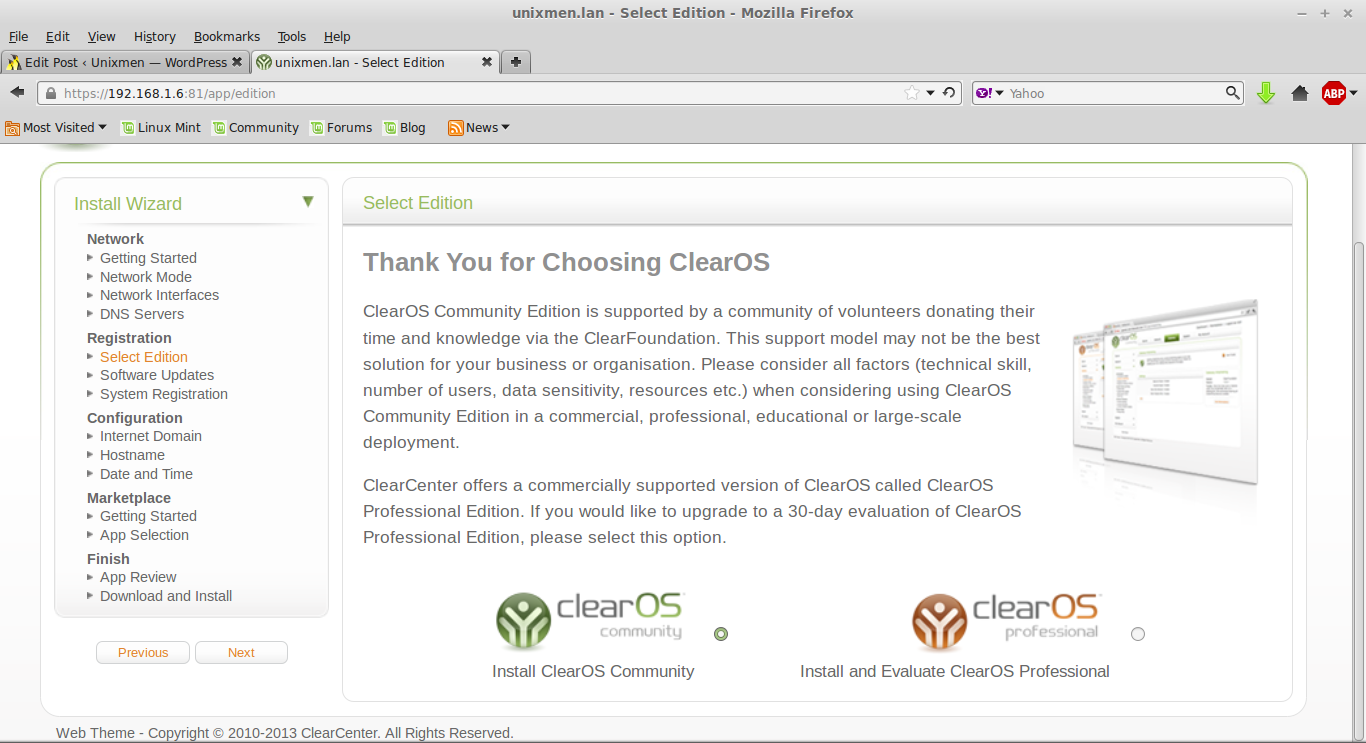
Click next, server will review updates available, Click next.
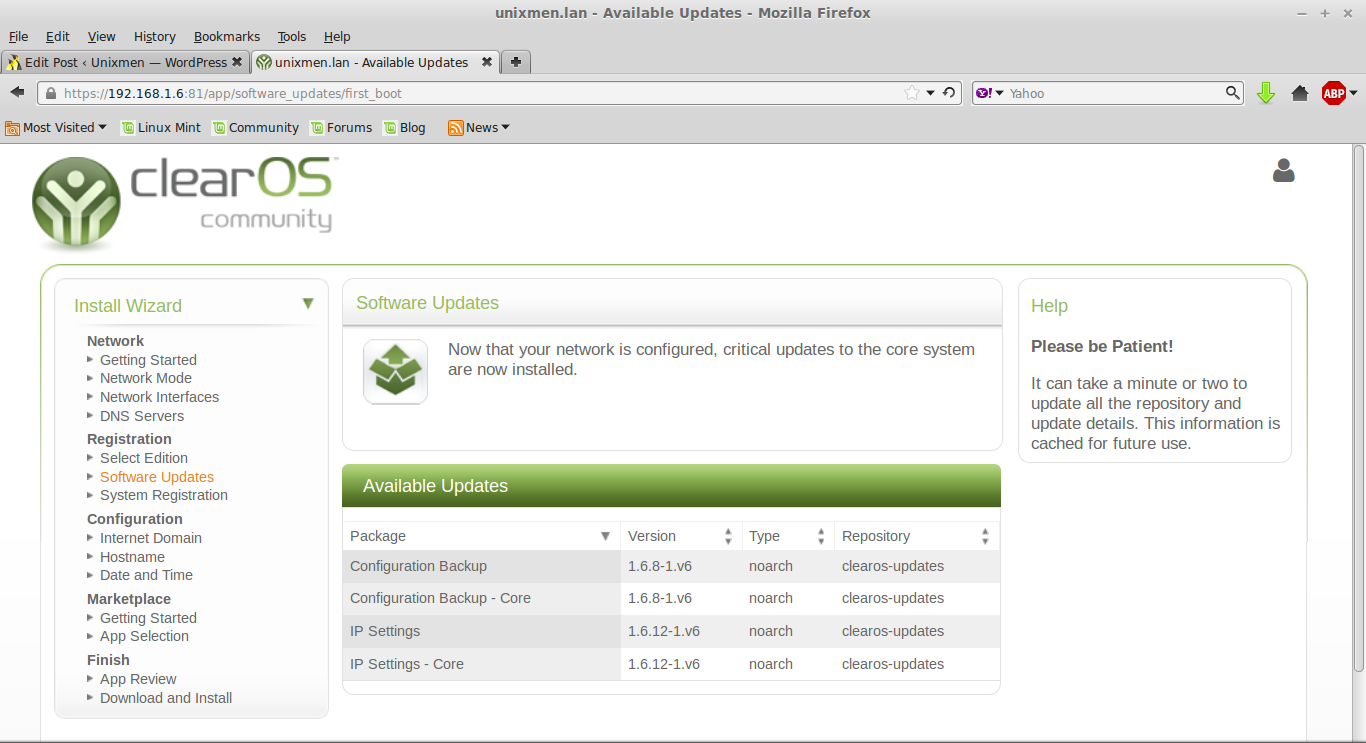
Let the Firewall update desired plugins, click next.

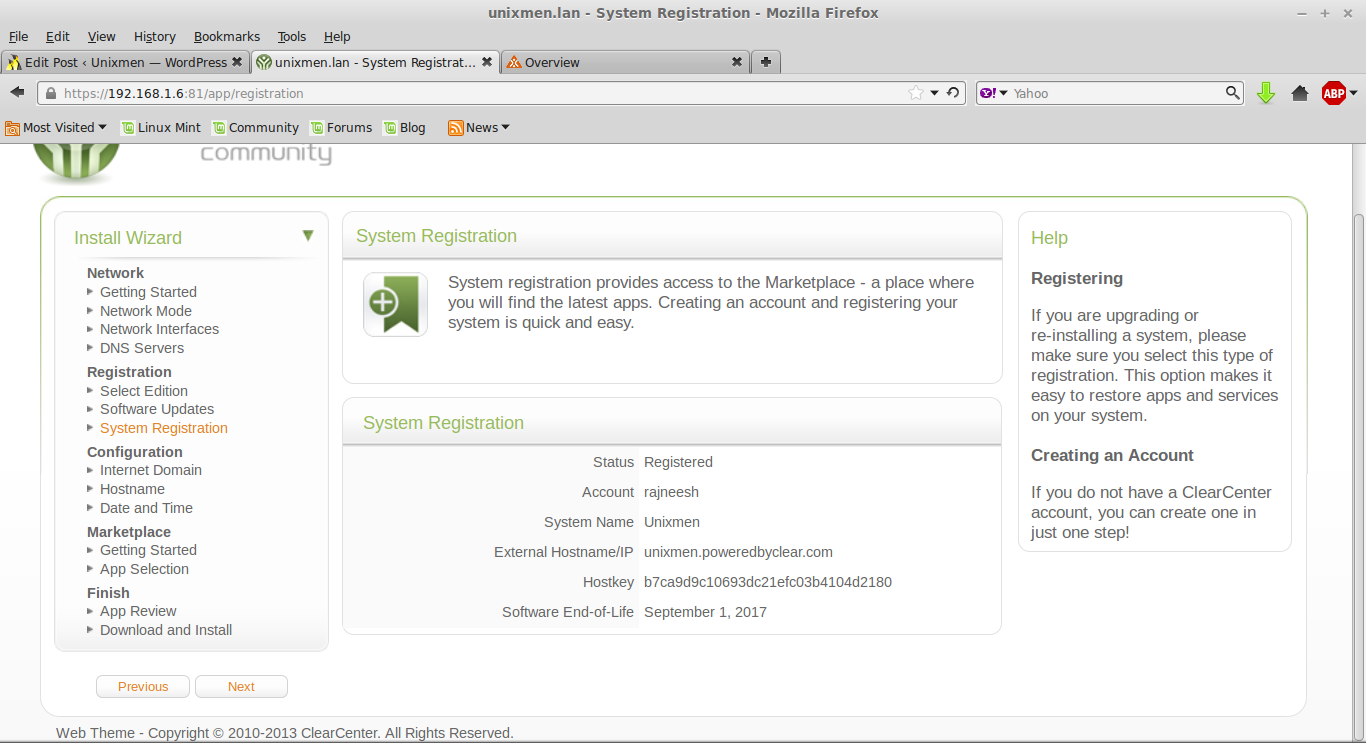
At this stage Firewall will ask for Clear Center Account, go to the following link and create and account.

Go to the link create account and login.

Now come back to installation step and fill up credentials which you created with above link, click to registration system link.
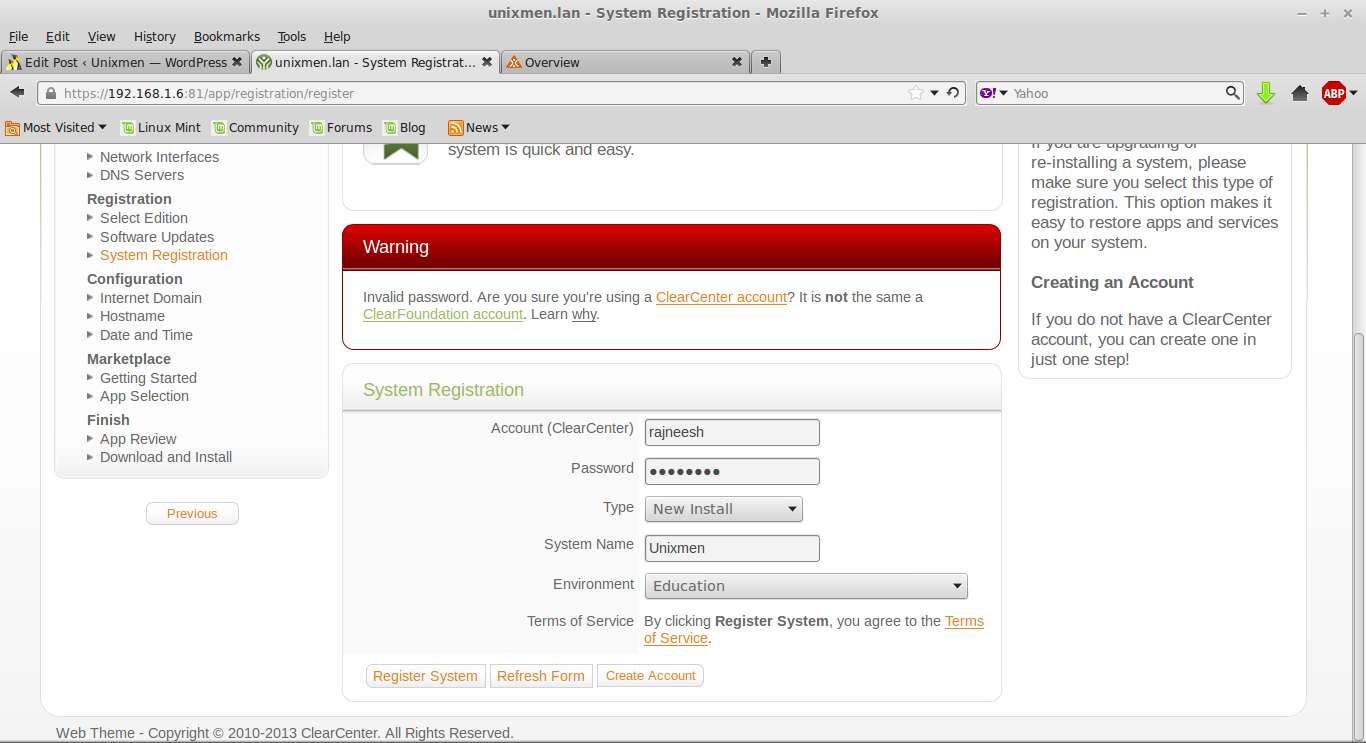
Your Server will get registered and a host key will be issued.
click next.
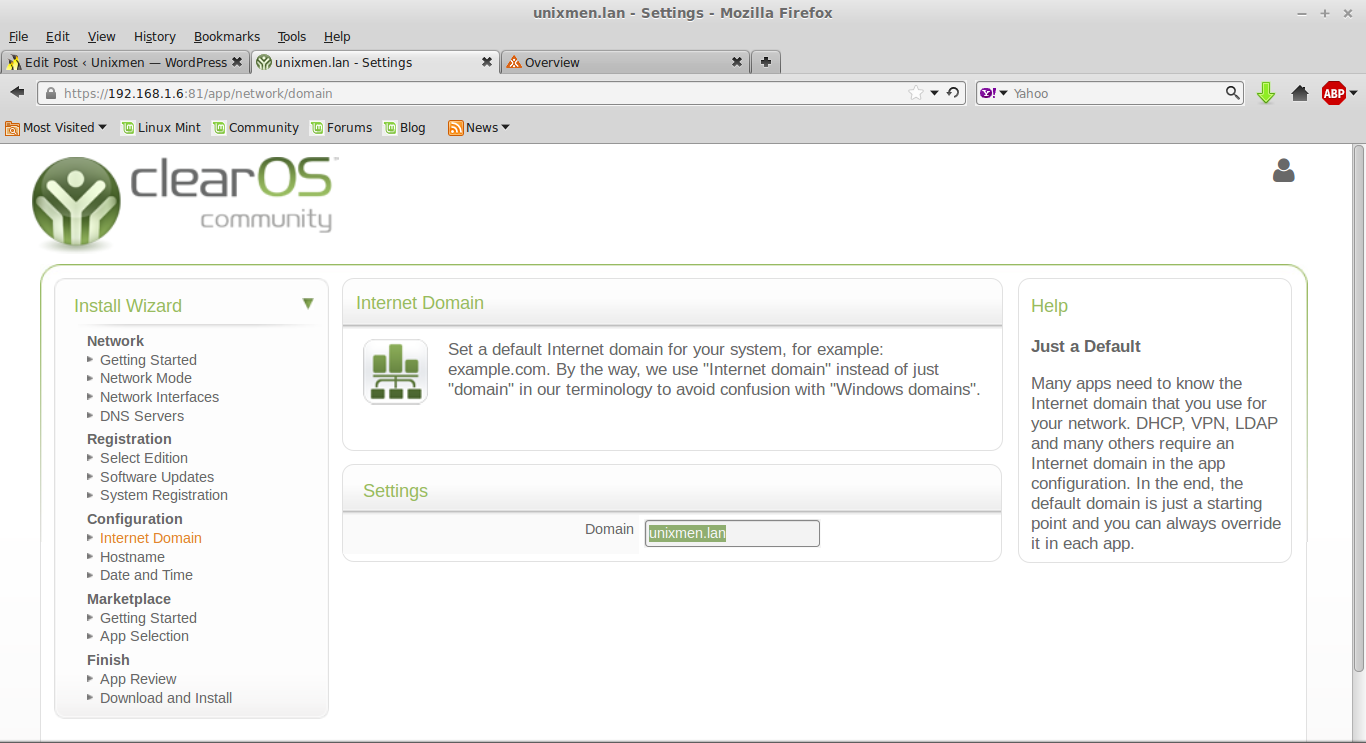
Assign a domain name.
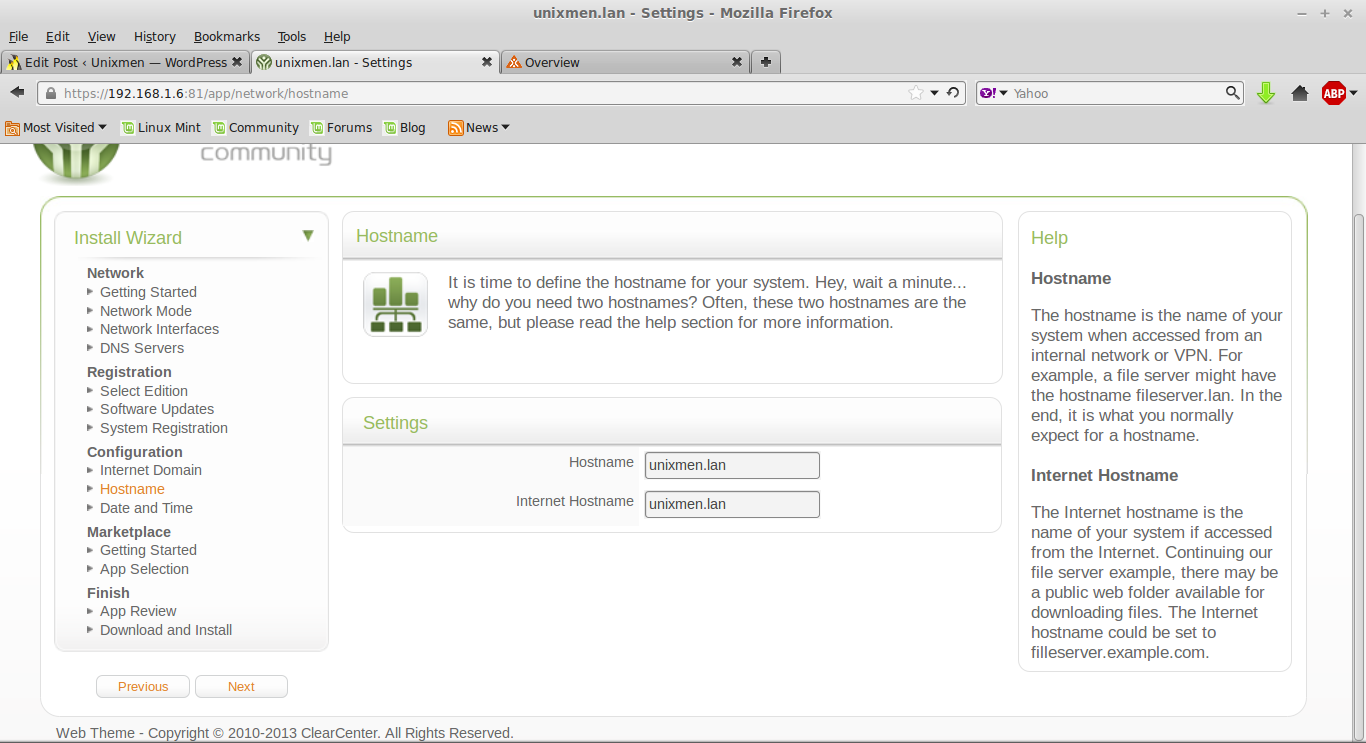
Assign host name.
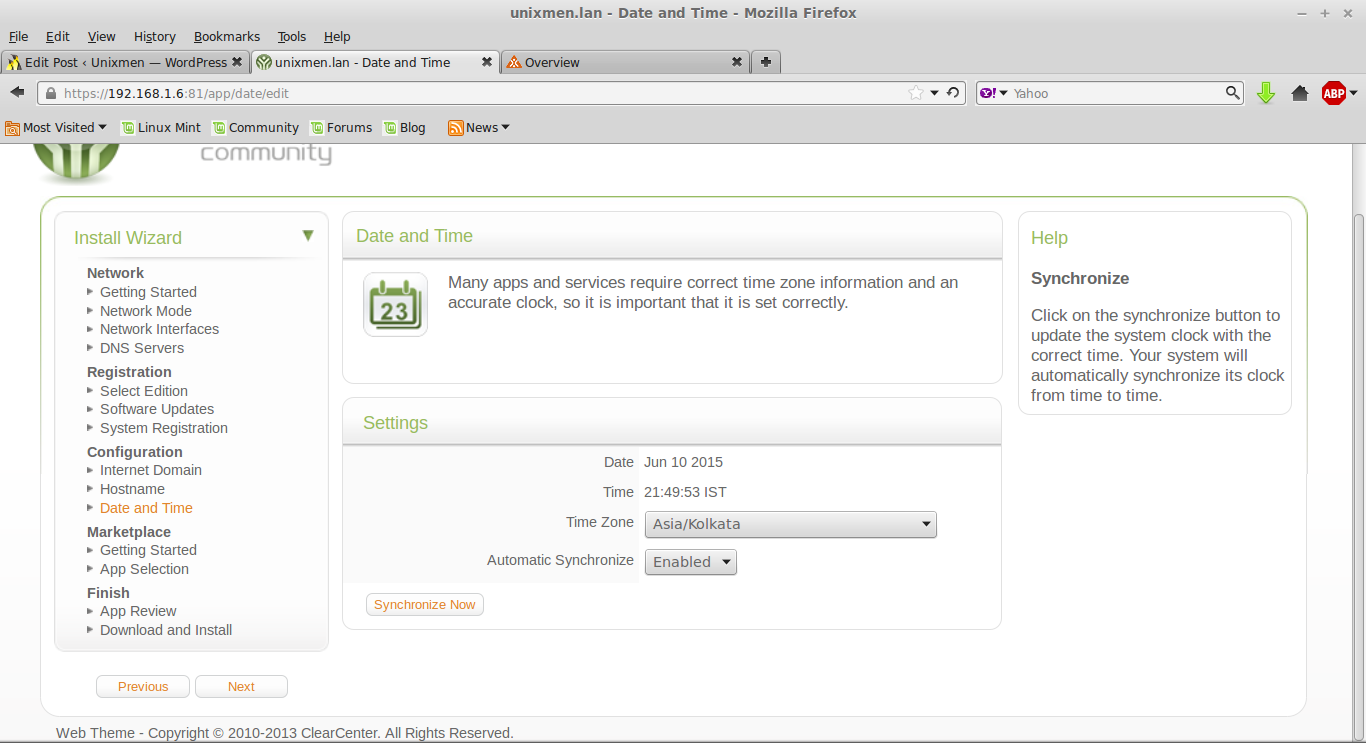
Select time zone.
Select desire option, click next.
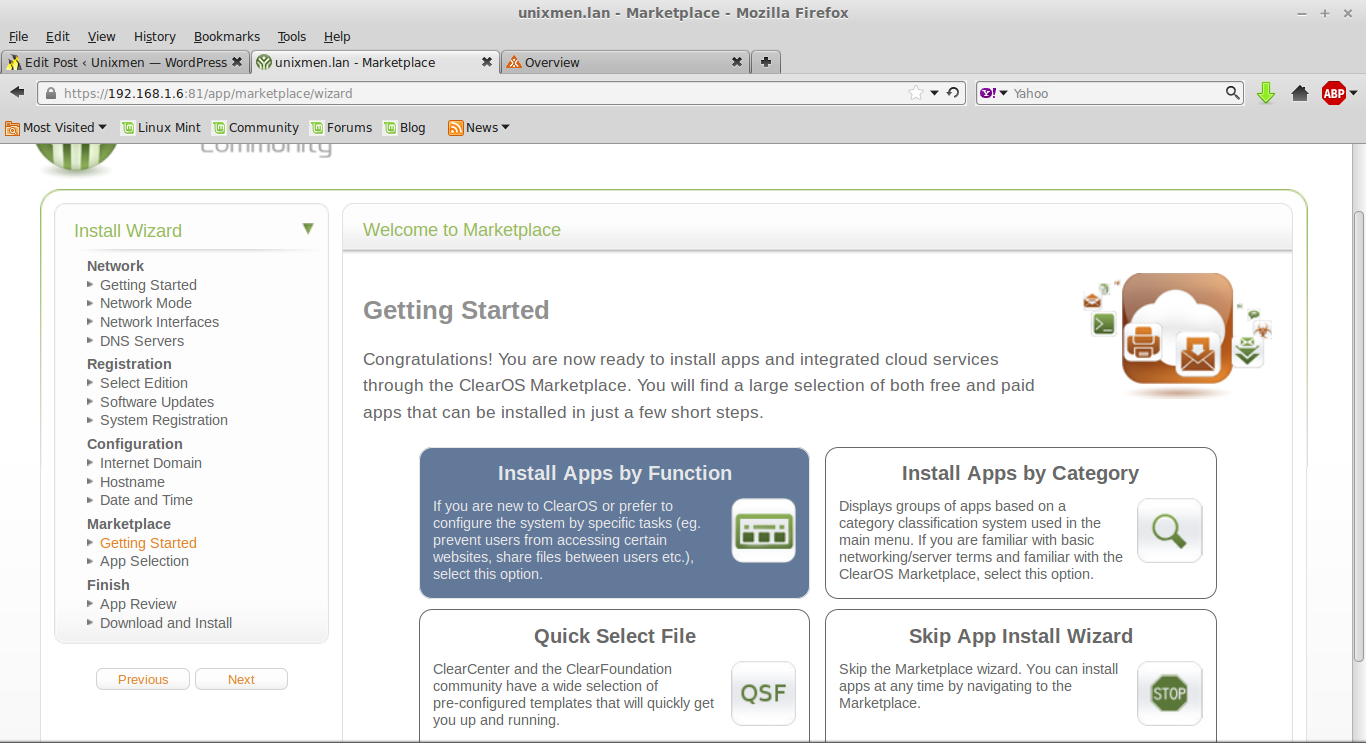
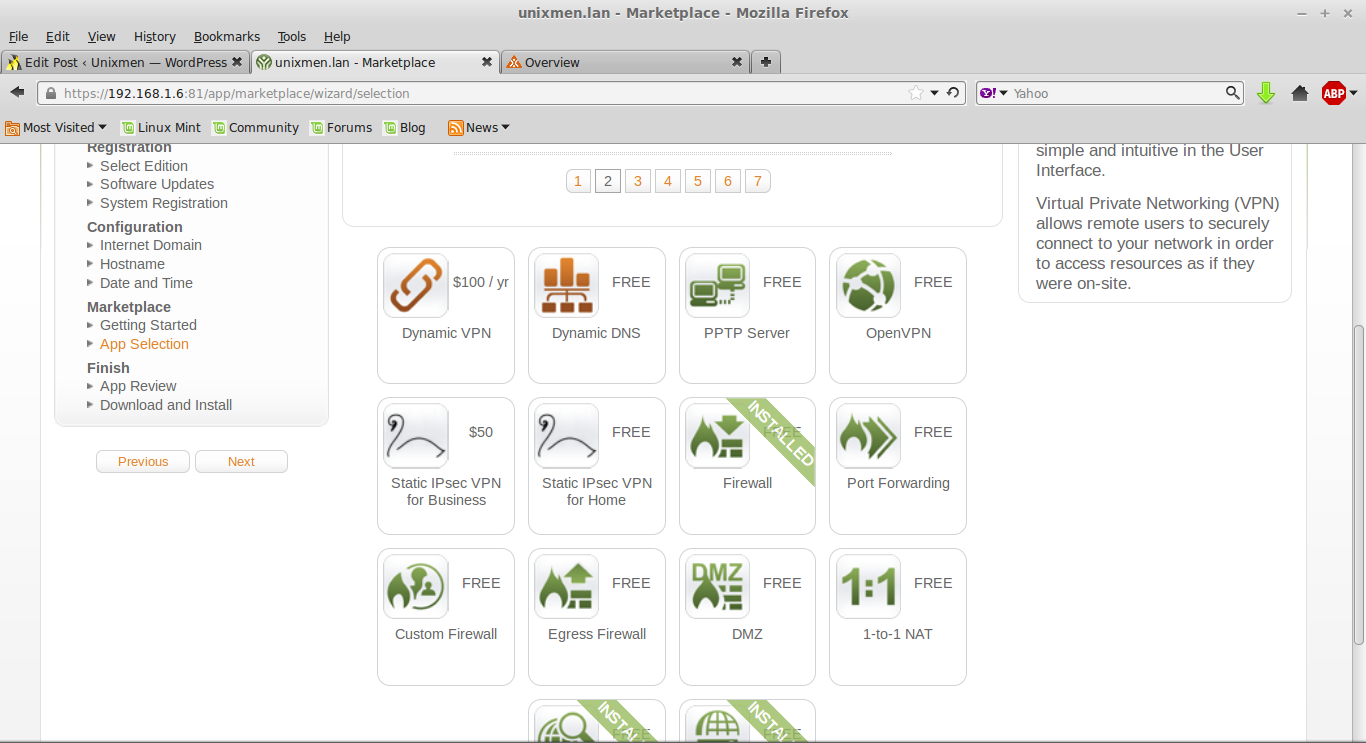
There is is a long list of free application, select some of them as per your need. and click next on the firewall.
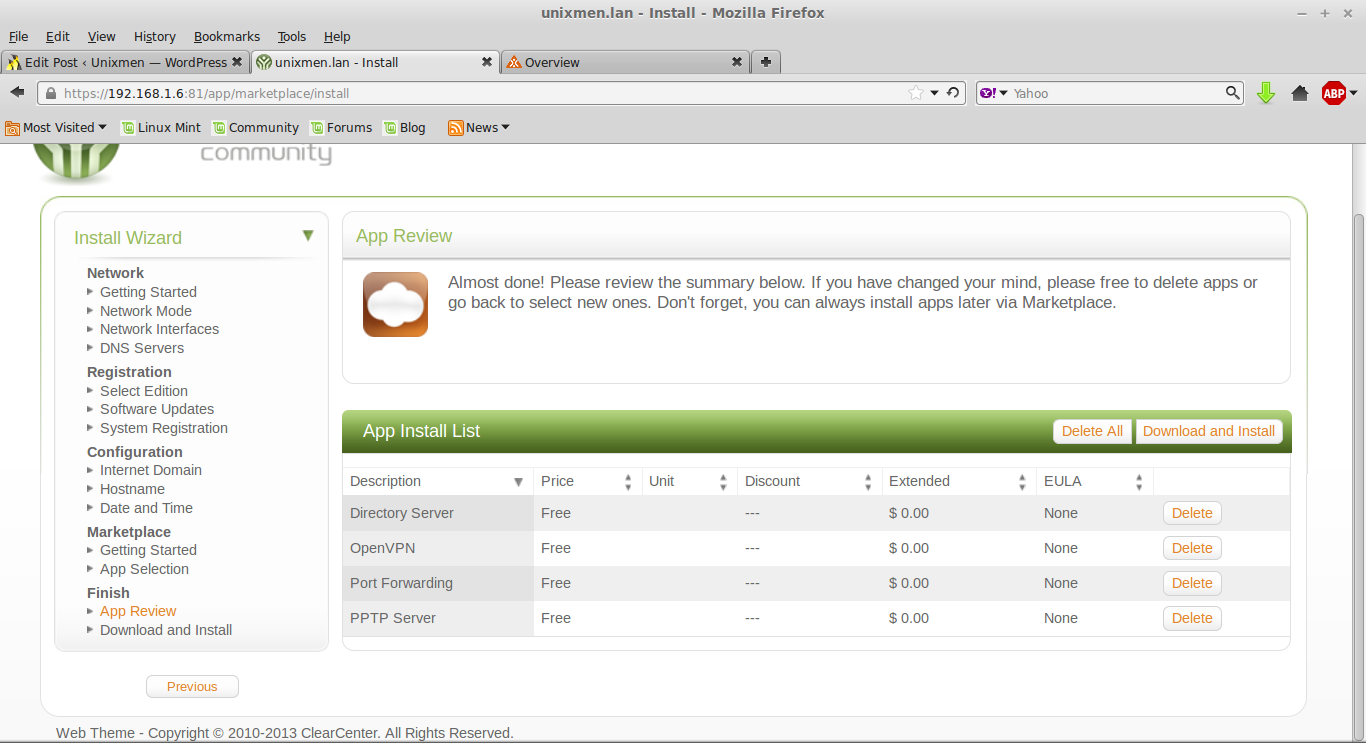
Download Selected Packages.
Finish the installation wizard, the dashboard will appear. Now you can start utilizing this ultimate firewall.
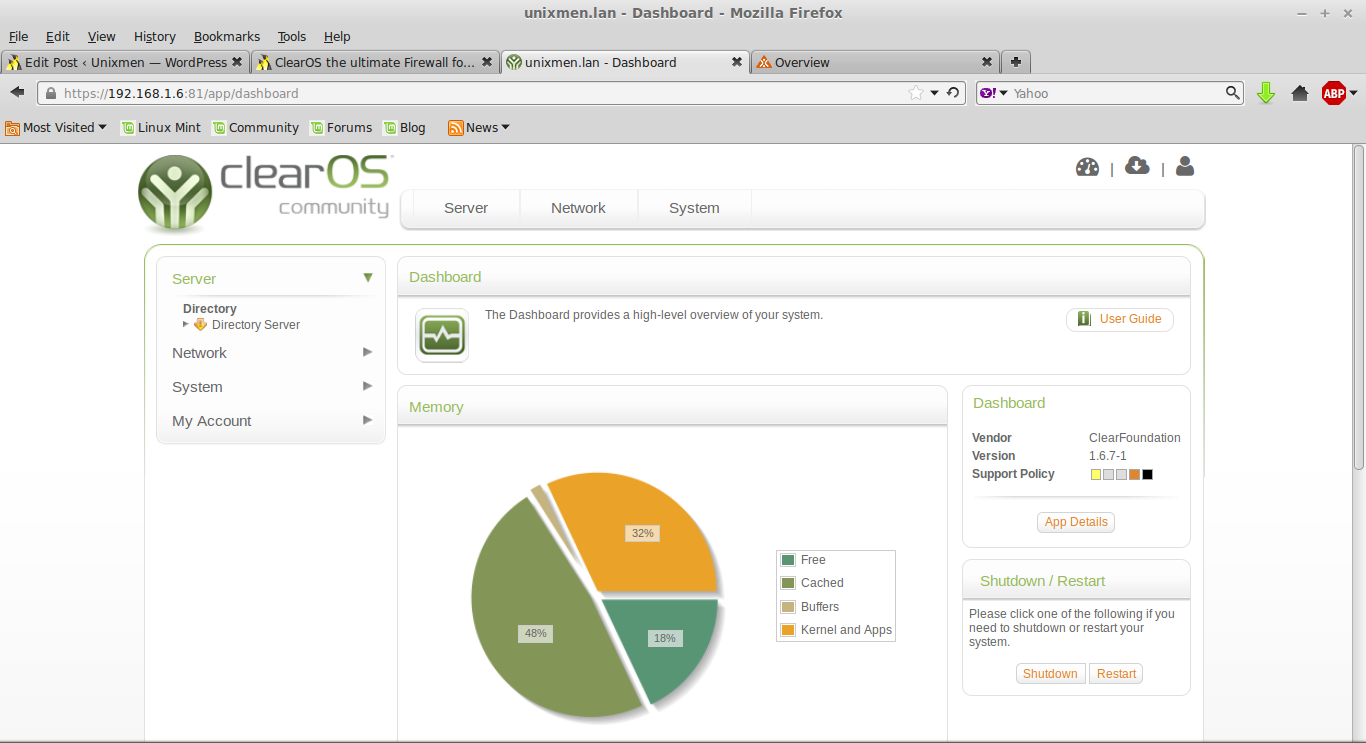
You can select more freely available packages from market place any time.
That’s all for now.


