Vanilla is an open-source, lightweight, and powerful web based discussion forum software used to build your own forum website. Around 648,352 websites are currently using Vanilla.
This article describes to you how to install and configure Vanilla forum software on CentOS 6.4. In this document I use the hostname server.unixmen.com with IP Address 192.168.1.200/24. Change these values according to your setup.
Installing Prerequisites
Vanilla needs Apache, MySQL and PHP modules in order to build a forum website. So let us install the following necessary prerequisites first:
[root@server ~]# yum install mysql mysql-server httpd php php-mysql php-gd php-imap php-ldap php-odbc php-pear php-xml php-xmlrpc php-mbstring wget unzip -y
Open the Apache main configuration file. Find and change from AllowOverride None to AllowOverride All:
[root@server ~]# vi /etc/httpd/conf/httpd.conf
 [...]
# AllowOverride controls what directives may be placed in .htaccess files.
 # It can be "All", "None", or any combination of the keywords:
 #   Options FileInfo AuthConfig Limit
 #
 AllowOverride All
[...
Start/Restart MySQL and Apache services now:
[root@server ~]# /etc/init.d/mysqld start
[root@server ~]# /etc/init.d/httpd start
[root@server ~]# chkconfig mysqld on
[root@server ~]# chkconfig httpd on
Create MySQL Root user password:
[root@server ~]# /usr/bin/mysql_secure_installation

NOTE: RUNNING ALL PARTS OF THIS SCRIPT IS RECOMMENDED FOR ALL MySQL
      SERVERS IN PRODUCTION USE!  PLEASE READ EACH STEP CAREFULLY!

In order to log into MySQL to secure it, we'll need the current
password for the root user.  If you've just installed MySQL, and
you haven't set the root password yet, the password will be blank,
so you should just press enter here.

Enter current password for root (enter for none):
OK, successfully used password, moving on...

Setting the root password ensures that nobody can log into the MySQL
root user without the proper authorisation.

Set root password? [Y/n] y
New password:
Re-enter new password:
Password updated successfully!
Reloading privilege tables..
 ... Success!

By default, a MySQL installation has an anonymous user, allowing anyone
to log into MySQL without having to have a user account created for
them.  This is intended only for testing, and to make the installation
go a bit smoother.  You should remove them before moving into a
production environment.

Remove anonymous users? [Y/n]
 ... Success!

Normally, root should only be allowed to connect from 'localhost'.  This
ensures that someone cannot guess at the root password from the network.

Disallow root login remotely? [Y/n]
 ... Success!

By default, MySQL comes with a database named 'test' that anyone can
access.  This is also intended only for testing, and should be removed
before moving into a production environment.

Remove test database and access to it? [Y/n]
 - Dropping test database...
 ... Success!
 - Removing privileges on test database...
 ... Success!

Reloading the privilege tables will ensure that all changes made so far
will take effect immediately.

Reload privilege tables now? [Y/n]
 ... Success!

Cleaning up...

All done!  If you've completed all of the above steps, your MySQL
installation should now be secure.

Thanks for using MySQL!
Create MySQL Database and user for Vanilla
Create a database for Vanilla called vanilladb and database user called vanillauser with password ‘centos’:
[root@server ~]# mysql -u root -p
Enter password:
Welcome to the MySQL monitor.  Commands end with ; or \g.
Your MySQL connection id is 10
Server version: 5.1.69 Source distribution

Copyright (c) 2000, 2013, Oracle and/or its affiliates. All rights reserved.

Oracle is a registered trademark of Oracle Corporation and/or its
affiliates. Other names may be trademarks of their respective
owners.

Type 'help;' or '\h' for help. Type '\c' to clear the current input statement.

mysql> create database vanilladb;
Query OK, 1 row affected (0.01 sec)

mysql> create user vanillauser;
Query OK, 0 rows affected (0.01 sec)

mysql> GRANT ALL PRIVILEGES ON vanilladb.* TO 'vanillauser' IDENTIFIED BY 'centos';
Query OK, 0 rows affected (0.01 sec)

mysql> flush privileges;
Query OK, 0 rows affected (0.00 sec)

mysql> exit
Bye
Adjust iptables to allow Apache default port ’80’:
[root@server html]# vi /etc/sysconfig/iptables
# Firewall configuration written by system-config-firewall
# Manual customization of this file is not recommended.
*filter
:INPUT ACCEPT [0:0]
:FORWARD ACCEPT [0:0]
:OUTPUT ACCEPT [0:0]
-A INPUT -p udp -m state --state NEW --dport 3306 -j ACCEPT
-A INPUT -p tcp -m state --state NEW --dport 3306 -j ACCEPT
-A INPUT -p udp -m state --state NEW --dport 80 -j ACCEPT
-A INPUT -p tcp -m state --state NEW --dport 80 -j ACCEPT
-A INPUT -p udp -m state --state NEW --dport 53 -j ACCEPT
-A INPUT -p tcp -m state --state NEW --dport 53 -j ACCEPT
-A INPUT -m state --state ESTABLISHED,RELATED -j ACCEPT
-A INPUT -p icmp -j ACCEPT
-A INPUT -i lo -j ACCEPT
-A INPUT -m state --state NEW -m tcp -p tcp --dport 22 -j ACCEPT
-A INPUT -j REJECT --reject-with icmp-host-prohibited
-A FORWARD -j REJECT --reject-with icmp-host-prohibited
COMMIT
Restart the iptables to save the changes:
[root@server html]# /etc/init.d/iptables restart
Disable SELinux and reboot your system:
[root@server ~]# vi /etc/sysconfig/selinux
# This file controls the state of SELinux on the system.
# SELINUX= can take one of these three values:
#     enforcing - SELinux security policy is enforced.
#     permissive - SELinux prints warnings instead of enforcing.
#     disabled - No SELinux policy is loaded.
SELINUX=disabled
# SELINUXTYPE= can take one of these two values:
#     targeted - Targeted processes are protected,
#     mls - Multi Level Security protection.
SELINUXTYPE=targeted
Note: Vanilla works fine for me without disabling SELInux. In case you encounter any problems with Vanilla installation, just disable it and continue installation.
Download Vanilla
To download Vanilla latest version visit here or enter the following command to download from terminal. Go to your Apache document root folder and create a folder called ‘vanilla’. Change to ‘vanilla’ folder and download the latest version:
[root@server ~]# mkdir /var/www/html/vanilla
[root@server ~]# cd /var/www/html/vanilla/
[root@server vanilla]# wget http://cdn.vanillaforums.com/www.vanillaforums.org/addons/I73N851HNLPN.zip
Extract the downloaded file:
[root@server vanilla]# unzip I73N851HNLPN.zip
Set full permissions for the following directories:
[root@server vanilla]# chmod -R 777 conf/ uploads/ cache/
Install Vanilla
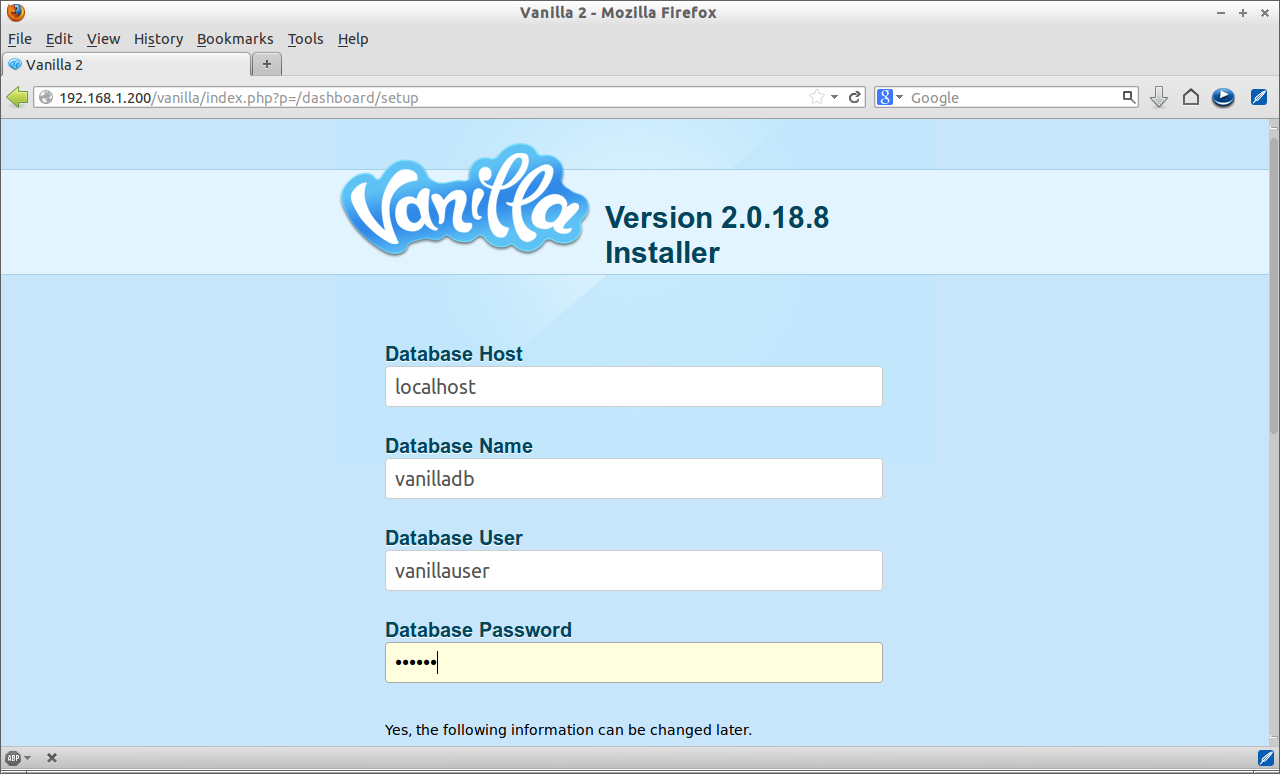
Now navigate to http://ip-address/vanilla from your browser. The following screen should appear. Enter the MySQL database name, user name and password for vanilla which are we created earlier.
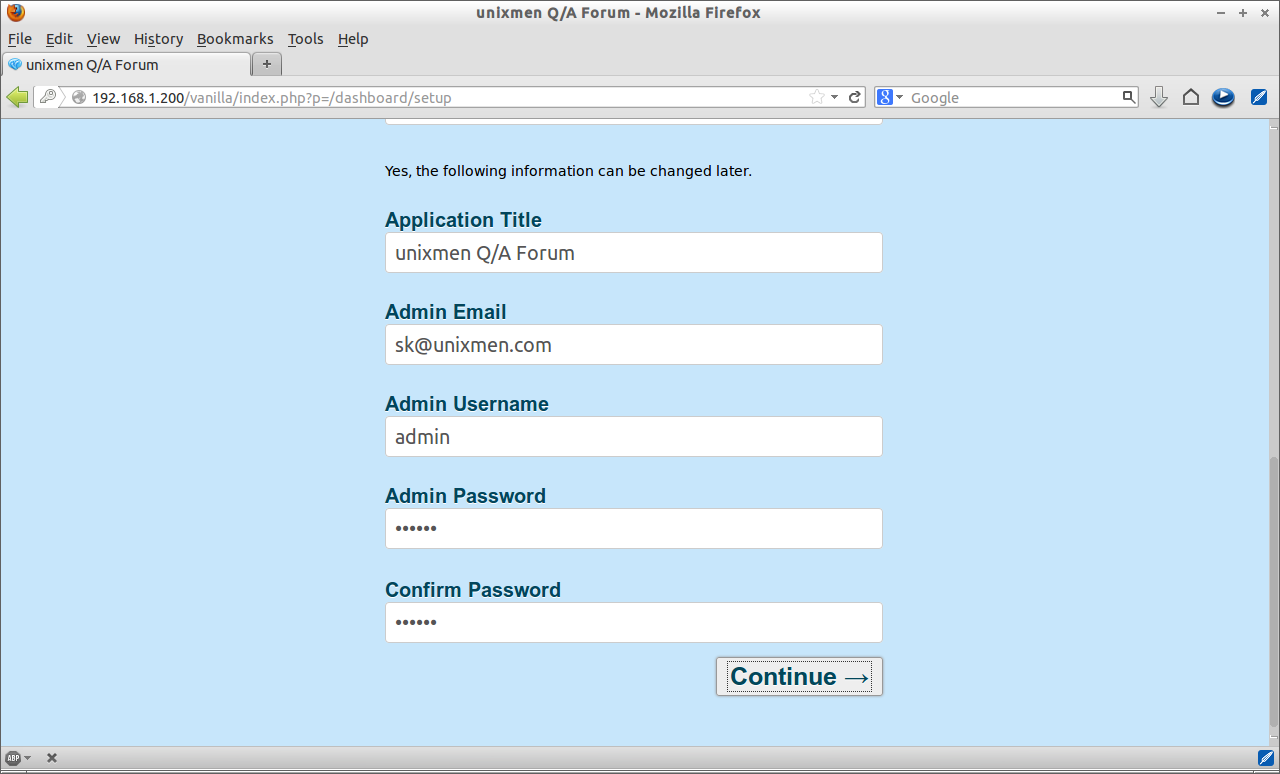
Scroll down and enter further details such as Title, Admin email ID, Admin Username and Password etc. Click Continue.
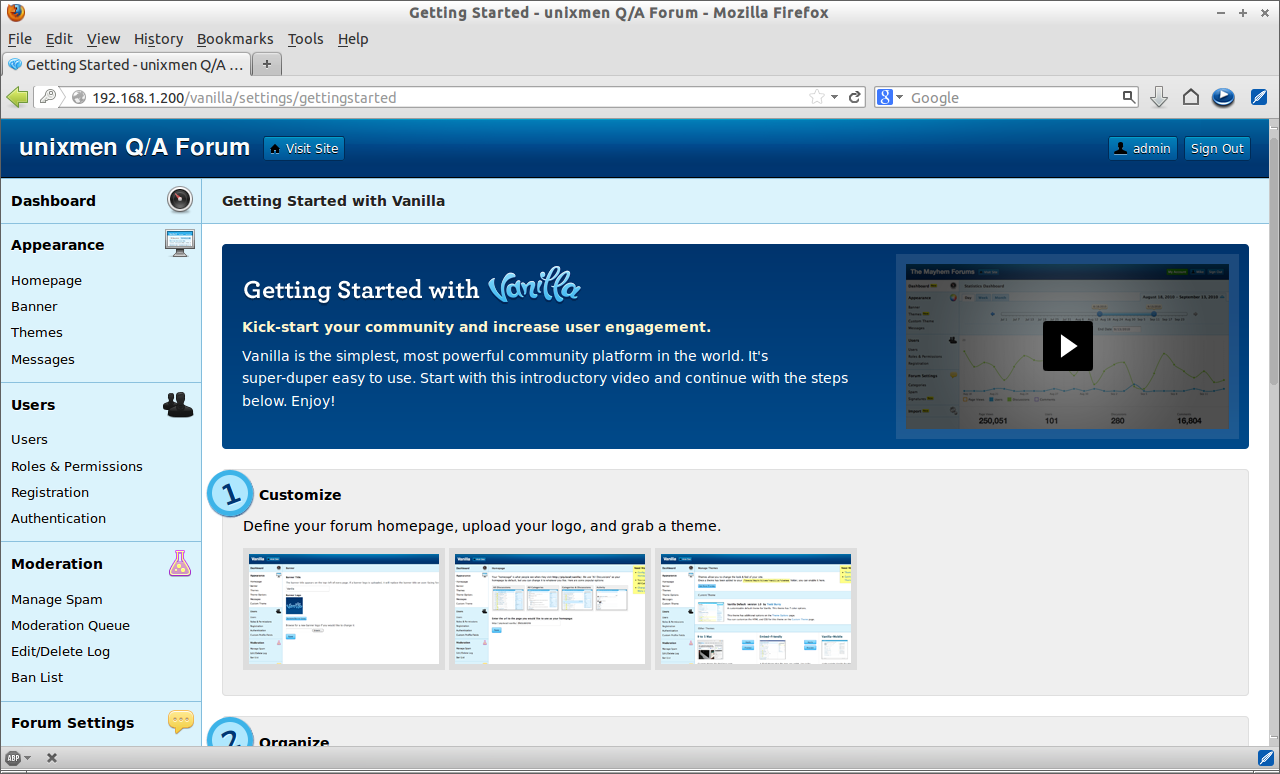
That’s it. Start creating users, roles & permissions etc. This is how your Vanilla Dashboard looks.
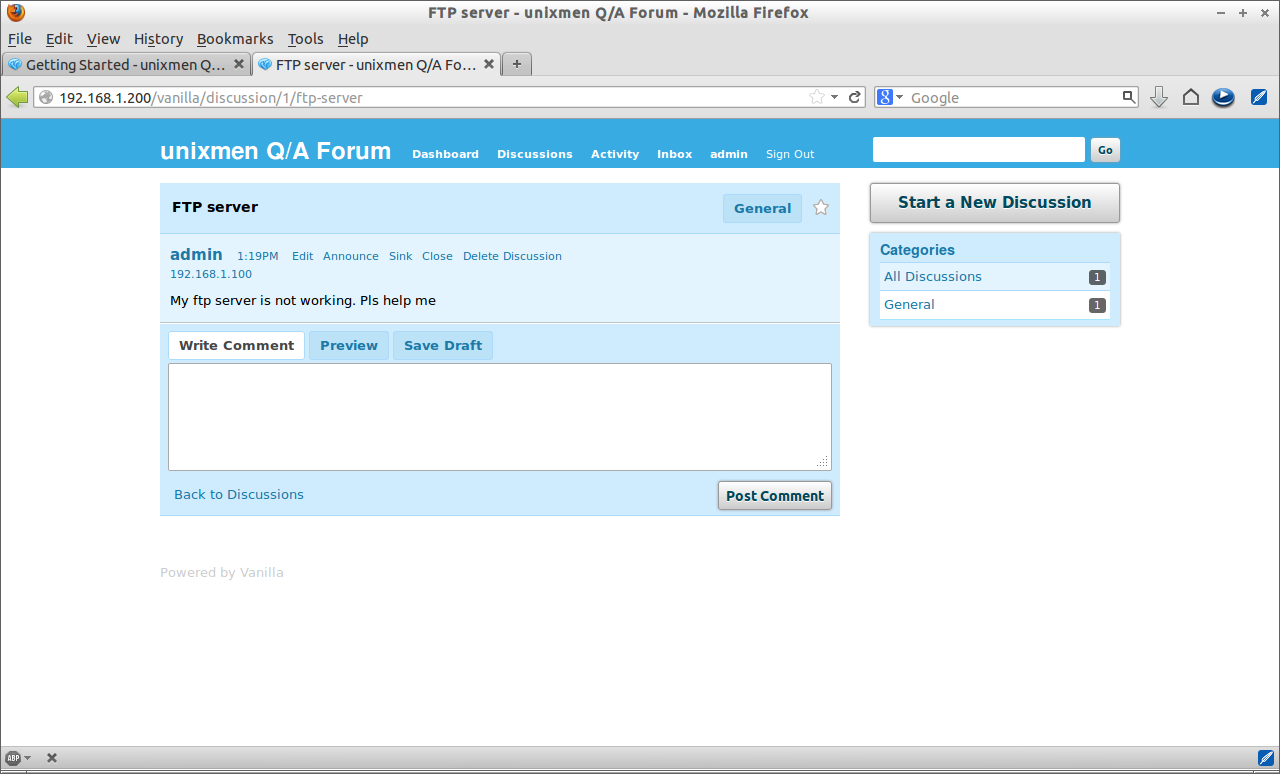
The home page of your Discussion forum will looks like below.
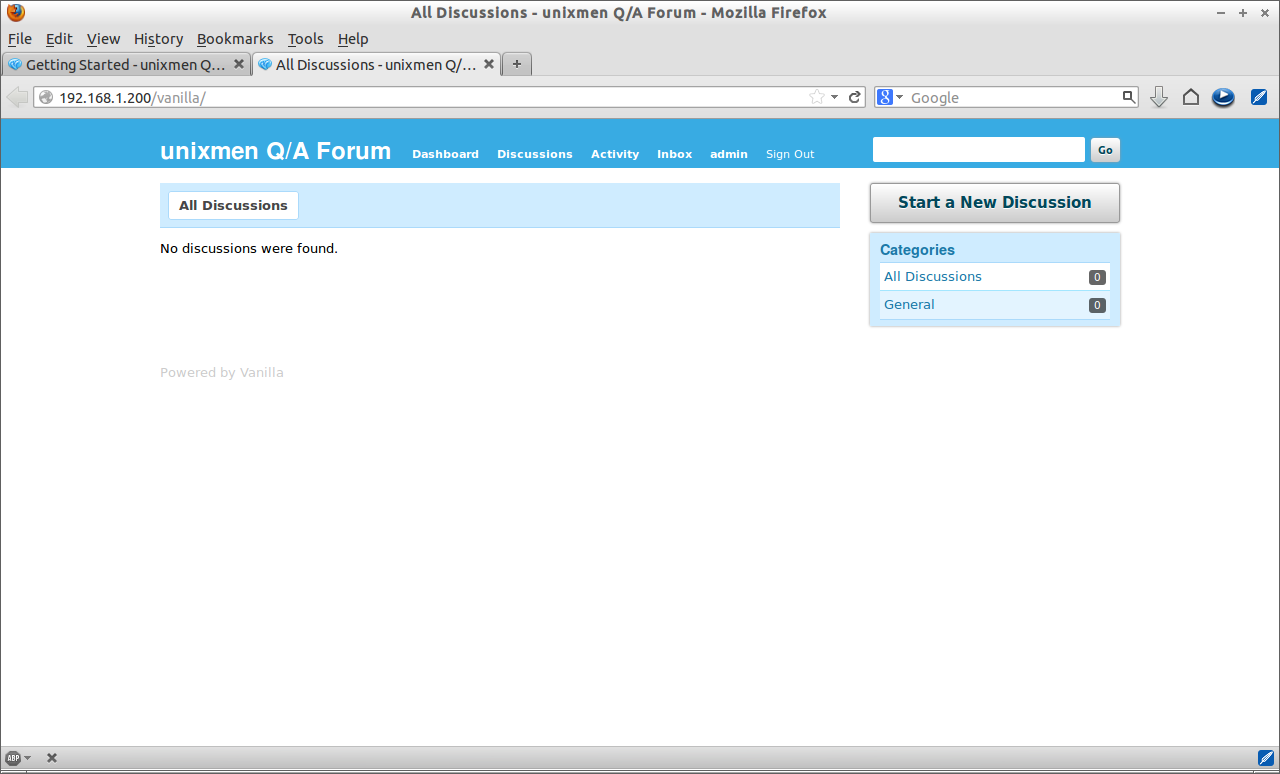
Now you will able to setup and use your own Discussion forum site with no cost using Vanilla software.
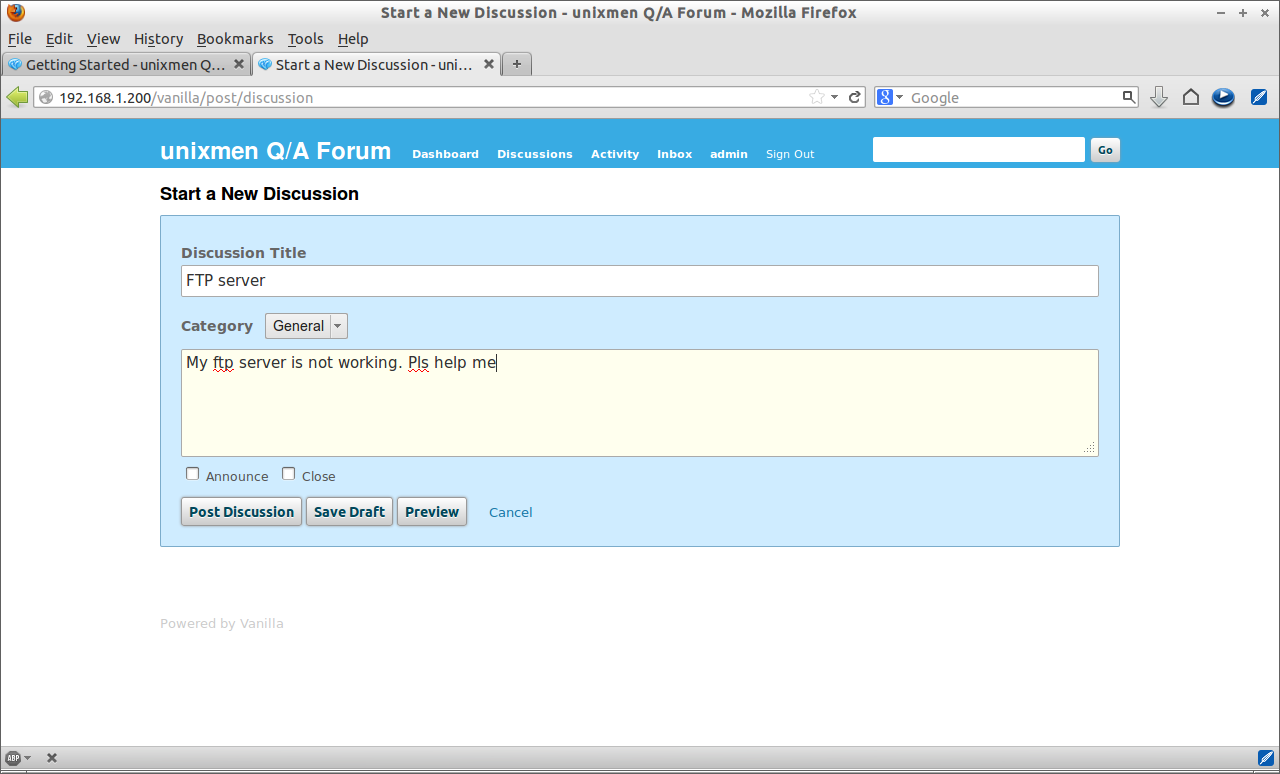
Submit a New Discussion
Click on ‘Start a New Discussion’ on the upper right corner. Enter the Discussion Title and the Problem Description. Click Post Discussion.
This software will be very useful for one who run their own Technical/How-to Blogs and Websites.


