
Setup FTP server on openSUSE
vsftpd (Very Secure File Transport Protocol Daemon) is a secure, fast FTP server for Unix/Linux systems. It is licensed under GPL, and it is the default FTP server for CentOS, Fedora, RHEL, Ubuntu, Slackware, and NimbleX.
This tutorial will describe how to install and configure a basic simple FTP server on openSUSE 42.1 using vsftpd. This method described in this tutorial is same for older openSUSE versions such as 13.2, 13.1 etc.
Install vsftpd
Enter the following the following command to install vsftpd package.
sudo zypper in vsftpd
Start vsftpd service, and enable it to start automatically on every reboot.
sudo systemctl start vsftpd
sudo systemctl enable vsftpd
Configure vsftpd
Create a folder for ftp users.
Note: In openSUSE 42.1, this directory will be created automatically after installing VSFTPD package.
sudo mkdir /srv/ftp
Create a group called ftp-users.
sudo groupadd ftp-users
Create a sample user called unixmen with home directory /srv/ftp/, and assign the user to ftp-users group.
sudo useradd -g ftp-users -d /srv/ftp/ unixmen
Set password for the new user.
sudo passwd unixmen
Make the ftp home directory /srv/ftp/ accessible by ftp users.
sudo chmod 750 /srv/ftp/
sudo chown unixmen:ftp-users /srv/ftp/
Edit file vsftpd.conf,
sudo nano /etc/vsftpd.conf
Make the changes as shown below.
[...]
# Uncomment and  Set YES to enable write.
write_enable=YES
[...]
# Uncomment and Set banner name for your website
ftpd_banner=Welcome to Unixmen FTP Server.
[...]
# Uncomment
ls_recurse_enable=YES
[...]
# Uncomment and set YES to allow local users to log in.
local_enable=YES
[...]
# To disable anonymous access, set NO.
anonymous_enable=NO
[...]
# Uncomment to enable ascii download and upload.
ascii_upload_enable=YES
ascii_download_enable=YES
[...]
## Add at the end of this  file ##
use_localtime=YES
Save and exit file.
Restart vsftpd service to take effect the changes.
sudo systemctl restart vsftpd
Test FTP Server in the local system itself
First let us try to login to our FTP server as shown below.
ftp localhost
Sample Output:
Trying ::1:21 ...
Connected to localhost.
220 Welcome to Unixmen FTP Server.
Name (localhost:skopensuse): ## Press Enter
331 Please specify the password.
Password: ## Enter password for the user 'skopensuse'
230 Login successful.
Remote system type is UNIX.
Using binary mode to transfer files.
ftp>
Here ‘skopensuse’ is my local system user name. As you see in the above output, we will be able to login to ftp server using the local user. Type quit to exit from ftp console.
If you want to login as a FTP user which we created (Ex.unixmen in our case), you need to enter the username in the FTP login prompt. Refer the following output.
ftp localhost
Sample output:
Trying ::1:21 ...
Connected to localhost.
220 Welcome to Unixmen FTP Server.
Name (localhost:skopensuse): unixmen ## Enter FTP username
331 Please specify the password.
Password: ## Enter password of the user 'unixmen'.
230 Login successful.
Remote system type is UNIX.
Using binary mode to transfer files.
ftp>
As you see in the above example, I have logged-in to the FTP server with user name ‘unixmen’.
Test FTP Server from a remote system
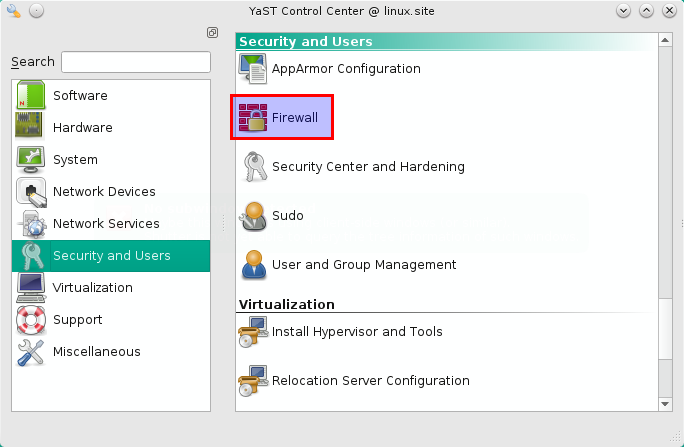
By default, openSUSE built-in firewall won’t allow to login to FTP from remote systems. So let us allow vsftpd service through suse firewall. To do that go to Yast -> Security and Users -> Firewall.
In the Firewall section, go to Allowed Services. In the zone selection drop down box, select External Zone and in Service to Allow drop-down box, select vsftpd server and click add.
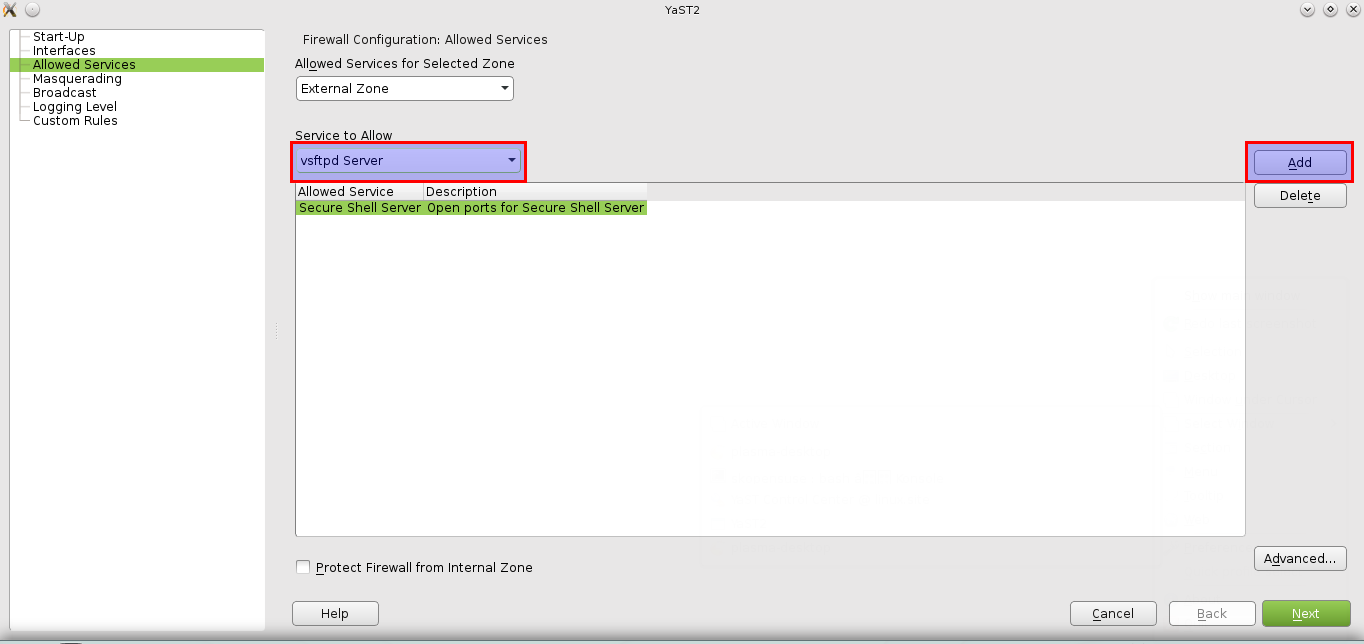
Click Next, and close Yast Control center.
Now, try to connect from a remote system.
In my case, I tried from my Ubuntu desktop.
ftp 192.168.1.102
Sample output:
Connected to 192.168.1.102.
220 Welcome to Unixmen FTP Server.
Name (192.168.1.102:sk): unixmen ## FTP username
331 Please specify the password.
Password:
230 Login successful.
Remote system type is UNIX.
Using binary mode to transfer files.
ftp>
As you see in the above output, I will be able to connect to FTP server. If you didn’t allow the vsftpd service through firewall, you may get a Connection timed out error.
Connect from Browser
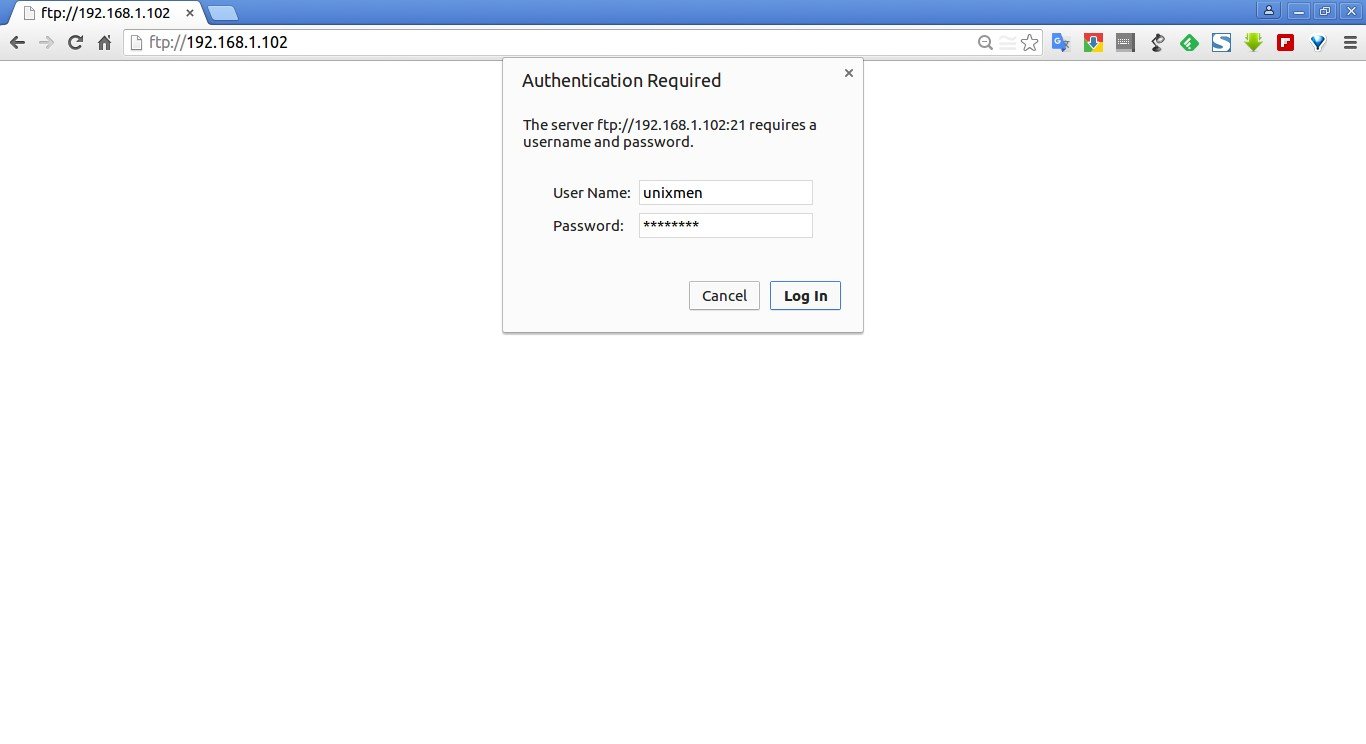
Open up your browser and Navigate to ftp://ip-address/. Enter the ftp user name and password.
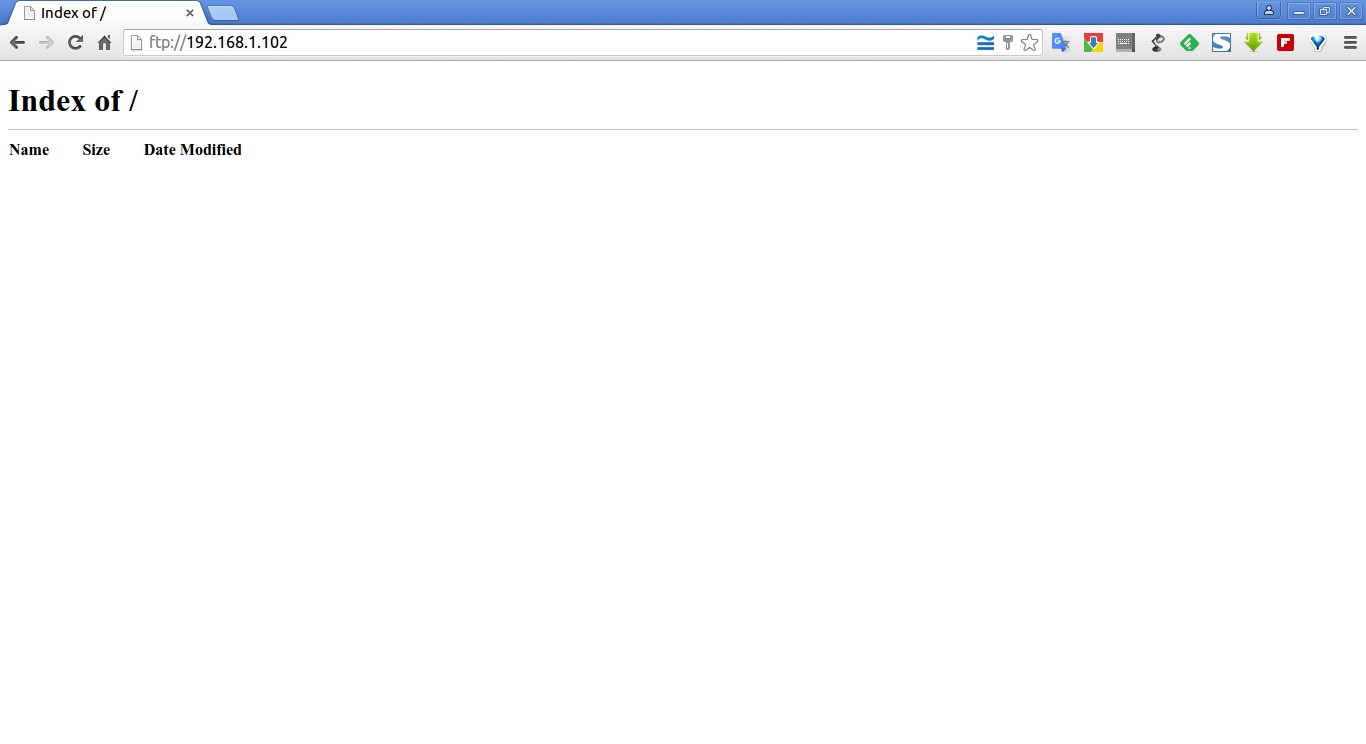
That’s it. Now you’ll be able to access the user’s FTP directory.
Connect to FTP server using FileZilla
Working from command-line mode might be bit difficult to newbies. So let us install a graphical FTP client called Filezilla to make things much easier.
Mostly, fileZilla is available on almost all Linux distributions default repositories.
On Debian/Ubuntu based systems:
sudo apt-get install filezilla
On Fedora/Redhat/CentOS systems:
sudo yum install filezilla
On openSUSE/SUSE:
sudo zypper in filezilla
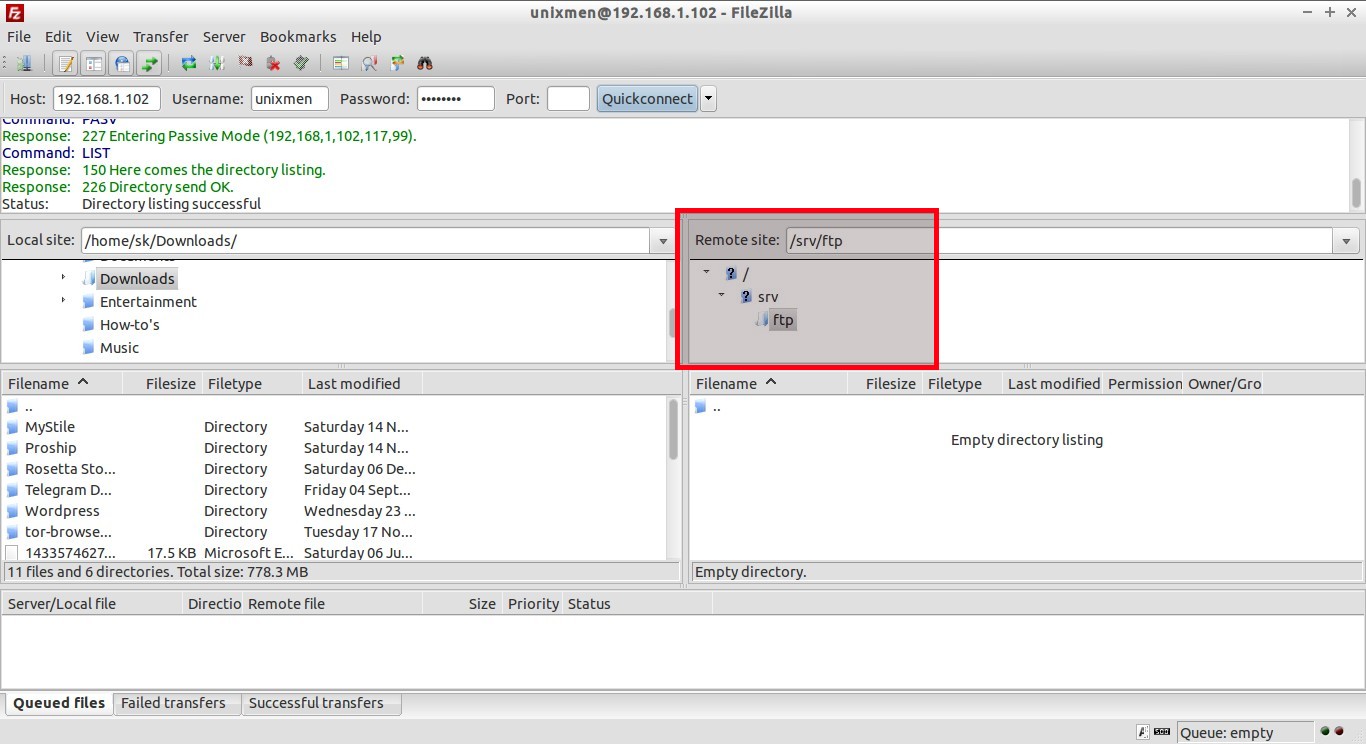
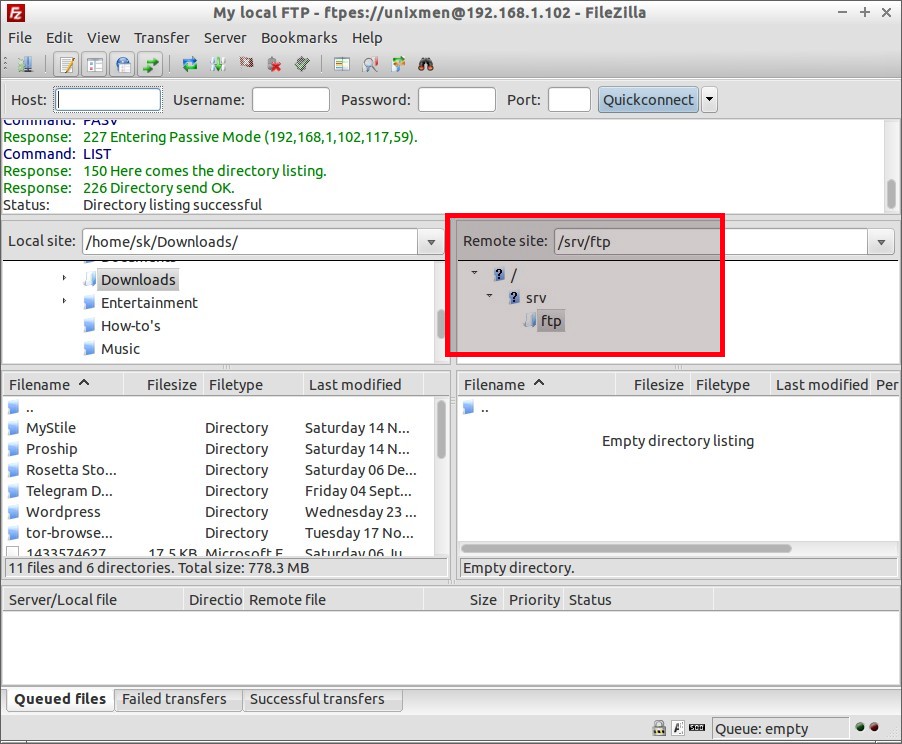
After installing filezilla, open it, and enter the ftp server IP address, user name and password and click quickconnect.
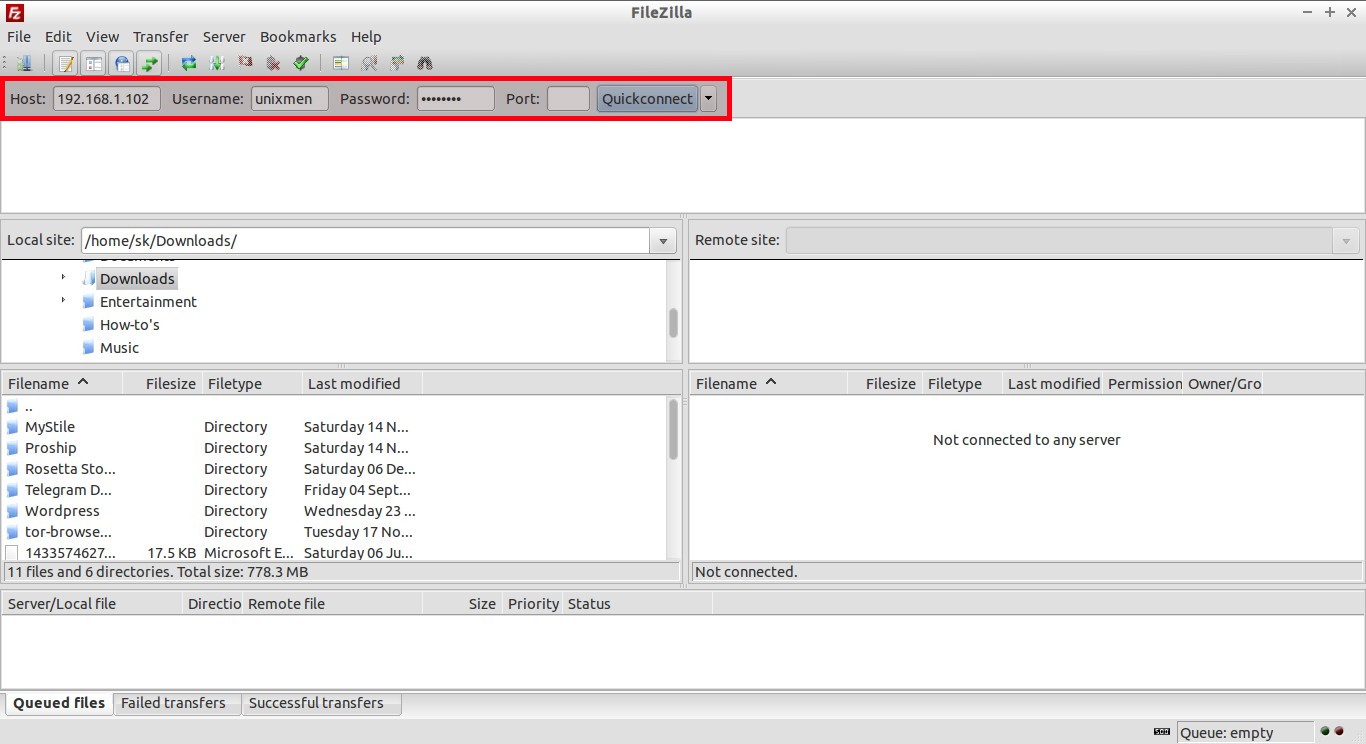
That’s it. You can now access the FTP home directory of the user ‘unixmen’.
Restrict particular users to access the FTP server
For added security, you can restrict FTP access to certain users by adding them to /etc/vsftpd.chroot_list file.
To do that, Edit vsftpd.conf file,
sudo nano /etc/vsftpd.conf
Make the changes as shown below.
[...]
# Uncomment and set YES
chroot_local_user=YES
chroot_list_enable=YES
chroot_list_file=/etc/vsftpd.chroot_list
[...]
Save and close file.
Then, Create a new file /etc/vsftpd.chroot_list,
sudo nano /etc/vsftpd.chroot_list
Add the users that you want to give access to FTP server. I added the user called unixmen.
unixmen
Restart ftp service.
sudo systemctl restart vsftpd
Now you will be able to connect to FTP server with users in the chroot list file.
If you try to connect to FTP server with users other than in the chroot list, you may get the following error:
500 OOPS: could not read chroot() list file:/etc/vsftpd.chroot_list
ftp: Login failed
That’s it. Your FTP server is ready to use.
Configuring Vsftpd With SSL/TLS
After installing vsftpd on openSUSE server, create the following directory if it’s not created already to store SSL certificates.
sudo mkdir /etc/ssl/private
Then, create the certificate and key files using the following command:
sudo openssl req -x509 -nodes -days 365 -newkey rsa:1024 -keyout /etc/ssl/private/vsftpd.pem -out /etc/ssl/private/vsftpd.pem
You’ll be asked to enter the series of questions such as Country, State Code, Email address, Organization name etc. Enter the details one by one. Here is my sample output:
 Generating a 1024 bit RSA private key
 ......++++++
 .............++++++
 writing new private key to '/etc/ssl/private/vsftpd.pem'
 -----
 You are about to be asked to enter information that will be incorporated
 into your certificate request.
 What you are about to enter is what is called a Distinguished Name or a DN.
 There are quite a few fields but you can leave some blank
 For some fields there will be a default value,
 If you enter '.', the field will be left blank.
 -----
 Country Name (2 letter code) [XX]:IN
 State or Province Name (full name) []:TN
 Locality Name (eg, city) [Default City]:Erode
 Organization Name (eg, company) [Default Company Ltd]:Unixmen
 Organizational Unit Name (eg, section) []:Technical
 Common Name (eg, your name or your server's hostname) []:linux.suse
 Email Address []:sk@unixmen.com
In the common name field, you can either use hostname or IP address of your vsftpd server.
Edit vsftpd configuration file /etc/vsftpd/vsftpd.conf,
sudo vi /etc/vsftpd.conf
Add the following lines at the end:
ssl_enable=YES allow_anon_ssl=NO force_local_data_ssl=YES force_local_logins_ssl=YES ssl_tlsv1=YES ssl_sslv2=NO ssl_sslv3=NOrsa_cert_file=/etc/ssl/private/vsftpd.pem
rsa_private_key_file=/etc/ssl/private/vsftpd.pem
Save and close the file. Restart vsftpd service.
sudo systemctl restart vsftpd
Check FTP Server
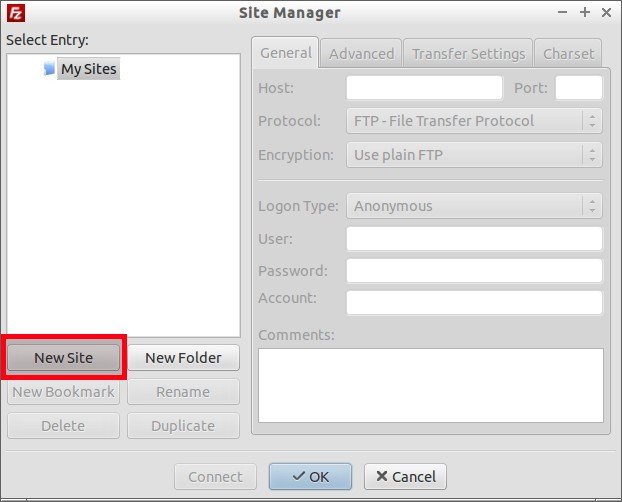
Open Filezilla from your client system. Go to File -> Site Manager.
In the Site Manager window, select New Site.
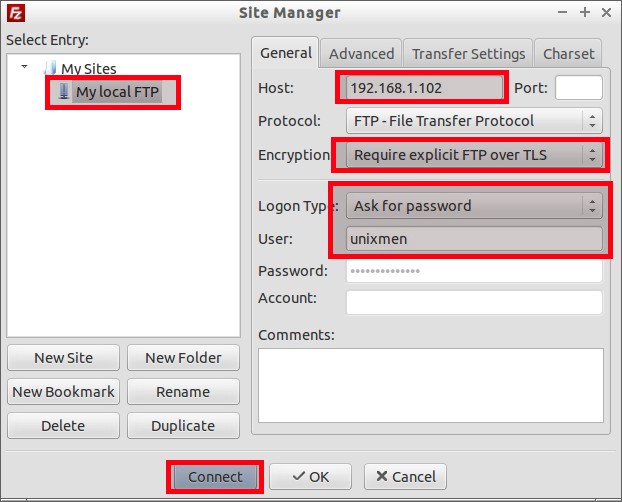
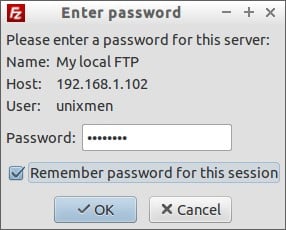
Name your new site, or leave it as it is. In my case I name it as My local FTP. Enter the FTP server IP address, and select“Require explicit FTP over TLS” from the Encryption drop down box. In the Logon Type drop downbox, select Ask for password option, and enter your FTP user name(Here unixmen is my FTP username). Finally click on the Connect button.
You’ll be asked to enter the ftp user password in the next screen.
Note: In case you got error something like below.
Response: 500 OOPS: child died
Error: Critical error
Error: Could not connect to server
Edit /etc/vsftpd.conf file:
sudo nano /etc/vsftpd.conf
Uncomment or add the following line:
seccomp_sandbox=NO
Then restart vsftpd service to take effect the changes.
sudo systemctl restart vsftpd
Then again go to the Site Manager, Enter the FTP server IP address, and select“Require explicit FTP over TLS” from the Encryption drop down box. In the Logon Type drop downbox, select Ask for password option, and enter your FTP user name. Finally click on the Connect button.
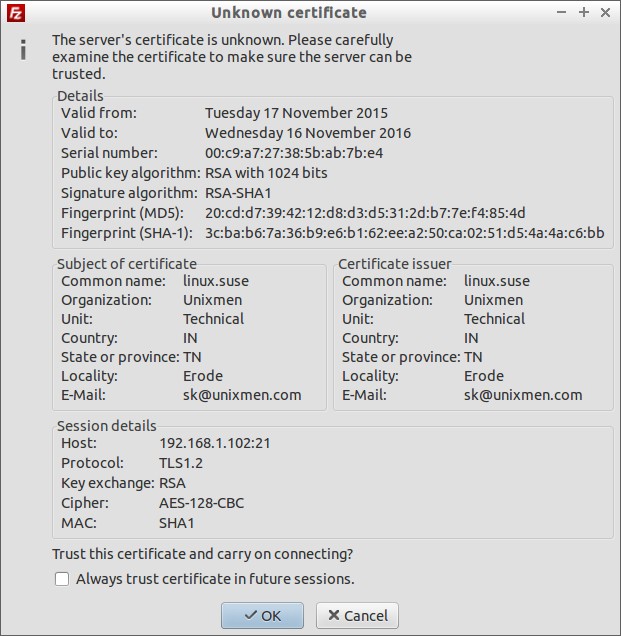
Now, you”ll be asked to accept the certificate that is being used to make sure the server can be trusted. In the Certificate window, you may see the list of values which is entered during the certificate generation process. Click Ok to accept the certificate and establish the connection.
That’s it. Now you’ll be able to access your FTP server.
That’s it. We have configured out FTP server with SSL/TLS.
Cheers!


