Ubuntu 14.04 x64 GITLab installation and configuration
Our goals is install and configure the GitLab server in Ubuntu 14.04 x64 for source code placing and synchronizing. This is WEB server and his control is very easy. Programmers synchronizes source codes with git client. The source code check is working with checksum and diff utilities. We must create the groups in the web portal and add programmers to this group. The differences of code changes is synchronizes incremental. All of this process is logging. In simple words this is for programmers.
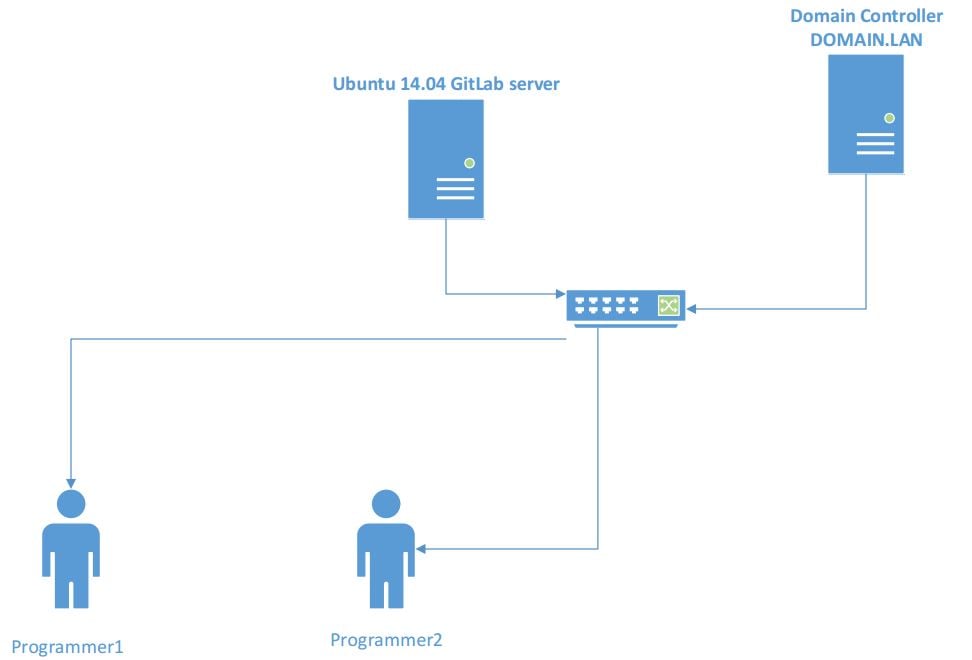
GitLab – This is web based wiki event tracking system with GIT repository controller. Program is written by Ukranian Dmitriy Zaporozhets in Ruby.
Firstly look at the domain controller credentials:
DC: DOMAIN.LAN
port: 636
bind_dn: ‘CN=DCADM,CN=Users,DC=domain,DC=lan’
password: ‘DC_PASSWORD’
user_filter: ‘(memberOf=CN=GITUsers,OU=DOMAINTech Groups,OU=DOMAINTech,DC=domain,DC=lan)’
Resources of Ubuntu 14.04 x64 virtual machine:
1 CPU 2 Core
4GB DDR
200GB HDD
- Packages and dependencies
apt-get update – Update system repositories
apt-get dist-upgrade – Update system packages and kernel
Please note, you must install packages just from sudo.
sudo apt-get install -y vim – install vim
sudo update-alternatives –set editor /usr/bin/vim.basic – Set VIM as default text editor
Install needed dependencies for Ruby and Ruby GEMS extensions.
sudo apt-get install -y build-essential zlib1g-dev libyaml-dev libssl-dev libgdbm-dev libreadline-dev libncurses5-dev libffi-dev curl openssh-server redis-server checkinstall libxml2-dev libxslt-dev libcurl4-openssl-dev libicu-dev logrotate python-docutils pkg-config cmake libkrb5-dev
sudo apt-get install -y git-core – Install GIT
git –version – Look at the GIT version, this must be between 1.7.12 and 2.0.0 or higher.
git version 1.9.1
Or if you want to delete old GIT and install from source codes, then firstly delete GIT and install from source codes with the following steps:
sudo apt-get remove git-core – Firstly delete installed GIT core
Install needed dependent packages:
sudo apt-get install -y libcurl4-openssl-dev libexpat1-dev gettext libz-dev libssl-dev build-essential
cd /tmp – For compile and install source codes, go to the /tmp folder
Download and extract the source code
curl -L –progress https://www.kernel.org/pub/software/scm/git/git-2.1.2.tar.gz | tar xz
cd git-2.1.2/ – Go to the GIT code folder
./configure – Configure for compile
make prefix=/usr/local all – For destination folder define /usr/local
sudo make prefix=/usr/local install – GIT installing to the /usr/local/bin path
Note: At the 5th step configurations, don’t forget in the config/gitlab.yml configuration file change the bin_path as floows:
git:
bin_path: /usr/local/bin/git
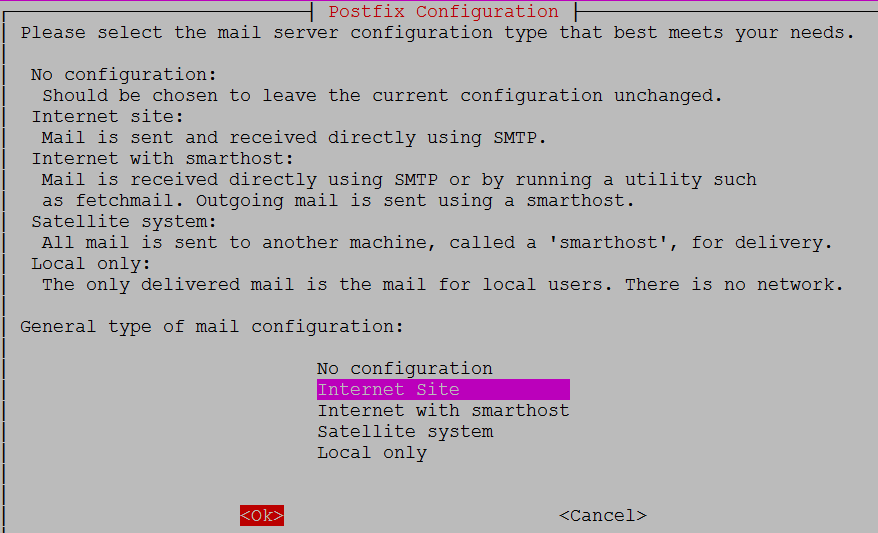
sudo apt-get install -y postfix – Install mail server for email send. Configure as follows. Select Internet site and write domain name.
- Install the Ruby
GitLab Shell is calling with OpenSSH and we can prevent existing version manager send and receive with SSH. Version managers is not supporting and for that we must use ruby. If old ruby is exists, delete this first.
sudo apt-get remove ruby1.8 – Delete old Ruby
mkdir /tmp/ruby && cd /tmp/ruby – For download and install Ruby create the folder and go to this folder.
Download and install in current directory.
curl -L –progress http://cache.ruby-lang.org/pub/ruby/2.1/ruby-2.1.5.tar.gz | tar xz
cd ruby-2.1.5/ – Enter the extracted folder
./configure –disable-install-rdoc – Configure for compile
make – Compile
sudo make install – Install
sudo gem install bundler –no-ri –no-rdoc – Install the Bundler GEM
- Sistem users
sudo adduser –disabled-login –gecos ‘GitLab’ git – Add user git for GitLab
- Databases
GitLAB advices for database PostgreSQL. For purpose extension use, we will use the PostgreSQL9.1. Install PostgreSQL, create database and username.
sudo apt-get install -y postgresql postgresql-client libpq-dev – Upgrade packages for database
sudo -u postgres psql -d template1 – Login to the PostgreSQL
template1=# CREATE USER git CREATEDB; – Create database user git (template1=# is console prompt and it is cannot entered as command)
Create GITLAB production database and grant full access to this database:
template1=# CREATE DATABASE gitlabhq_production OWNER git;
template1=# \q – Exit from database console
sudo -u git -H psql -d gitlabhq_production – Try to login to database with already created user
gitlabhq_production=> \q – Exit from database console
- Redis
sudo apt-get install redis-server – Install the redis server package
Give access for use redis sockets:
sudo cp /etc/redis/redis.conf /etc/redis/redis.conf.orig
Change Redis listener TCP port to 0 for stop listening.
sed ‘s/^port .*/port 0/’ /etc/redis/redis.conf.orig | sudo tee /etc/redis/redis.conf
Start default Debian/Ubuntu socket for Redis:
echo ‘unixsocket /var/run/redis/redis.sock’ | sudo tee -a /etc/redis/redis.conf
Give access to this socket for all Redis members:
echo ‘unixsocketperm 770’ | sudo tee -a /etc/redis/redis.conf
Create folder for socket, give access for user and group:
sudo mkdir /var/run/redis
sudo chown redis:redis /var/run/redis
sudo chmod 755 /var/run/redis/
If socket tempfiles folder exists, then add line to redis.conf file:
if [ -d /etc/tmpfiles.d ]; then
echo ‘d /var/run/redis 0755 redis redis 10d -‘ | sudo tee -a /etc/tmpfiles.d/redis.conf
fi
After changes in redis.conf, restart the service:
sudo service redis-server restart
sudo usermod -aG redis git – Add git user to redis group
- GitLab Install and configure
cd /home/git # We will install GitLab to the git user home folder. For that go to this folder.
Clone the gitlab source code to the local folder:
sudo -u git -H git clone https://gitlab.com/gitlab-org/gitlab-ce.git -b 7-6-stable gitlab
Configure:
cd /home/git/gitlab – Go to the GitLab installation folder
sudo -u git -H cp config/gitlab.yml.example config/gitlab.yml – Copy configuration from example file
sudo -u git -H editor config/gitlab.yml – Change the starting lines in the configuration file as follows. Note, we will configure HTTPS for nginx soon.
gitlab:
host: git.domain.lan
port: 443
https: true
email_from: jamal.shahverdiev@gmail.com
Be sure you have access to write to the log/ and tmp/ folders:
sudo chown -R git log/
sudo chown -R git tmp/
sudo chmod -R u+rwX,go-w log/
sudo chmod -R u+rwX tmp/
Create folder and give access for Satellite:
sudo -u git -H mkdir /home/git/gitlab-satellites
sudo chmod u+rwx,g=rx,o-rwx /home/git/gitlab-satellites
Be sure GitLab have access to write to tmp/pids/ and tmp/sockets/ folders:
sudo chmod -R u+rwX tmp/pids/
sudo chmod -R u+rwX tmp/sockets/
Be sure GitLab have access to write to public/uploads/ folder:
sudo chmod -R u+rwX public/uploads
Copy unicorn configuration file:
sudo -u git -H cp config/unicorn.rb.example config/unicorn.rb
nproc – Find the CPU core counts
4
If you have a lot of loads then, activate cluster mode. If your RAM is 4GB then, set worker_processes count is equal to CORE count:
sudo -u git -H editor config/unicorn.rb
Copy the rack_attack configuration file:
sudo -u git -H cp config/initializers/rack_attack.rb.example config/initializers/rack_attack.rb
Configure Git global configuration for user git. This needed when you will configure through web browser. Change user.email, how we did in the gitlab.yml configuration file:
sudo -u git -H git config –global user.name “GitLab”
sudo -u git -H git config –global user.email “jamal.shahverdiyev@gmail.com”
sudo -u git -H git config –global core.autocrlf input
Configure redis connection:
sudo -u git -H cp config/resque.yml.example config/resque.yml
If you are not using socket default in Debian/Ubuntu-da you can change path in the following file.
Important note: Be sure gitlab.yml and unicorn.rb configurations are the same.
Configuration GitLab DB
Copy configuration file for PostgreSQL
sudo -u git cp config/database.yml.postgresql config/database.yml
For PostgreSQL and MySQL change the configuration in the following file:
configure username/password in the config/database.yml configuration file. We must write database, username and password which talked about in the first step. If you changed the password then write new pass in password directive. You can write between single quotes ”
sudo -u git -H editor config/database.yml
For PostgreSQL and MySQL. Change access for read for git user to config/database.yml file:
sudo -u git -H chmod o-rwx config/database.yml
Install GEMS
Note: For Bundler 1.5.2 you can use bundle install -jN command (N – number of you CPU cores. You can find cores with nproc command). This is doing our job for 60% fastest. But be sure you bundler newer than 1.5.2 version. You can check this with bundle -v command.
bundle -v – My version was
Bundler version 1.7.9
# For PostgreSQL (this option tells install without MySQL)
sudo -u git -H bundle install –deployment –without development test mysql aws
Install GitLab Shell
GitLab Shell is specially program written for GitLab which is using for grant access to SSH and control repository. For install gitlab-shell use the following command(If you changed `redis path` you must change here). Write command in one line
sudo -u git -H bundle exec rake gitlab:shell:install[v2.4.0] REDIS_URL=unix:/var/run/redis/redis.sock RAILS_ENV=production
By default gitlab-shell configuration is generated from main Gitlab configuration. You can see your GitLab-shell configuration with the following command.
sudo -u git -H editor /home/git/gitlab-shell/config.yml – Output of command
user: git
gitlab_url: https://git.domain.lan/
http_settings:
self_signed_cert: true
repos_path: “/home/git/repositories/”
auth_file: “/home/git/.ssh/authorized_keys”
redis:
bin: “/usr/bin/redis-cli”
namespace: resque:gitlab
socket: “/var/run/redis/redis.sock”
log_level: INFO
audit_usernames: false
Initialize the database and activate functionalities
sudo -u git -H bundle exec rake gitlab:setup RAILS_ENV=production
For create database tables write yes and ENTER button. After you will see the following lines:
Administrator account created:
login………root
password……5iveL!fe
Note: You can change the Administrator password from the GITLAB_ROOT_PASSWORD path variable. Of course it is possible from web too.
sudo -u git -H bundle exec rake gitlab:setup RAILS_ENV=production GITLAB_ROOT_PASSWORD=newpassword
Install the init script
sudo cp lib/support/init.d/gitlab /etc/init.d/gitlab – Copy the Init script to the startup scripts path
If you install from different folder than default, then copy from this folder. But we installed from default folder.
sudo cp lib/support/init.d/gitlab.default.example /etc/default/gitlab
If you install GitLab from different user and different folder than default then, you must change this configurations in /etc/default/gitlab file. Please note, in then /etc/init.d/gitlab file don’t change anything because this file will change automatically.
sudo update-rc.d gitlab defaults 21 – Add GitLab to startup
LogRotasiyasini ishe saliriq:
sudo cp lib/support/logrotate/gitlab /etc/logrotate.d/gitlab – Copy logrotate file
Check program status. Check GitLab and his environment:
sudo -u git -H bundle exec rake gitlab:env:info RAILS_ENV=production
Compile the actives:
sudo -u git -H bundle exec rake assets:precompile RAILS_ENV=production
Start the GitLab service:
sudo service gitlab start
Or
sudo /etc/init.d/gitlab restart
- Install and configure nGinx
nginx is officially supported by GitLab. If you want to use dffierent web server than nginx then, check GitLab portal about this web server.
Installation:
sudo apt-get install -y nginx
Site configuration:
Copy the site configuration template to the path and link to him(gitlab for HTTP and gitlab-ssl for HTTPS)
For HTTP
sudo cp lib/support/nginx/gitlab /etc/nginx/sites-available/gitlab
sudo ln -s /etc/nginx/sites-available/gitlab /etc/nginx/sites-enabled/gitlab
For HTTPS:
sudo cp lib/support/nginx/gitlab-ssl /etc/nginx/sites-available/gitlab-ssl
sudo ln -s /etc/nginx/sites-available/gitlab-ssl /etc/nginx/sites-enabled/gitlab-ssl
Edit configuration files which of them you choosen:
sudo editor /etc/nginx/sites-available/gitlab – Fot HTTP this file
sudo editor /etc/nginx/sites-available/gitlab-ssl – I has choose HTTPS
Important configuration lines must be correctly configured to your DNS A record name:
upstream gitlab {
server unix:/home/git/gitlab/tmp/sockets/gitlab.socket fail_timeout=0;
}
server {
listen 10.50.3.206:80;
server_name git.domain.lan;
server_tokens off;
return 301 https://$server_name$request_uri;
access_log /var/log/nginx/gitlab_access.log;
error_log /var/log/nginx/gitlab_error.log;
}
server {
listen 10.50.3.206:443 ssl;
server_name git.domain.lan;
server_tokens off; root /home/git/gitlab/public;
client_max_body_size 20m;
ssl on;
# We will create SSL certificates
ssl_certificate /etc/nginx/ssl/gitlab.crt;
ssl_certificate_key /etc/nginx/ssl/gitlab.key;
ssl_ciphers “ECDHE-RSA-AES256-GCM-SHA384:ECDHE-RSA-AES128-GCM-SHA256:DHE-RSA-AES256-GCM-SHA384:DHE-RSA-AES128-GCM-SHA256:ECDHE-RSA-AES256-SHA384:ECDHE-RSA-AES128-SHA256:ECDHE-RSA-AES256-SHA:ECDHE-RSA-AES128-SHA:DHE-RSA-AES256-SHA256:DHE-RSA-AES128-SHA256:DHE-RSA-AES256-SHA:DHE-RSA-AES128-SHA:ECDHE-RSA-DES-CBC3-SHA:EDH-RSA-DES-CBC3-SHA:AES256-GCM-SHA384:AES128-GCM-SHA256:AES256-SHA256:AES128-SHA256:AES256-SHA:AES128-SHA:DES-CBC3-SHA:HIGH:!aNULL:!eNULL:!EXPORT:!DES:!MD5:!PSK:!RC4”;
ssl_protocols TLSv1 TLSv1.1 TLSv1.2;
ssl_prefer_server_ciphers on;
ssl_session_cache shared:SSL:10m;
ssl_session_timeout 5m;
access_log /var/log/nginx/gitlab_access.log;
error_log /var/log/nginx/gitlab_error.log;
location / {
try_files $uri $uri/index.html $uri.html @gitlab;
}
location @gitlab {
gzip off;
proxy_read_timeout 300;
proxy_connect_timeout 300;
proxy_redirect off;
proxy_set_header Host $http_host;
proxy_set_header X-Real-IP $remote_addr;
proxy_set_header X-Forwarded-Ssl on;
proxy_set_header X-Forwarded-For $proxy_add_x_forwarded_for;
proxy_set_header X-Forwarded-Proto $scheme;
proxy_set_header X-Frame-Options SAMEORIGIN;
proxy_pass http://gitlab;
}
location ~ ^/(assets)/ {
root /home/git/gitlab/public;
gzip_static on;
expires max;
add_header Cache-Control public;
}
error_page 502 /502.html;
}
When you created certificates in the right address, check nginx status with the following command . You must see the same answer:
sudo nginx -t
nginx: the configuration file /etc/nginx/nginx.conf syntax is ok
nginx: configuration file /etc/nginx/nginx.conf test is successful
Restart the nGinx service:
sudo service nginx restart
Create certificate for HTTPS:
Do the following steps exactly.
- In theyml file
- change the port to 443
- In the first section change https to true
- In theyml file
- Option for gitlab_url set as https (https://git.domain.lan)
- For using certificates you can set ca_file and ca_path
- In the nGinx configuration file change gitlab to gitlab-ssl
- Write right server FQDN
- Write right path for ssl_certificate and ssl_certificate_key
- See the configuration file and change other security configurations.
- Generate the Self-Signed certificate:
sudo mkdir -p /etc/nginx/ssl/
cd /etc/nginx/ssl/
sudo openssl req -newkey rsa:2048 -x509 -nodes -days 3560 -out gitlab.crt -keyout gitlab.key
Country Name (2 letter code) [AU]:AZ
State or Province Name (full name) [Some-State]:Baku
Locality Name (eg, city) []:YeniYasamal
Organization Name (eg, company) [Internet Widgits Pty Ltd]:DOMAIN
Organizational Unit Name (eg, section) []:IT
Common Name (e.g. server FQDN or YOUR name) []:git.domain.lan
Email Address []:jamal.shahverdiyev@domain.az
sudo chmod o-r gitlab.key
- In the gitlab-shell for file yml change self_signed_cert option to true.
Check the program state again
Check all configuration status again:
cd /home/git/gitlab
sudo -u git -H bundle exec rake gitlab:check RAILS_ENV=production
Result must be as following:
Redis version >= 2.0.0? … yes
Ruby version >= 2.0.0 ? … yes (2.1.5)
Your git bin path is “/usr/bin/git”
Git version >= 1.7.10 ? … yes (1.9.1)
Checking GitLab … Finished
Note: With the set of SANITIZE=true environment variable you will block of output about projects when you will use the gitlab:check command. Open https://git.domain.lan link in your browser with the following login and password and change the password.
login: root
pass: 5iveL!fe
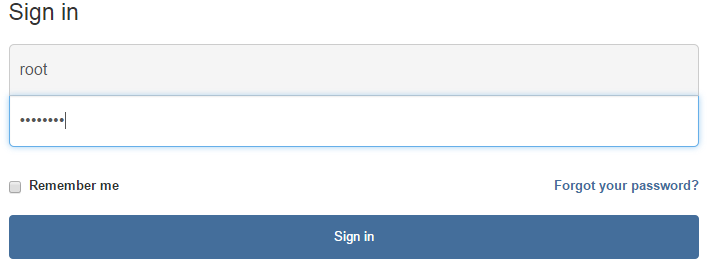
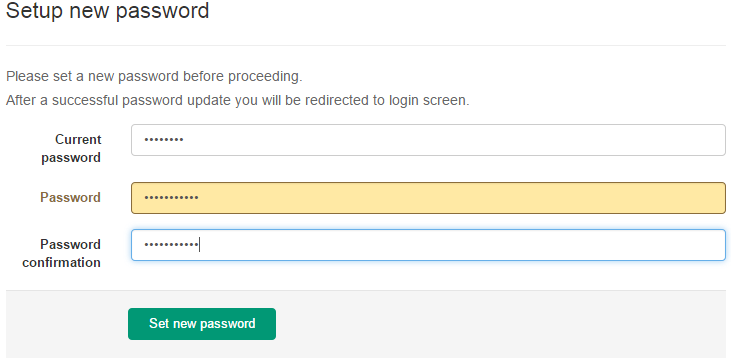
Then click the Sign in button and change the password as follows:
You can restart, stop or start the services with the following commands.
sudo service gitlab restart
[sudo] password for jamal:
Shutting down both Unicorn and Sidekiq.
GitLab is not running.
Starting both the GitLab Unicorn and Sidekiq.
The GitLab Unicorn web server with pid 28862 is running.
The GitLab Sidekiq job dispatcher with pid 28904 is running.
GitLab and all its components are up and running.
You can change Redis connections for you requirements:
If you want connect to Redis with different host and port then, change the configuration in the config/resque.yml file.
# Example
production: redis://redis.example.tld:6379
If you want to connect to the redis with “unix:” socket then, change the config/resque.yml configuration file as follows:
# Copy
production: unix:/path/to/redis/socket
Different SSH connection
If you changed SSH listen port then, you must change the SSH configuration for GitLab user.
Add the following lines in the /home/git/.ssh/config file
host localhost # hostname
user git # remote git username
port 2222 # SSH port number
hostname 127.0.0.1; # Server name or IP
Of course you must change right configurations in the config/gitlab.yml file for ssh_user, ssh_host, admin_uri options
MSLDAP registration
If we want authenticate GitLAB users in our company domain controller then, we must change in the config/gitlab.yml file right configurations for connect to DC and check for users.
cd /home/git/gitlab – Go to the configuration folder
sudo -u git editor config/gitlab.yml – Change LDAP configuration as follows.
ldap:
enabled: true
servers:
main:
label: ‘LDAP‘
host: ‘domain.lan‘
port: 636
uid: ‘sAMAccountName‘
method: ‘ssl‘ # “tls” or “ssl” or “plain”
bind_dn: ‘CN=DCADM,CN=Users,DC=domain,DC=lan‘
password: ‘DC_PASSWORD‘
active_directory: true
allow_username_or_email_login: false
base: ‘DC=domain,DC=lan‘
user_filter: ‘(memberOf=CN=GITUsers,OU=DOMAINTech Groups,OU=DOMAINTech,DC=domain,DC=lan)‘
sudo /etc/init.d/gitlab restart – Restart the Gitlab service
Check the LDAP configurations. We must see the users.
sudo -u git -H bundle exec rake gitlab:ldap:check RAILS_ENV=production
Checking LDAP …
LDAP users with access to your GitLab server (only showing the first 100 results)
Server: ldapmain
DN: CN=Eldaniz Ibrahimov,OU=DOMAINTech Users,OU=DOMAINTech,DC=domain,DC=lan sAMAccountName: eldaniz
DN: CN=Jamal Shahverdiyev,OU=DOMAINTech Users,OU=DOMAINTech,DC=domain,DC=lan sAMAccountName: jamal
DN: CN=Sukur Rzayev,OU=DOMAINTech Users,OU=DOMAINTech,DC=domain,DC=lan sAMAccountName: SukurR
DN: CN=Musaqil Musabeyli,OU=DOMAINTech Users,OU=DOMAINTech,DC=domain,DC=lan sAMAccountName: MusaqilM
DN: CN=Hidayat Soltanzade,OU=DOMAINTech Users,OU=DOMAINTech,DC=domain,DC=lan sAMAccountName: HidayatS
DN: CN=Alakbar Velizade,OU=DOMAINTech Users,OU=DOMAINTech,DC=domain,DC=lan sAMAccountName: AlakbarV
DN: CN=Rufat Babakishiyev,OU=DOMAINTech Users,OU=DOMAINTech,DC=domain,DC=lan sAMAccountName: RufatBa
DN: CN=Javid Ismayilzade,OU=DOMAINTech Users,OU=DOMAINTech,DC=domain,DC=lan sAMAccountName: JavidI
DN: CN=Yunis Babayev,OU=DOMAINTech Users,OU=DOMAINTech,DC=domain,DC=lan sAMAccountName: YunisB
DN: CN=Rovshan Baghirov,OU=DOMAINTech Users,OU=DOMAINTech,DC=domain,DC=lan sAMAccountName: RovshanB
Checking LDAP … Finished
At the end go to the https://git.domain.lan link and login with DC username as following:
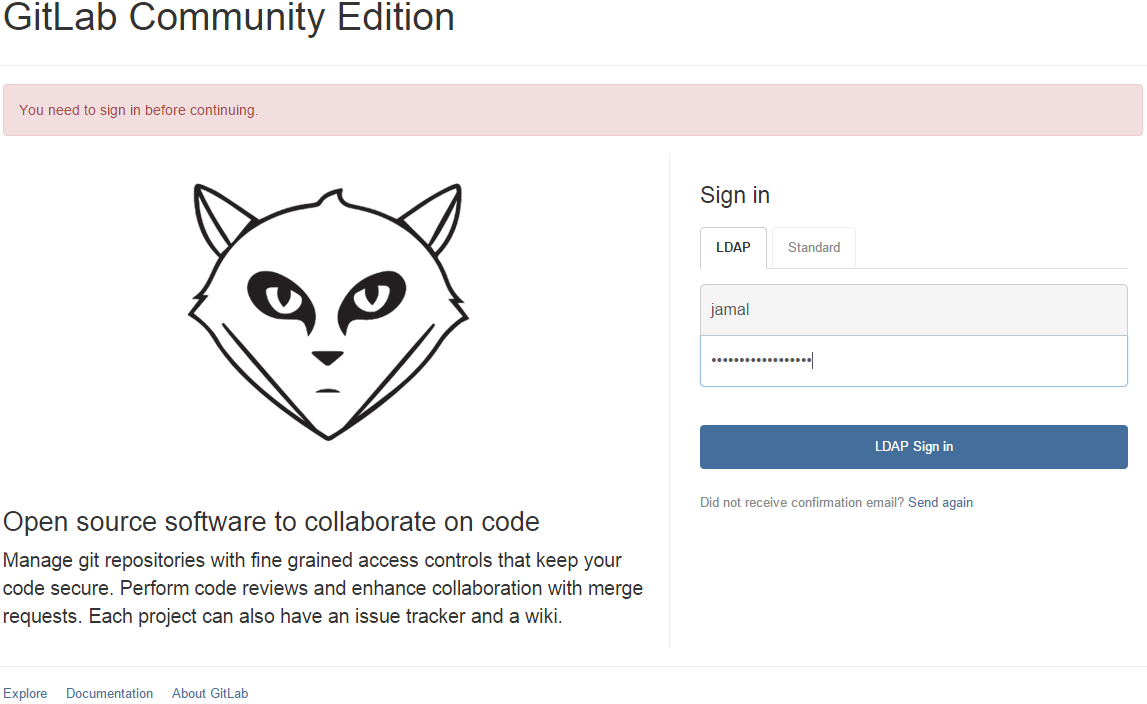
Now programmers can synchronize theirs source codes from selected folder to our server.
At the end I will note again. In the /home/git/gitlab/config/gitlab.yml configuration file option for bin_path the binary path must be correct to your system git(/usr/local/bin/git) path.


