
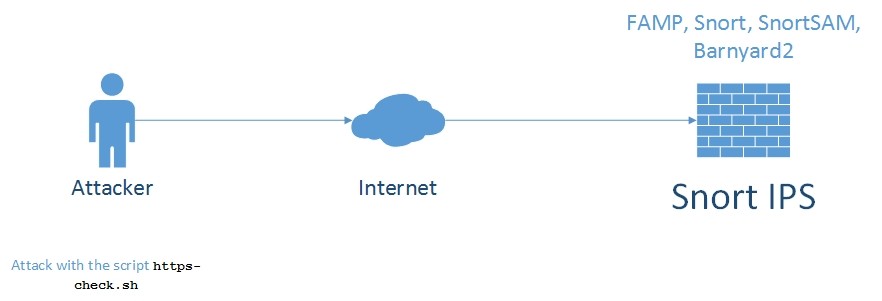
The topology will be as follows:
Apache, MySQL and PHP already installed and configured.
In /usr/local/etc/php.ini file configure the following lines:
error_reporting = E_ALL & ~E_NOTICE

date.timezone = 'Asia/Baku'

include_path = ".:/usr/local/share/pear:/usr/local/share/fpdf"
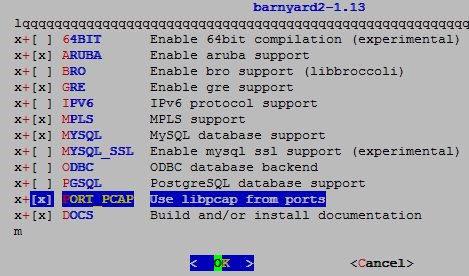
cd /usr/ports/security/snort
make config # Choose modules
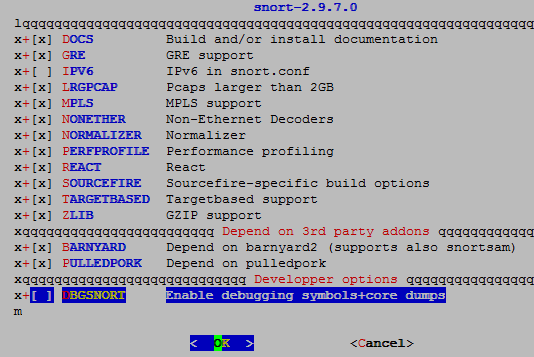
make -DBATCH install # Install
mkdir /root/snortrules # create folder which we will download the rules
cd /root/snortrules # Enter the folder
Register in site http://snort.org, and then download snortrules-snapshot-2970.tar.gz file to our server folder /root/snortrules:
tar zxf snortrules-snapshot-2970.tar.gz # extract the rules
Move the rules to the necessary address:
mv /root/snortrules/so_rules/ /usr/local/etc/snort/
mv /root/snortrules/rules/ /usr/local/etc/snort/
When configure BARNYARD2 we will need ‘sid-msg.map’ and ‘gen-msg.map’ files. So we copy that before to the ‘/usr/local/etc/snort’ folder.
cp /root/snortrules/etc/sid-msg.map /usr/local/etc/snort

cp /usr/ports/security/snort/work/snort-2.9.7.0/etc/gen-msg.map /usr/local/etc/snort
turn off USBUS interface, because when SNORT will sniff the network it will use first interface usbus0 device and after that will output error. You must reboot after it:
echo hw.usb.no_pf=1 >>/boot/loader.conf # Create needed files.
touch /usr/local/etc/snort/rules/blacklist.rules
touch /usr/local/etc/snort/rules/whitelist.rules # Create needed files.
If we want to start snort with different user, we must create it before:
adduser

Username: snort

Full name: Snort IPS User

Uid (Leave empty for default): 1003

Login group [snort]:

Login group is snort. Invite snort into other groups? []:

Login class [default]:

Shell (sh csh tcsh nologin) [sh]: nologin

Home directory [/home/snort]:

Home directory permissions (Leave empty for default):

Use password-based authentication? [yes]: no

Lock out the account after creation? [no]: no

Username   : snort

Password   : <disabled>

Full Name  : Snort IPS User

Uid        : 1003

Class      :

Groups     : snort

Home       : /home/snort

Home Mode  :

Shell      : /usr/sbin/nologin

Locked     : no
chown –R snort:snort /usr/local/etc/snort # Change user and group for snort folder.
start configuration of /usr/local/etc/snort/snort.conf file:
ipvar HOME_NET [10.50.19.0/24,10.50.3.0/24] # Declare Local Subnets in variable.
The same as in the ‘/usr/local/etc/snort/snort.conf’ file for simple rules, so-rules and preproc-rules edit and change the path. Do not forget that all error logs are collected in ‘/var/log/messages’ file.
var RULE_PATH ./rules

var SO_RULE_PATH ./so_rules

var PREPROC_RULE_PATH ./preproc_rules

var WHITE_LIST_PATH ./rules

var BLACK_LIST_PATH ./rules
Set path for Dynamic preprocessor engine and detector:
dynamicpreprocessor directory /usr/local/lib/snort_dynamicpreprocessor

dynamicengine /usr/local/lib/snort_dynamicengine/libsf_engine.so

dynamicdetection directory /usr/local/lib/snort_dynamicrules
mkdir /usr/local/lib/snort_dynamicrules # Create needed folder
Note: If in the folder is not found any file, we must copy needed files with command below:
cp /usr/ports/security/snort/work/snort-2.9.7.0/src/dynamic

preprocessors/build/usr/local/lib/snort_dynamicpreprocessor/* /usr/local/lib/snort_dynamicpreprocessor
You can also find dynamic engine file from this path /usr/ports/security/snort/work/snort-2.9.7.0/src/dynamic-plugins/sf_engine/.libs/libsf_engine.so
whitelist $WHITE_LIST_PATH/whitelist.rules, # change the name of white_list.rules file to whitelist.rules
blacklist $BLACK_LIST_PATH/blacklist.rules # change the name of black_list.rules to blacklist.rules. Save the snort.conf file and exit.
We also find the line below in the file /usr/local/etc/snort/snort.conf and add comment before the line because, we do not need local rules:
#include $RULE_PATH/local.rules
And at the end before all includes we must set output unified2 as below (You must delete nostamp):
output unified2: filename snort.log, limit 32, mpls_event_types, vlan_event_types
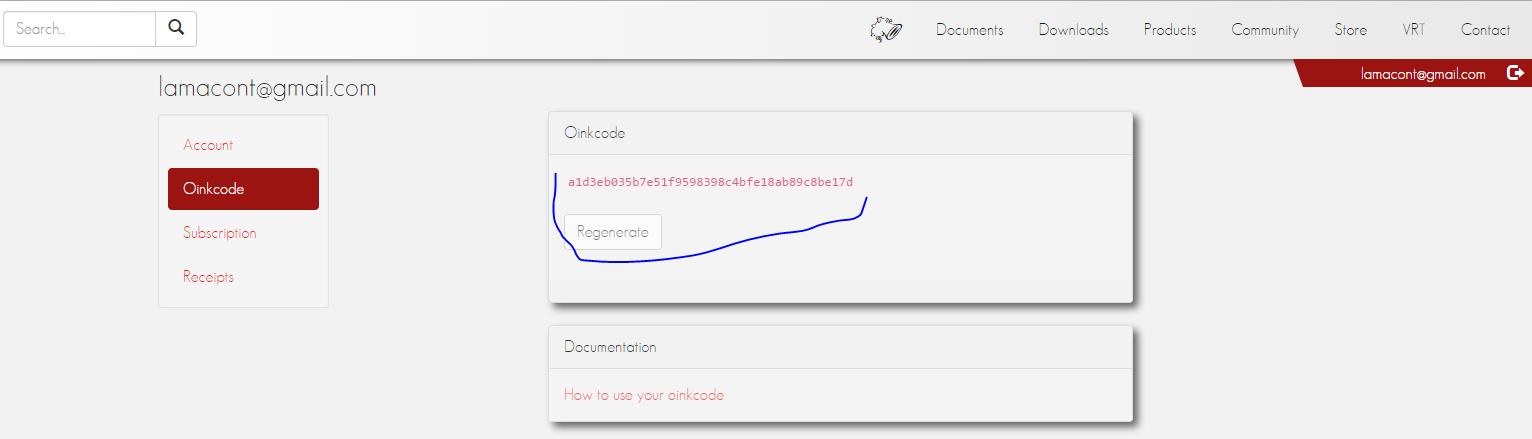
This is needed for autoupdate snort rules. But you must register in the http://snort.org site to get oinkcode because, it will be needed for update in our url link.
cd /usr/ports/security/oinkmaster # Enter the port
make config # Choose needed modules
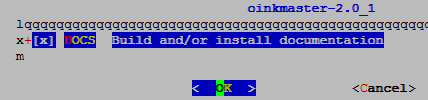
make -DBATCH install # Install
echo "check_certificate = off" > /root/.wgetrc # Turn off certificate checking for WGET
In the file /usr/local/bin/oinkmaster find the address that the following lines are in it:
# Make sure all urls look ok, and untaint them.
my @urls = @{$config{url}};

$#{$config{url}} = -1;

foreach my $url (@urls) {

clean_exit("incorrect URL: \"$url\"")

# Delete the line and,

unless ($url =~ /^((?:https*|ftp|file|scp):\/\/.+\.(?:tar\.gz|tgz))$/ || $url =~ /^(dir:\/\/.+)/);

# Add this line

      unless ($url =~ m,(http.*?://([^\s)\"](?!ttp:))+),g);

my $ok_url = $1;
Prepare master configuration file for OinkMaster. But you must get generated code for OinkCode, from your registered account(As the print screen):
cp /usr/local/etc/oinkmaster.conf.sample /usr/local/etc/oinkmaster.conf
I must say that, the pathes of rules shown in URL starting with the name snortrules-snapshot-2970.tar.gz. You must take the number 2970 from Snort version, in order to match. You can get the version with the following command:
snort -V

,,_     -*> Snort! <*-

o"  )~   Version 2.9.7.0 GRE (Build 149) FreeBSD

''''    By Martin Roesch & The Snort Team: http://www.snort.org/contact#team

Copyright (C) 2014 Cisco and/or its affiliates. All rights reserved.

Copyright (C) 1998-2013 Sourcefire, Inc., et al.

Using libpcap version 1.4.0

Using PCRE version: 8.35 2014-04-04

Using ZLIB version: 1.2.8
cat /usr/local/etc/oinkmaster.conf # Configuration file will be as follows
url = http://www.snort.org/rules/snortrules-snapshot-2970.tar.gz?oinkcode=a1d3eb035b7e51f9598398c4bfe18ab89c8be17d

path = /bin:/usr/bin:/usr/local/bin

tmpdir = /home/oinkmaster/tmp/

update_files = \.rules$|\.config$|\.conf$|\.txt$|\.map$

skipfile local.rules

skipfile deleted.rules

skipfile snort.conf
mkdir -p /home/oinkmaster/tmp/ # Create temp folder
We will need the makesidex.pl file for signature maps and configuration. For that do the following steps:
cp /usr/ports/security/oinkmaster/work/oinkmaster-2.0/contrib/makesidex.pl /usr/local/etc/snort # Set as executable
chmod 700 /usr/local/etc/snort/makesidex.pl
./makesidex.pl /usr/local/etc/snort/rules/ > /usr/local/etc/autodisable.conf
In the end test updates:
oinkmaster -o /usr/local/etc/snort/rules -C /usr/local/etc/oinkmaster.conf -C /usr/local/etc/autodisable.conf

Loading /usr/local/etc/oinkmaster.conf

Loading /usr/local/etc/autodisable.conf

Downloading file from http://www.snort.org/rules/snortrules-snapshot-2970.tar.gz?oinkcode=a1d3eb035b7e51f9598398c4bfe18ab89c8be17d... done.

Archive successfully downloaded, unpacking... done.

Setting up rules structures... done.

Processing downloaded rules... disabled 0, enabled 0, modified 0, total=21885

Setting up rules structures... done.

Comparing new files to the old ones... done.
[***] Results from Oinkmaster started 20141027 23:22:35 [***]
[*] Rules modifications: [*]
None.
[*] Non-rule line modifications: [*]
None.
[*] Added files: [*]
None.
For automatization our jobs we must add 5:30 schedule every morning to the /etc/crontab file(restart the cron daemon):
# Snort Rules Update
30 5 * * * root /usr/local/bin/oinkmaster -o /usr/local/etc/snort/rules/ >/dev/null 2>&1
/etc/rc.d/cron restart # Restart the daemon
We try to start snort from the Console. But don’t forget to check existing of /var/log/snort folder before. If it is not exist you must create.
snort -c /usr/local/etc/snort/snort.conf # Add snort to startup
echo 'snort_enable="YES"'>> /etc/rc.conf
## You can also add lines below to /etc/rc.conf file.
## But in my situation I used just line before.
## Don’t forget, in my situation snort listened on all interfaces
#snort_interface="em0"

#snort_conf="/usr/local/etc/snort/snort.conf"

#snort_group="snort"

#snort_flags="-D -q"
/usr/local/etc/rc.d/snort start # Start the snort
ps -ax | grep snort.conf | grep -v grep  # Check snort PID

1278  -  Ss     0:09.78 /usr/local/bin/snort -D -q -c /usr/local/etc/snort/snort.conf
Remember, if snort doesn’t start you can find error logs from the /var/log/messages file. You can find answer of all problems from this file.
Note: If you remember, i said that in the /usr/local/etc/snort/snort.conf configuration file the limit of log file will reach 32Mb it will create new one. This is not in rotation and one time will take all space in your file system. Before set to cron and remove log files we must detect handle time approximately. For example interval for 15 days was normal for me.
Add the following lines to the /etc/crontab file, for clean snort alert logs each 15 days:
# Snort Alert logs clean
* 6 * * * root /usr/bin/find /var/log/snort/ -type f -mtime +15 -exec rm -f {} \; >/dev/null 2>&1
And now connect Snort from Barnyard2 to MySQL database:
Barnyard takes alerts from Snort logs and insert them to MySQL database:
cd /usr/ports/security/barnyard2 # Go to the port folder
make config # Choose needed modules
make install
But if we want, we can also start barnyard with different username. For that you must do the following steps:
## Add to the system user ‘barny’ with the 999 UID and GID.
Username: barny

Full name: Barnyard user for Snort

Uid (Leave empty for default): 999

Login group [barny]:

Login group is barny. Invite barny into other groups? []:

Login class [default]:

Shell (sh csh tcsh nologin) [sh]: nologin

Home directory [/home/barny]:

Home directory permissions (Leave empty for default):

Use password-based authentication? [yes]: no

Lock out the account after creation? [no]:

Username   : barny

Password   : <disabled>

Full Name  : Barnyard user for Snort

Uid        : 999

Class      :

Groups     : barny

Home       : /home/barny

Home Mode  :

Shell      : /usr/sbin/nologin

Locked     : no

OK? (yes/no): yes
mkdir /var/log/barnyard2 # Create log folder for Barnyard2.
touch /var/log/snort/barnyard2.waldo # Create the file.
## Set access for Snort and barny for both logs.
chown -R barny:snort /var/log/barnyard2/

chmod -R 770 /var/log/barnyard2/

chown -R barny:snort /var/log/snort

chmod -R 770 /var/log/snort

touch /var/log/snortsnort.log

chown snort:barny /var/log/snortsnort.log
We also add the line below to the cron schedule to work each 1 minute. Because when each log is created, this will take owning of root user and snort group.
# Snort logs chown
*/1 * * * * root chown -R barny:snort /var/log/snort
/etc/rc.d/cron restart # Restart the service
Create database for barnyard:
mysql -u root –pfreebsd # Connect to MySQL with root username and create database, login and password. Also grant access.
CREATE DATABASE snort;

GRANT ALL PRIVILEGES ON snort.* TO 'snort'@'localhost' IDENTIFIED BY 'freebsd';

FLUSH PRIVILEGES;
Create structure for Barnyard in MySQL:
mysql -u snort -pfreebsd snort < /usr/local/share/examples/barnyard2/create_mysql
our configuration file /usr/local/etc/barnyard2.conf will be as follows:
config utc

config reference_file:      /usr/local/etc/snort/reference.config

config classification_file: /usr/local/etc/snort/classification.config

config gen_file:            /usr/local/etc/snort/gen-msg.map

config sid_file:            /usr/local/etc/snort/sid-msg.map
config event_cache_size: 4096
config logdir: /var/log/barnyard2
output alert_fast
config hostname: IT_VPS
config interface: em0
config alert_with_interface_name
config daemon
config set_gid: 999
config set_uid: 999
config waldo_file: /var/log/snort/barnyard2.waldo
input unified2
output alert_fast
output log_tcpdump: tcpdump.log
# To connect Barnyard to our database configuration line is as follows
output database: log, mysql, user=snort password=freebsd dbname=snort host=localhost
# And this line is for connecting to SnortSAM and when its time will come we will delete comment before line
#Here it means connect to the localhost and port 777 with 123 password
#output alert_fwsam: localhost:777/123
Check the starting of Barnyard:
/usr/local/bin/barnyard2 -c /usr/local/etc/barnyard2.conf -d /var/log/snort -f snort.log
echo 'barnyard2_enable="YES"'>> /etc/rc.conf # Add Barnyard to startup
barnyard2_flags="-d /var/log/snort -f snort.log -w /var/log/snort/barnyard2.waldo"

barnyard2_conf="/usr/local/etc/barnyard2.conf"
/usr/local/etc/rc.d/barnyard2 start # Start the Barnyard
ps -ax | grep barnyard | grep -v grep # Check PID of Barnyard
1413 - Rs 1:54.97 /usr/local/bin/barnyard2 -d /var/log/snort -f snort.log -w /var/log/snort/barnyard2.waldo -c /usr/local/etc/barnyard2.conf -D
Remember, if snort doesn’t start you can find error logs from the /var/log/messages file. You can find answer of all problems from this file. The successful result from /var/log/messages file is as follows:
Oct 28 03:25:44 snort barnyard2[1439]: database: compiled support for (mysql)
Oct 28 03:25:44 snort barnyard2[1439]: database: configured to use mysql
Oct 28 03:25:44 snort barnyard2[1439]: database: schema version = 107
Oct 28 03:25:44 snort barnyard2[1439]: database: host = localhost
Oct 28 03:25:44 snort barnyard2[1439]: database: user = snort
Oct 28 03:25:44 snort barnyard2[1439]: database: database name = snort
Oct 28 03:25:44 snort barnyard2[1439]: database: sensor name = IT_VPS:em0
Oct 28 03:25:44 snort barnyard2[1439]: database: sensor id = 1
Oct 28 03:25:44 snort barnyard2[1439]: database: sensor cid = 3
Oct 28 03:25:44 snort barnyard2[1439]: database: data encoding = hex
Oct 28 03:25:44 snort barnyard2[1439]: database: detail level = full
Oct 28 03:25:44 snort barnyard2[1439]: database: ignore_bpf = no
Oct 28 03:25:44 snort barnyard2[1439]: database: using the “log” facility
Oct 28 03:25:44 snort barnyard2[1439]:
Oct 28 03:25:44 snort barnyard2[1439]: –== Initialization Complete ==–
Oct 28 03:25:44 snort barnyard2[1439]: Barnyard2 initialization completed successfully (pid=1439)
Oct 28 03:25:44 snort barnyard2[1439]: Using waldo file ‘/var/log/snort/barnyard2.waldo’: spool directory = /var/log/snort spool filebase = snort.log time_stamp = 1414447356 record_idx = 0
Oct 28 03:25:44 snort barnyard2[1439]: Opened spool file ‘/var/log/snort/snort.log.1414447356’
Oct 28 03:25:44 snort barnyard2[1439]: Closing spool file ‘/var/log/snort/snort.log.1414447356’. Read 0 records
Oct 28 03:25:44 snort barnyard2[1439]: Opened spool file ‘/var/log/snort/snort.log.1414451087’
Oct 28 03:25:47 snort barnyard2[1439]: Waiting for new data
Note: Usually this problem appears when restart MySQL and Barnyard2 have not access to own PID file. We must restart Barnyard when we restart MySQL. Just delete PID files as it is shown below and start Barnyard again.
rm /var/run//barnyard2_em0.pid # Delete PID files
rm /var/run//barnyard2_em0.pid.lck
And now let’s install Snorby WEB interface:
Snorby was written in Ruby-Rails programing language. And for it we must install ruby1.9: because Snorby needs only it(This will not work with 2.0 version):
cd /usr/ports/converters/wkhtmltopdf # snorby needs this port
make install # install
After installation it will write binary files as pathes below:
/usr/local/bin/wkhtmltoimage

/usr/local/bin/wkhtmltopdf
echo "RUBY_DEFAULT_VER=1.9" >> /etc/make.conf # Set Ruby version before
echo "WITHOUT_X11=yes" >> /etc/make.conf # We don’t need X.
cd /usr/ports/lang/ruby19 # Go to the port
make config # Choose needed modules
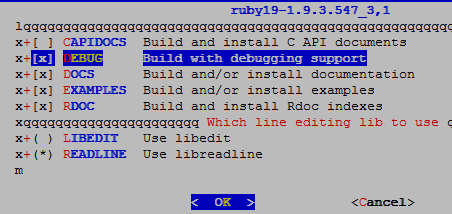
make install # Install
cd /usr/ports/devel/ruby-gems/ # Go to the port
make config # Choose needed modules
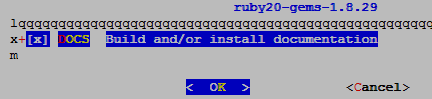
make install # Install
After installation binary file will be written to the /usr/local/bin/gem19 path.
cd /usr/ports/devel/git # Go to the GIT port
make config # Choose needed modules
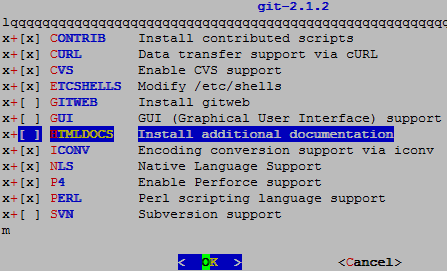
make install # Install
Continue installation:
/usr/local/bin/gem install prawn –no-rdoc –no-ri
/usr/local/bin/gem install rake -v 0.8.7 –no-rdoc –no-ri
/usr/local/bin/gem install rails –no-rdoc –no-ri
/usr/local/bin/gem install mysql –no-rdoc –no-ri
/usr/local/bin/gem install passenger –no-rdoc –no-ri
/usr/local/bin/passenger-install-apache2-module -a
After the installation the following lines in the /usr/local/etc/apache24/httpd.conf configuration file add after the last line of LoadModule directive:
LoadModule passenger_module /usr/local/lib/ruby/gems/1.9/gems/passenger-4.0.53/buildout/apache2/mod_passenger.so

        <IfModule mod_passenger.c>

        PassengerRoot /usr/local/lib/ruby/gems/1.9/gems/passenger-4.0.53

        PassengerDefaultRuby /usr/local/bin/ruby19

</IfModule>
/usr/local/etc/rc.d/apache24 restart # Restart the Daemon for commit changes.
mkdir /usr/local/www/snorby # Create Public_HTML folder for Snorby
cd /usr/local/www/snorby # Go to the folder
wget https://github.com/Snorby/snorby/archive/v2.6.2.tar.gz # Download snorby archived file
tar -zxf v2.6.2.tar.gz # Extract the file
cp -R snorby-2.6.2/* . # Copy the files to snorby folder
rm -rf snorby-2.6.2.tar.gz # Remove the zip file
rm -rf snorby-2.6.2 # Remove extracted fodler
chown -R www:www /usr/local/www/snorby # Change owner and group of folder to www
bundle pack # This command will download needed packets to the /usr/local/www/snorby/vendor/cache
bundle install --path vendor/cache # Install downloaded packets
Then copy the configuration files from sample to original:
cp /usr/local/www/snorby/config/snorby_config.yml.example /usr/local/www/snorby/config/snorby_config.yml
cp /usr/local/www/snorby/config/database.yml.example /usr/local/www/snorby/config/database.yml
Note: I detected a problem here. When Snorby tried to start it was warning snort database structure in MySQL. And that is why I had to create a new snorby database and connect to the barnyard.
mysql -uroot –pfreebsd # Login to the MySQL and create the database
CREATE DATABASE snorby; # Create the database
# Grant access to database with username, host and password
GRANT ALL PRIVILEGES ON snorby.* TO 'snorby'@'localhost' IDENTIFIED BY 'freebsd';

FLUSH PRIVILEGES;
Change the /usr/local/www/snorby/config/snorby_config.yml configuration file as follows:
production:

  domain: 'localhost:3000'

  wkhtmltopdf: /usr/local/bin/wkhtmltopdf

  ssl: false

  mailer_sender: 'snorby@snorby.org'

  geoip_uri: "http://geolite.maxmind.com/download/geoip/database/GeoLiteCountry/GeoIP.dat.gz"

  rules:

    - "/usr/local/etc/snort/rules"

    - "/usr/local/etc/snort/so_rules"

    - "/usr/local/etc/snort/preproc_rules"

  authentication_mode: database

  time_zone: 'AZST'

development:

  domain: localhost:3000

  wkhtmltopdf: /Users/mephux/.rvm/gems/ruby-1.9.2-p0/bin/wkhtmltopdf

  ssl: false

  mailer_sender: 'snorby@snorby.org'

  geoip_uri: "http://geolite.maxmind.com/download/geoip/database/GeoLiteCountry/GeoIP.dat.gz"

  rules:

    - "/Users/mephux/.snort/rules"

    - "/Users/mephux/.snort/so_rules"

  authentication_mode: database

test:

  domain: localhost:3000

  wkhtmltopdf: /usr/local/bin/wkhtmltopdf

  mailer_sender: 'snorby@snorby.org'

  geoip_uri: "http://geolite.maxmind.com/download/geoip/database/GeoLiteCountry/GeoIP.dat.gz"

  authentication_mode: database
The configuration file /usr/local/www/snorby/config/database.yml for database will be as follows:
snorby: &snorby

  adapter: mysql

  username: snorby

  password: "freebsd" # Example: password: "s3cr3tsauce"

  host: localhost
development:
database: snorby
<<: *snorby
test:
database: snorby
<<: *snorby
production:
database: snorby
<<: *snorby
If you want to configure mail, you can change the /usr/local/www/snorby/config/initializers/mail_config.rb file as lines below. For example configuration of Gmail.
# Snorby Mail Configuration
# #
# Gmail Example:
#
# ActionMailer::Base.delivery_method = :smtp
# ActionMailer::Base.smtp_settings = {
# :address => “smtp.gmail.com”,
# :port => 587,
# :domain => “snorby.org”,
# :user_name => “snorby”,
# :password => “snorby”,
# :authentication => “plain”,
# :enable_starttls_auto => true
# }
# #
# Sendmail Example:
#
# ActionMailer::Base.delivery_method = :sendmail
# ActionMailer::Base.sendmail_settings = {
# :location => ‘/usr/sbin/sendmail’,
# :arguments => ‘-i -t’
ActionMailer::Base.perform_deliveries = true

ActionMailer::Base.raise_delivery_errors = true
# Mail.register_interceptor(DevelopmentMailInterceptor) if Rails.env.development?
At the end start.
cd /usr/local/www/snorby # Enter the address and start
bundle exec rake snorby:setup
Jammit Warning: Asset compression disabled — Java unavailable.
No time_zone specified in snorby_config.yml; detected time_zone: Asia/Baku
97c2e4924cd06a2ebec95759dfce4292e70c0dd816c90f8eb80b7c7c8da3fe56b6f702fa548170d3dd2bf30842970e1 0903a1039f2f09b6819ca26043989b049
# Don’t look at error because we have already created the database.
ERROR 1007 (HY000) at line 1: Can’t create database ‘snorby’; database exists
[datamapper] Finished auto_upgrade! for :default repository ‘snorby’
[~] Adding `index_timestamp_cid_sid` index to the event table
[~] Adding `index_caches_ran_at` index to the caches table
[~] Adding `id` to the event table
[~] Building `aggregated_events` database view
[~] Building `events_with_join` database view
* Removing old jobs
* Starting the Snorby worker process.
Jammit Warning: Asset compression disabled — Java unavailable.
* Adding jobs to the queue
chown -R www:www /usr/local/www/snorby # Change owner and group to www
bundle exec rails server -e production # We can start Bu emr ile production server from console by this command. But we will do it from apache.
Before we will create for that virtualhost in apache configuration and then will add needed port for listen to apache configuration file:
Add the lines below to /usr/local/domen/snorby.atl.az file:
<VirtualHost *:3000>

        ServerAdmin webmaster@localhost

        DocumentRoot "/usr/local/www/snorby/public"

        ServerName snorby.atl.az

        ServerAlias www.snorby.atl.az

        <Directory "/usr/local/www/snorby/public">

                AllowOverride all

                Options -MultiViews

                Require all granted

        </Directory>

</VirtualHost>
In the /usr/local/etc/apache24/httpd.conf configuration file, after Listen 80 directive add new listen directive to start snorby as below:
Listen 80

Listen 3000
/usr/local/etc/rc.d/apache24 restart # At the end restart the web server
At last go to this link http://snorby.atl.az:3000/users/login get the page below:
Username: snorby@snorby.org
Pass: snorby
If login successfully the following page will be shown:
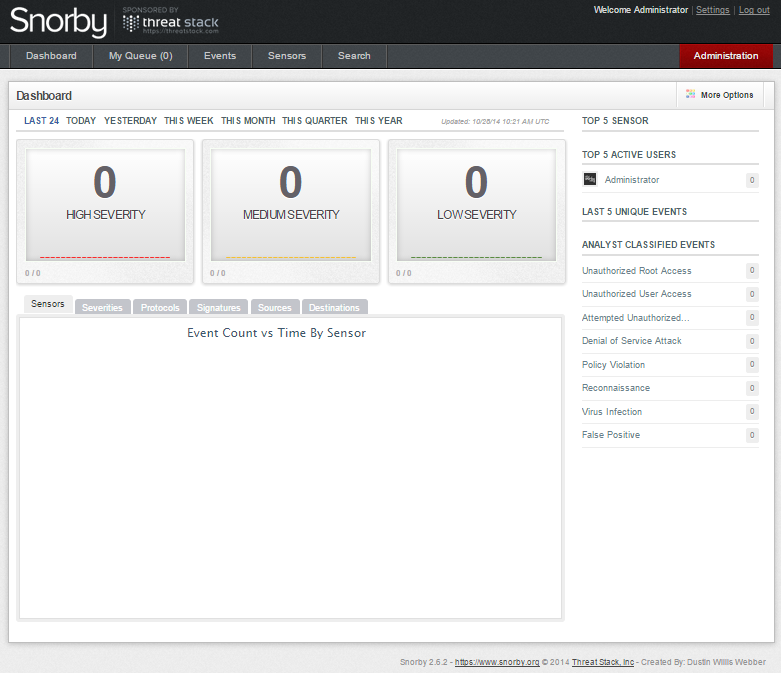
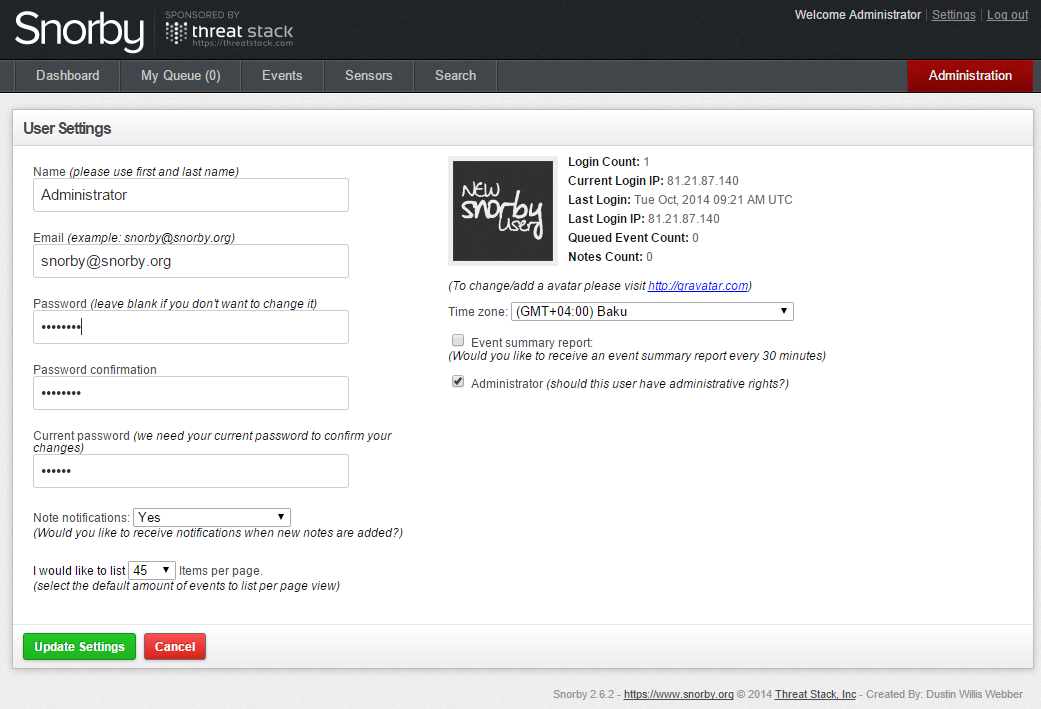
Before all you must change the password:
And we see that there is nothing in the logs. Because, as I said before snorby didn’t want to work without creating database and so I had to create a database named snorby, in order to connect and write there. And that is why we can’t see the barnyard’s logs. And it means that now in real there is no connection between snorby and snort in database. Let’s fix it. Login to MySQL and add needed access:
mysql -u root -pfreebsd # Login to MySQL with root account and grant access to barnyard for snorby database. After flush privileges for commit changes.
GRANT ALL PRIVILEGES ON snorby.* TO 'snort'@'localhost' IDENTIFIED BY 'freebsd';

FLUSH PRIVILEGES;
Also in the /usr/local/etc/barnyard2.conf configuration file change the line below to connect to the snorby database:
output database: log, mysql, user=snort password=freebsd dbname=snorby host=localhost
/usr/local/etc/rc.d/barnyard2 stop # Stop the barnyard
/usr/local/etc/rc.d/barnyard2 start # Start the barnyard
Analyze the /var/log/messages file and if we see the lines below, then all our works is success:
Oct 28 14:39:18 snort barnyard2[92208]: Barnyard2 initialization completed successfully (pid=92208
Oct 28 14:39:18 snort barnyard2[92208]: Using waldo file ‘/var/log/snort/barnyard2.waldo’: spool directory = /var/log/snort spool filebase = snort.log time_stamp = 1414451087 record_idx = 25412
Oct 28 14:39:18 snort barnyard2[92208]: Opened spool file ‘/var/log/snort/snort.log.1414451087’
Oct 28 14:39:20 snort barnyard2[92208]: Waiting for new data
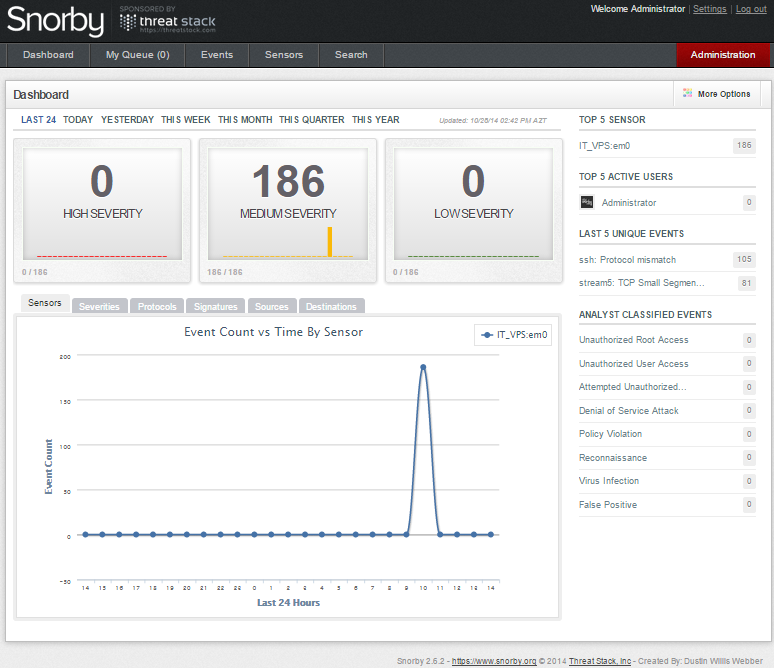
You must wait minimum 10 minute, because barnyard must write all events to mysql database.
After success the statistics will be shown as below:
If you will see the error Snorby worker is not currently working you can fix this as below:
What it is for:
- When snorby starts one process in background which starts snorby in production mode. You can see about this at the end of first page of https://snorby.org/ official page and the lines that I showed below.
bundle exec rails server -e production

ruby script/delayed_job start RAILS_ENV=production
You can use the following command to start from CLI:
/usr/local/bin/ruby /usr/local/www/snorby/script/delayed_job start
To automate our work we will use expect language and for using it we must install it:
cd /usr/ports/lang/expect # Go to the port
make install # install
Add the following lines to this /root/run_snorby_WP file:
#!/usr/local/bin/expect -f

set timeout 1000

spawn /bin/ps aux

expect "delayed_job" {

     exit

}

cd /usr/local/www/snorby

spawn /usr/local/bin/ruby script/delayed_job start

expect "ERROR: there is already one or more instance(s) of the program running" {

     cd /usr/local/www/snorby

     system /usr/local/bin/ruby script/delayed_job restart

}

exit
chmod 700 /root/run_snorby_WP # Doing executable for root user
expect /root/run_snorby_WP # With this command you can run from CLI to test it
For kill you can use command below:
kill `ps aux | grep -v "grep" | grep delayed_job | awk '{ print $2 }'`
Add cron schedule to check work each 15 minutes and automatic work after reboot:
*/15 *    *    *    *    root /usr/local/bin/expect -f /root/run_snorby_WP >/dev/null 2>&1

@reboot root    /usr/local/bin/expect -f /root/run_snorby_WP >/dev/null 2>&1
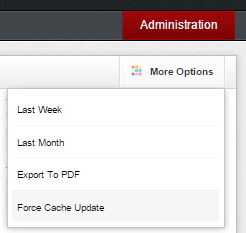
But Snorby can work unstable and can’t update itself. Then we will do it manually from the link as it is shown following screenshot More Options -> Force Cache Update.
Note: Because of the fault below your database can be widen illogically and we don’t need this.
The only way to solve it is to TRUNCATE all coloums with big numerals.
stream5: TCP session without 3-way handshake
At last it is time Snortsam
We can say that Snortsam has no documentation and it is in dead position.The only solution way is its communication with barnyard.You can read about it from the README.snortsam documentation.
cd /usr/ports/security/snortsam/ # Go to the port folder
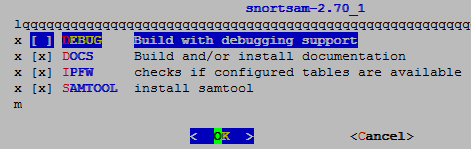
make config # Don’t forget to select IPFW module and don’t check debug cause it will not compile
make install # install
After installation copy all all sample files to the original:
cp /usr/local/etc/snortsam/country-rootservers.conf.sample /usr/local/etc/snortsam/country-rootservers.conf

cp /usr/local/etc/snortsam/rootservers.cfg.sample /usr/local/etc/snortsam/rootservers.cfg

cp /usr/local/etc/snortsam/snortsam.conf.sample /usr/local/etc/snortsam/snortsam.conf
The configuration /usr/local/etc/snortsam/snortsam.conf file will be consist of the following lines:
defaultkey 123 # 123 is the key which we use to talk with barnyard
port 777 # Listen on the port 777
accept 127.0.0.1, 123 # Allow to access from the 127.0.0.1 IP address with the 123 password
logfile /var/log/snortsam.log # Set the log file
loglevel 3 # Log level debug for detail information
fwexec /sbin/ipfw # Used firewall IPFW
ipfw2 em0 1 2 # Listen on em0 and write rules to table 1 and 2
daemon # Start in daemon mode for working automatically
#include /usr/local/etc/snortsam/rootservers.cfg

#include /usr/local/etc/snortsam/country-rootservers.conf
touch /var/log/snortsam.log # Create log file to see logs
We create /etc/ipfw.conf configuration file for our firewall and write the following lines in it:
ipfw add 00010 deny ip from any to "table(1)" via em0

ipfw add 00011 deny ip from "table(2)" to any via em0

ipfw add 00200 deny ip from any to 127.0.0.0/8

ipfw add 00300 deny ip from 127.0.0.0/8 to any

ipfw add 65000 allow ip from any to any
Add the following lines to /etc/rc.conf file for working after reboot:
firewall_enable="YES"

firewall_type="UNKNOWN"

firewall_script="/etc/ipfw.conf"

gateway_enable="YES"
In the configuration /boot/loader.conf file will be the following lines or you must add IPDIVERT and IPFW options to your kernel and recompile to work IPFW firewall:
ipdivert_load="YES"

ipfw_load="YES"

hw.usb.no_pf=1
At the end we delete the comment that was in the last line of /usr/local/etc/barnyard2.conf configuration file and then restart it in order to connect to snortsam:
output alert_fwsam: 127.0.0.1:777/123
Add the following lines to /etc/rc.conf configuration file for working snortsam after rebooting:
snortsam_enable="YES"

snortsam_conf="/usr/local/etc/snortsam/snortsam.conf"
/usr/local/etc/rc.d/snortsam start # We start Daemon and successful result must be as follows.
SnortSam, v 2.70.
Copyright (c) 2001-2009 Frank Knobbe <frank@knobbe.us>. All rights reserved.
Plugin ‘fwsam’: v 2.5, by Frank Knobbe
Plugin ‘fwexec’: v 2.7, by Frank Knobbe
Plugin ‘pix’: v 2.9, by Frank Knobbe
Plugin ‘ciscoacl’: v 2.12, by Ali Basel <alib@sabanciuniv.edu>
Plugin ‘cisconullroute’: v 2.5, by Frank Knobbe
Plugin ‘cisconullroute2’: v 2.2, by Wouter de Jong <maddog2k@maddog2k.net>
Plugin ‘netscreen’: v 2.10, by Frank Knobbe
Plugin ‘ipf’: v 2.16, by Erik Sneep <erik@webflex.nl>
Plugin ‘pf2’: v 3.3, by Olaf Schreck <chakl@syscall.de>
Plugin ‘ipfw2’: v 2.4, by Robert Rolfe <rob@wehostwebpages.com>
Plugin ‘watchguard’: v 2.7, by Thomas Maier <thomas.maier@arcos.de>
Plugin ’email’: v 2.12, by Frank Knobbe
Plugin ’email-blocks-only’: v 2.12, by Frank Knobbe
Plugin ‘snmpinterfacedown’: v 2.3, by Ali BASEL <ali@basel.name.tr>
Plugin ‘forward’: v 2.8, by Frank Knobbe
Parsing config file /usr/local/etc/snortsam/snortsam.conf…
Linking plugin ‘fwexec’…
Linking plugin ‘ipfw2’…
Checking for existing state file “/var/db/snortsam.state”.
Found. Reading state file.
Starting to listen for Snort alerts.
cat /var/log/snortsam.log # We must see the following result in the log file
2014/10/28, 22:27:34, -, 3, fwexec, fwexec: Will call '/sbin/ipfw' to initiate blocks.

2014/10/28, 22:27:34, -, 1, snortsam, Starting to listen for Snort alerts.
At the end we reboot server and can see the following lines in the /var/log/snortsam.log file where connection from localhost coming to snortsam:
2014/10/28, 22:42:25, 127.0.0.1, 3, snortsam, Accepted connection from 127.0.0.1.

2014/10/28, 22:42:25, 127.0.0.1, 3, snortsam, Adding sensor 127.0.0.1 to list.
If you do all steps exactly, after reboot everything will work. Because when I did everything worked. But, in any way if snortsam will not start, add the following lines to the /etc/crontab file and remove snortsam lines from /etc/rc.conf file. It will be enough.
@reboot /usr/local/sbin/snortsam >/dev/null 2>&1
For testing create rule and test our IPS
mkdir /usr/local/etc/snort/rules/local.rules # Create folder for rule
Add the following lines to the /usr/local/etc/snort/rules/local.rules/test.rules file:
alert tcp any any -> 88.8.81.134 80 (msg:"TEST block remoteserver port 80"; sid:5555501; rev:1; priority:1;)

alert tcp any any -> 88.8.81.134 443 (msg:"TEST block remoteserver port 443"; sid:5555502; rev:1; priority:1;)
chown -R snort:snort /usr/local/etc/snort # Change owner and group to snort
rev – It is the version of the rule, if we don’t write it, the rule won’t work.
priority 1 – It is the priority of the rule, it will be red.
SID(Snort IDENTIFIER) – And just with it comes block commant to IPFW.
It means that we block access for 10 minutes from any of source IP address and ports to our server IP 88.8.81.134 and ports 80,443(If we write here dst it will be block for destination). If you noticed exactly, you saw every rule had it own SID.
We have to add these SIDs with similar syntax to the /usr/local/etc/sid-block.map file to block source which are match the rules. sid-block.map file is roughly defined in barnyard2 code that it must be in the same address with its configuration file. It means if barnyard2.conf configuration file is located in /usr/local/etc/ address, sid-block.map file has to be in the same address.
Then we create /usr/local/etc/sid-block.map named file in the folder that barnyard.conf is located and add the following lines:
5555501: src, 10 min # Here we write SID, traffic direction and block time.
5555502: src, 10 min # Here we write SID, traffic direction and block time
Explain the syntax from sid-block.map file:
sid – This is Snort ID which is communicating with Snort SAM rule
who – src(source), dst(destination)
IP address which will block with snort ID
how – In, out, src, dest, either, both, this, conn, connection
It is not required parameter which says to SnortSAM that block any coming packets, In and Out from this host.
time – Blocking time with seconds. (It is possible ‘days‘, ‘months‘, ‘weeks‘,
‘years‘, ‘minutes‘, ‘seconds‘, ‘hours‘. Alternative way with writing
0(always) or PERManent, INFinite, ALWAYS you can block it for ever
(Be careful with this!).
Examples:
1487: src[either],15min;

1292: dst[in], 2 days 4 hours

1638: src, 1 hour
We add the following line to the configuration file /usr/local/etc/snort/snort.conf where include is located, to start the rules:
include $RULE_PATH/local.rules/test.rules
Then we restart Snort and BarnYard. Or we reboot server for test all startups.
/usr/local/etc/rc.d/snort restart

/usr/local/etc/rc.d/barnyard2 restart
Then we test by attacking to server where snort is located with our following script(Add lines below to https-check.sh file):
# cat https-check.sh
#!/usr/local/bin/bash
if ! [ -x “$(type -P ab)” ]; then
echo “ERROR: script requires apache bench”
echo “For FreeBSD and friends get it with ‘pkg_add -r apache22′”
echo “If you have it, perhaps you don’t have permissions to run it, try ‘sudo $(basename $0)'”
exit 1
fi
if [ “$#” -ne “4” ]; then
echo “ERROR: script needs four arguments, where:”
echo
echo “1. Number of times to repeat test (e.g. 10)”
echo “2. Total number of requests per run (e.g. 100)”
echo “3. How many requests to make at once (e.g. 50)”
echo “4. URL of the site to test (e.g. http://yoursite.org/)”
echo
echo “Example:”
echo ” $(basename $0) 10 100 50 http://yoursite.org/”
echo
echo “The above will send 100 GET requests (50 at a time) to http://yoursite.org. The test will be repeated 10 times.”
exit 1
else
runs=$1
number=$2
concurrency=$3
site=$4
fi
log=ab.$(echo $site | sed -r ‘s|https?://||;s|/$||;s|/|_|g;’).log
if [ -f $log ]; then
echo removing $log
rm $log
fi
echo “==================================================================”
echo ” Results”
echo “==================================================================”
echo ” site ………. $site”
echo ” requests …… $number”
echo ” concurrency … $concurrency”
echo “——————————————————————”
for run in $(seq 1 $runs); do
ab -c$concurrency -n$number $site >> $log
echo -e ” run $run: \t $(grep “^Requests per second” $log | tail -1 | awk ‘{print$4}’) reqs/sec”
done
avg=$(awk -v runs=$runs ‘/^Requests per second/ {sum+=$4; avg=sum/runs} END {print avg}’ $log)
echo “——————————————————————”
echo ” average ……. $avg requests/sec”
echo
echo “see $log for details”
Execute this script and use for attack:
# chmod +x https-check.sh

# ./https.sh 3 4000 500 http://snort.server.ip/
apr_socket_recv: Connection reset by peer (54)
run 1: reqs/sec
apr_socket_recv: Connection reset by peer (54)
run 2: reqs/sec
apr_socket_connect(): Permission denied (13)
We will see in Snort log file that Snort send the requests to Barnyard and Barnyard insert these requests to MySQL database. After complete this insert it will connect to SnortSAM and send alert. SnortSAM get this alert, and send request to IPFW2 for adding IP address of coming source to 1st and 2nd table:
tail -n 10 /var/log/mysql.log
1 Query INSERT INTO opt (sid,cid,optid,opt_proto,opt_code,opt_len,opt_data) VALUES (1,1185659,0,6,2,2,’05B4′)
1 Query INSERT INTO iphdr (sid, cid, ip_src, ip_dst, ip_ver, ip_hlen, ip_tos, ip_len, ip_id, ip_flags, ip_off,ip_ttl, ip_proto, ip_csum) VALUES (1,1185659,423182146,1578389894,4,5,0,48,766,0,0,124,6,62388)
1 Query COMMIT
1 Query BEGIN
1 Query INSERT INTO event (sid,cid,signature,timestamp) VALUES (1, 1185660, 509, ‘2014-10-29 14:04:07′)
1 Query INSERT INTO tcphdr (sid, cid, tcp_sport, tcp_dport, tcp_seq, tcp_ack, tcp_off, tcp_res, tcp_flags, tcp_win, tcp_csum, tcp_urp) VALUES (1,1185660,3072,80,4200216406,2152351244,7,0,2,8192,41671,0)
1 Query INSERT INTO opt (sid,cid,optid,opt_proto,opt_code,opt_len,opt_data) VALUES (1,1185660,0,6,2,2,’05B4’)
1 Query INSERT INTO iphdr (sid, cid, ip_src, ip_dst, ip_ver, ip_hlen, ip_tos, ip_len, ip_id, ip_flags, ip_off,ip_ttl, ip_proto, ip_csum) VALUES (1,1185660,241434114,1578389894,4,5,0,48,766,0,0,124,6,16330)
1 Query COMMIT
1 Query BEGIN
We see in SnortSAM log that it added information about blocking to IP address sourced 99.45.57.58 to IPFW tables:
tail -f /var/log/snortsam.log
2014/10/29, 02:23:21, 127.0.0.1, 2, snortsam, Blocking host 99.45.57.58 completely for 600 seconds (Sig_ID: 5555501).
2014/10/29, 02:23:21, -, 3, ipfw2, Info: Command “/sbin/ipfw table 1 add 99.45.57.58/32;/sbin/ipfw table 2 add 99.45.57.58/32” Executed Successfully
We look at the rules in 1st and 2nd tables of IPFW:
ipfw -i table 1 list | grep 99.45.57.58/32

99.45.57.58/32 0.0.0.0

ipfw -i table 2 list | grep 99.45.57.58/32

99.45.57.58/32 0.0.0.0
tail -f /var/log/barnyard2/barnyard2.alert # Also we can see in the log file of barnyard that it send alert to SnortSAM.
10/29-02:23:20.735311 [**] [1:5555501:1] <em0> Snort Alert [1:5555501:1] [**] [Classification ID: 0] [Priority ID: 1] {TCP} 99.45.57.58:1024 -> 88.8.81.134:80
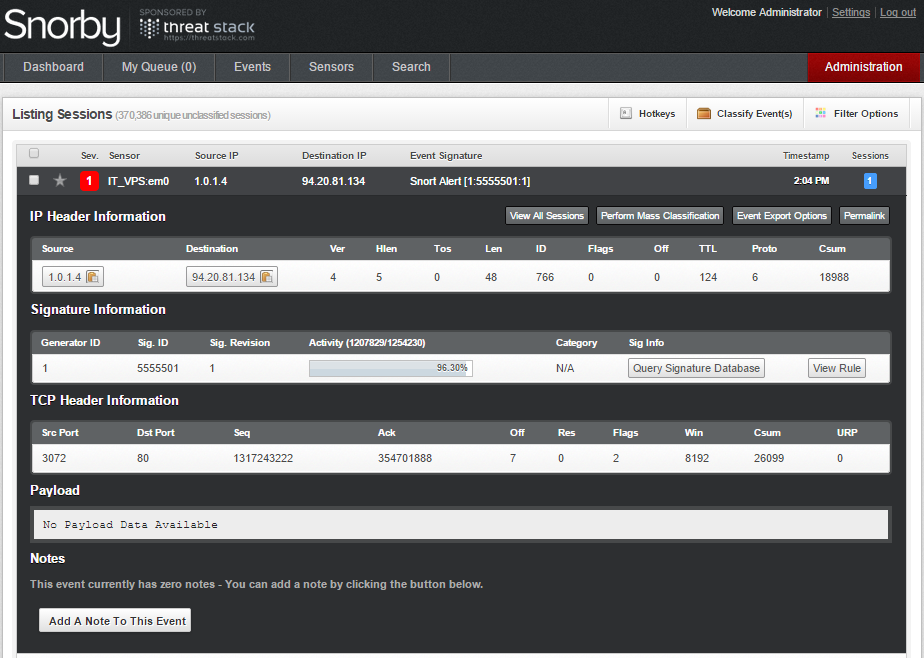
For example we can see in our Snort server the attack of different host to the server which IPS is located:
But the /usr/local/etc/sid-block.map file’s filling automatically, working dynamically is not a day’s work. But we can do it something.For doing this it was used a lot of regex syntax and let’s explain them before:
We match the Regex lines:
^[^\#] – # Started with the symbol
.*sid: – Any symbol on the left and any word with sid word on the right:
(.[0-9]*[0-9]\) – () the inner is which we want to catch, but [0-9]*[0-9] any ordered amount of numbers.
.* – At the end wildcard for the sed
s// – The operator which writes it \1″:” “src,” “30min”/p”
\1 – that we catched before
“:” “src,” “30min” – It is the text that we connect to, if here will be double brackets ” ” it means space
\p – Go to the new line
Then we write pathes of files with spaces. Remember that it is not needed to write all rules for src-a gore yazilmali deyil. In my case this is just an example.
Result:
sed -n "\%^[^\#].*sid:\(.[0-9]*[0-9]\).*% s//\1":" "src," "30min"/p" /usr/local/etc/snort/rules/backdoor.rules /usr/local/etc/snort/rules/bad-traffic.rules /usr/local/etc/snort/rules/black_list.rules /usr/local/etc/snort/rules/botnet-cnc.rules /usr/local/etc/snort/rules/ddos.rules /usr/local/etc/snort/rules/exploit-kit.rules /usr/local/etc/snort/rules/exploit.rules /usr/local/etc/snort/rules/blacklist.rules /usr/local/etc/snort/rules/malware-backdoor.rules /usr/local/etc/snort/rules/malware-cnc.rules /usr/local/etc/snort/rules/malware-other.rules /usr/local/etc/snort/rules/malware-tools.rules /usr/local/etc/snort/rules/phishing-spam.rules /usr/local/etc/snort/rules/policy-spam.rules /usr/local/etc/snort/rules/spyware-put.rules /usr/local/etc/snort/rules/virus.rules /usr/local/etc/snort/rules/web-attacks.rules /usr/local/etc/snort/rules/local.rules/test.rules > /usr/local/etc/sid-block.map
/usr/local/etc/rc.d/barnyard2 restart # Restart the Barnyard daemon.
Automatize all things!
Update rules from Snort site and after block!
OinkMaster is busy and that is why we will do it next!
First we must create rules for src and dst block!
/tmp/test/blocksrc.rules – The file for src block
/tmp/test/blockdst.rules – The file for dst blocks
We need 2 sed command:
Delete old file and add content for src from blocksrc.rules file.
sed -n "\%^[^\#].*sid:\(.[0-9]*[0-9]\).*% s//\1":" "src," "30min"/p" /tmp/test/blocksrc.rules > /tmp/test/sid-block.map
Delete old file and add content for dst from blockdst.rules file.
sed -n "\%^[^\#].*sid:\(.[0-9]*[0-9]\).*% s//\1":" "dst," "30min"/p" /tmp/test/blockdst.rules > /tmp/test/sbd_tmp.map
The blocking of first file wasn’t done succesfully with sed , and that is why we join two files with the 3rd command.
cat /tmp/test/sbd_tmp.map >> /tmp/test/sid-block.map
At the end we add the following line to /etc/crontab file after OinkMaster finishing its work, for Barnyard collecting blocked files and restarting it.
30 5 * * * root /usr/local/bin/oinkmaster -o /usr/local/etc/snort/rules/&&/usr/bin/sed -n "\%^[^\#].*sid:\(.[0-9]*[0-9]\).*% s//\1":" "src," "30min"/p" /tmp/test/blocksrc.rules > /tmp/test/sid-block.map&&/usr/bin/sed -n "\%^[^\#].*sid:\(.[0-9]*[0-9]\).*% s//\1":" "dst," "30min"/p" /tmp/test/blockdst.rules > /tmp/test/sbd_tmp.map&&/bin/cat /tmp/test/sbd_tmp.map >> /tmp/test/sid-block.map&&/bin/ps aux | /usr/bin/grep -v "grep" | /usr/bin/grep /usr/local/bin/barnyard2 | /usr/bin/awk '{print $2}' | /usr/bin/xargs kill&&/usr/local/bin/barnyard2 -Dn -c /usr/local/etc/barnyard2.conf -d /var/log/snort -f snort.log >/dev/null 2>&1
It is needed resources for this system, because,there can be emergency, Snort can create big traffic. It is true that snort will write them quickly to its files. But Barnyard2 and MySQL can take them for an hour!
For example snort generated 310MB traffic for 2 minutes. In my virtual machine was 1 CPU, 4 core and 4GB RAM, but I waited insert from barnyard2 to MySQL more than an hour.
Used sources: http://www.itcooky.com/


