
About openDCIM
Today we present to you a great tool that will help you to manage your data center.
openDCIM is an free and open source solution for Data Center Infrastructure Management. It is already used by a few organizations, and is quickly improving due to the efforts of its developers. The number one goal for openDCIM is to eliminate the excuse for anybody to ever track their data center inventory using a spreadsheet or word processing document again. We’ve all been there in the past, which is what drove us developers to create this project.
Features
The following features are available in the present version:
- Image mapping with custom image for creating click-able zones for each cabinet
- Overlay layers on map for Power, Space, Temperature, and Weight capacity
- Mapping of power connections from device -> power strip -> panel -> source feed
- Mapping of network connections to any device classified as a switch
- Chassis device support
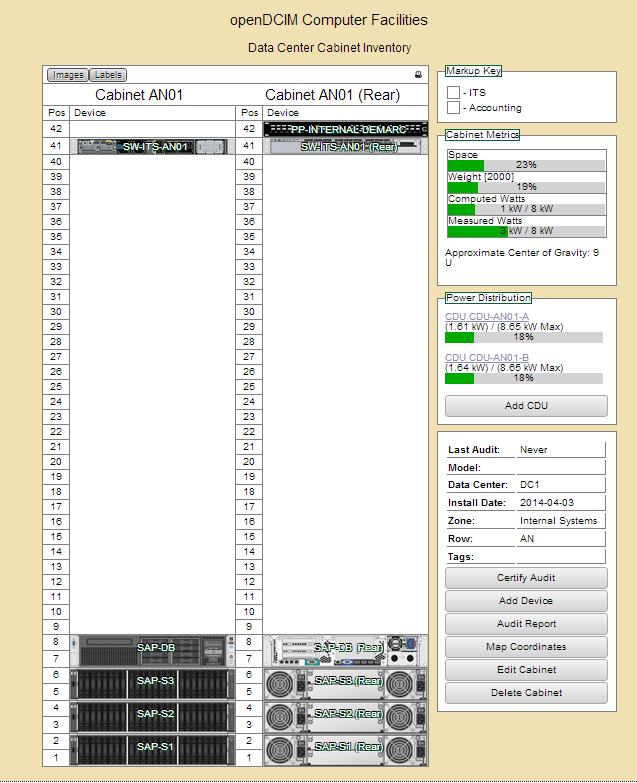
- Graphical Cabinet Viewer (user must supply graphic images)
- Multiple levels of user rights
- Basic workflow system for generating rack requests
- Reporting on Hosting Costs by department based on a cost per U and cost per Watt formula
- Reporting on Fault Tolerance status for devices, and impact simulation of a panel or source feed outage
- Support for automatic transfer switches
Requirements
Before start installing openDCIM you need to have those requirements:
- Web host running Apache 2.x (or higher) with an SSL Enabled site.
- MySQL 5.x (or higher) database
- PHP 5.3 (or higher)
- User Authentication
- Web Based Client
Let’s start.
openDCIM Server configuration
Before installing openDCIM, make sure that you have a properly configured instance of Apache/PHP running.
First steps to do is to install LAMP server under your centos server.
yum install httpd php mysql mysql-server php-mbstring php-mysql
For more details you can check our article Install LAMP Server (Apache, MySQL, PHP) On RHEL, CentOS, Scientific Linux 6.5/6.4
The next step is to create a database for openDCIM (change the database name
and the password
to something that suits you):
mysql -u root -p
mysql> create database dcim;
mysql> grant all privileges on dcim.* to 'dcim' identified by 'dcimpassword';
Then you need to enable https under your web server. This command is to install mod_ssl under centos.
yum -y install mod_ssl
Next step is to generate the necessary keys and copy them to the proper directories:
cd /root
openssl genrsa -out ca.key 1024
openssl req -new -key ca.key -out ca.csr
openssl x509 -req -days 365 -in ca.csr -signkey ca.key -out ca.crt
cp ca.crt /etc/pki/tls/certs
cp ca.key /etc/pki/tls/private/ca.key
cp ca.csr /etc/pki/tls/private/ca.csr
To let Apache know of the proper locations of the keys, edit
…
vim +/SSLCertificateFile /etc/httpd/conf.d/ssl.conf
comment out the line
SSLCertificateFile /etc/pki/tls/certs/localhost.crt
..and substitute with this line
SSLCertificateFile /etc/pki/tls/certs/ca.crt
Also comment out the line
SSLCertificateKeyFile /etc/pki/tls/private/localhost.key
… and substitute with this ligne
SSLCertificateKeyFile /etc/pki/tls/private/ca.key
To set the server name:
vim +/ServerName /etc/httpd/conf/httpd.conf
Find the line…
#ServerName www.example.com:80
…and add below it:
ServerName opendcim.example.com:443
Finally restart Apache…
service httpd restart
After you enabled mod_ssl under your web service , you need now to create virtual host.
vim +/NameVirtualHost /etc/httpd/conf/httpd.conf
Find the line:
#NameVirtualHost *:80
and add below it:
NameVirtualHost *:443
Now create a new configuration file for the openDCIM VirtualHost…
vim /etc/httpd/conf.d/opendcim.example.com.conf
and finally add the lines
<VirtualHost *:443>
     ServerAdmin anis@unixmen.com
     DocumentRoot /var/www/opendcim
     ServerName opendcim.unximen.net
     <Directory /var/www/opendcim>
         AuthType Basic
         AuthName "openDCIM"
         AuthUserFile /var/www/.htpasswd
         Require valid-user
     </Directory>
</VirtualHost>
You have protected the openDCIM web directory with a requirement for Basic authentication, with the lines already added in your Apache configuration file above.
Now, to create at least on user, do:
touch /var/www/.htpasswd
htpasswd /var/www/.htpasswd Administrator
You will be asked for a password for user “Administrator” twice.
The last step in the server configuration is to enable port 443 under your firewall
The
firewall is enabled on CentOS be default, and blocks access to HTTPS port 443. To allow it…
vim /etc/sysconfing/iptables
..and add below this line:
-A INPUT -m state --state NEW -m tcp -p tcp --dport 443 -j ACCEPT
Restart iptables:
service iptables restart
openDCIM Installation
Now after finished the configuration of the server, you need to download the openDCIM package from opendcim.com
cd /var/www
wget http://www.opendcim.org/packages/openDCIM-3.2.tar.gz
Extract the archive and create a symbolic link:
tar zxvf openDCIM-3.2.tar.gz
ln -s openDCIM-3.2.1 opendcim
The symbolic link is not required. If you don’t want to create it, just rename the directory
to
. However, having a symbolic link in place allows you to find out the version of openDCIM at a glance, and makes upgrades easier.
Now, prepare the configuration file for access to the database:
cd /var/www/opendcim
cp db.inc.php-dist db.inc.php
vim db.inc.php
Edit the following lines, to reflect your settings of database host (in this example
), database name (
), and credentials that you assigned when creating the database:
$dbhost = 'localhost';
$dbname = 'dcim';
$dbuser = 'dcim';
$dbpass = 'dcimpassword';
Finally, restart Apache one last time:
service httpd restart
Now, you can open openDCIM in your browser to proceed with the installation. If you have set up a DNS entry for a domain name to point to your web server’s IP, you will go to something similar to https://opendcim.example.com/. Otherwise, you can visit https://IP_of_web_server/.
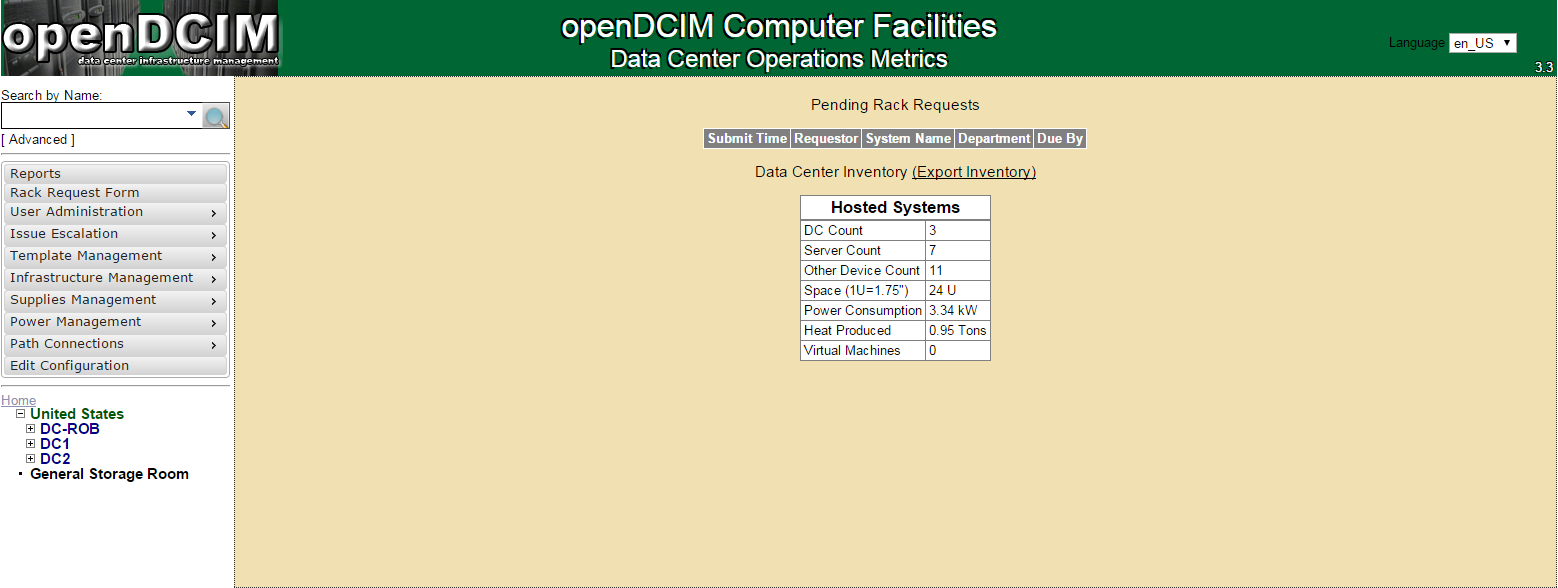
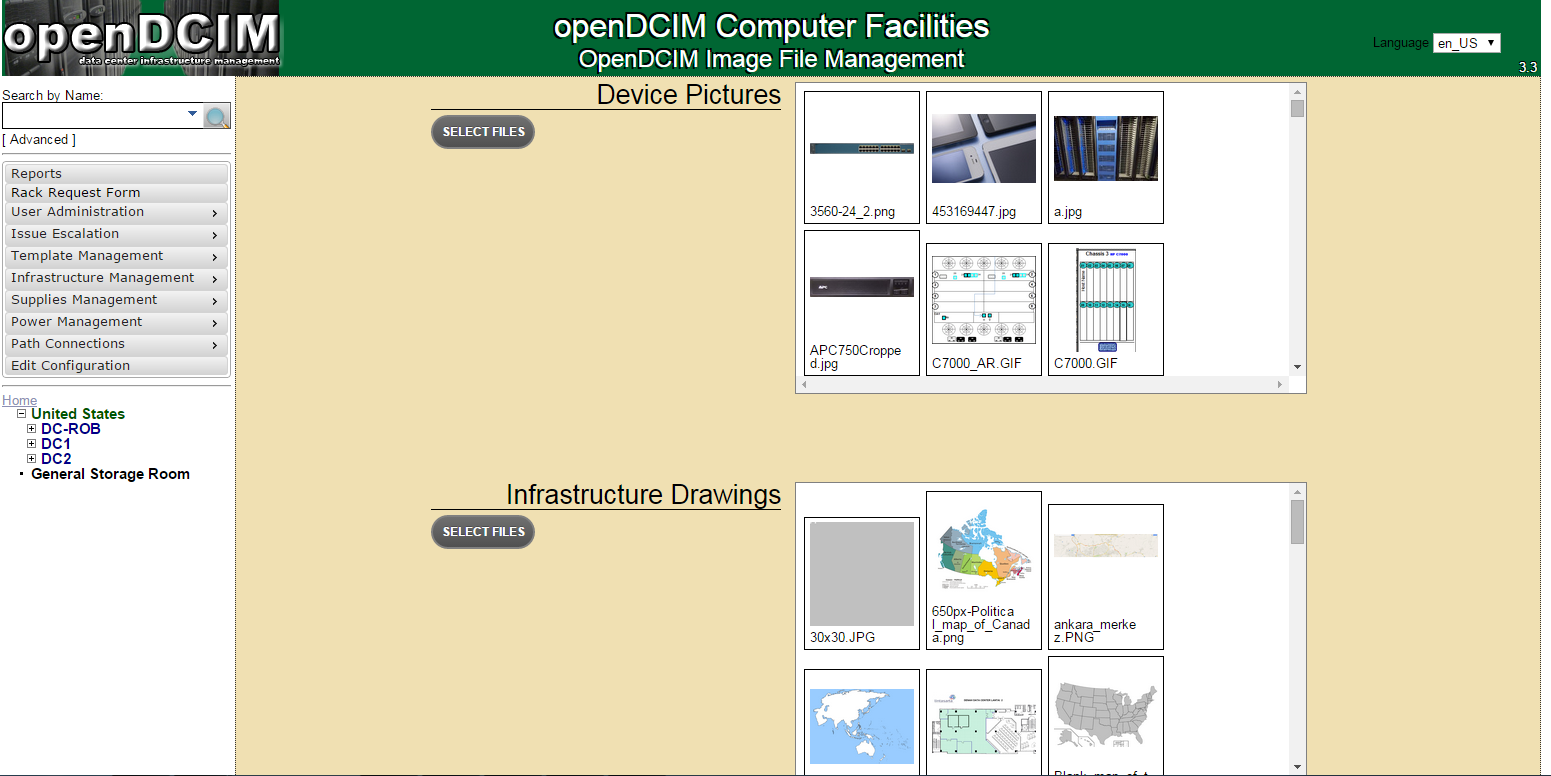
Screenshots
That’s all for now. Thanks for visiting Unixmen. Stay tuned with us.


