
Dear Ubuntu geeks,
In this tutorial I will teach you how to use a feature-rich app for taking screenshots and editing them in your Ubuntu machine. This program is very useful when you want to take screenshots for your technical blogs, help your friends to use tools and share your shiny Ubuntu desktop with other internet users.
I find shutter very useful in my part time job as a technical blogger. I can easily capture, edit and share screenshots by using the shutter’s built-in upload function or by joining the cloud. As far as I am concerned the latest version of shutter supports Ubuntu One as well.
Another tool that can help me is Gnome Screenshot which comes installed by default in Ubuntu Linux systems, but it does not offer as many features as shutter does. I suck at graphic design and I find it very time consuming to install Gimp or other photo editing software in my machine for adding text or drawing a simple line in my screenshots.
Shutter can help me to edit my screenshots. I can easily add text to them, draw ellipses, arrows, highlight stuff and censor portions of my screenshot to hide secret data or data I don’t like to show to the public. A very useful tool for technical bloggers or people that explain things with screenshots is the auto-increment tool that can be found in shutter’s screenshot editor. The auto-increment tool is used to add an auto-increment shape to the screenshot.
I did not know that shutter existed before, so I struggled with very complex tools that require experience and a lot of knowledge such as Gimp and Photoshop. I used to read a lot of tutorials about Gimp and at the end of the day I was not able to edit my screenshots the way I wanted.
I lost a lot of energy. Then I discovered shutter. It helps me to take the screenshot, edit it with the shutter’s editor and then share it directly from shutter with the people I want.
The cool thing is that you can capture nearly anything on your screen with shutter from specific areas to menus or tooltips and websites. The following information is taken from the shutter’s official website.
Capture a Specific Area
This allows you to select an arbitrary region of your screen and capture only those parts you really need. Shutter offers two different tools to do so in order to meet any user’s taste.
Capture Your Desktop
Shutter does not only capture all the contents of your desktop (or workspace) – it also supports Multi-monitor settings, e.g. Capture the active monitor
Capture a Window
Simply use your mouse to select the window you want to capture. The shutter will highlight the currently selected window in an attractive and useful way. It is even possible to simply select a window from a list and capture it right away.
Capture a Menu or Tooltip
Capturing menus or tooltips is very easy with Shutter. You select one of the options and a (user-defined) countdown starts. During this time you can open the desired menu or let a specific tooltip come up. Shutter will recognize and capture it.
Capture a Web site
Shutter uses gnome-web-photo to capture a website without opening a browser window.
Install And Use Shutter On Ubuntu
The shutter app is included in the Ubuntu’s default repositories. You can easily install it with the apt-get command-line tool like shown below.
sudo apt-get install shutter
After the installation is finished, you can launch shutter by typing the following command in the terminal. A new terminal can be opened by pressing CTRL+ALT+T in your keyboard.
shutter
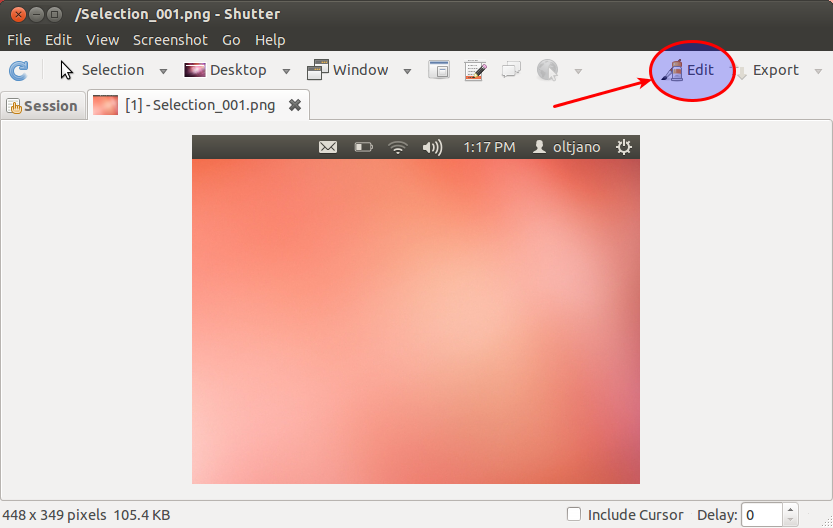
To take a screenshot use the Selection tool. Select the area you want to grab and hit Enter to take the screenshot. After you have taken the screenshot you can edit it with the shutter’s editor like shown below.
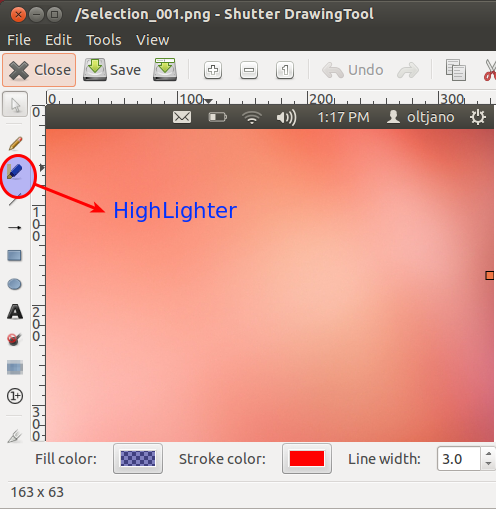
Use the Highlighter tool to highlight stuff.
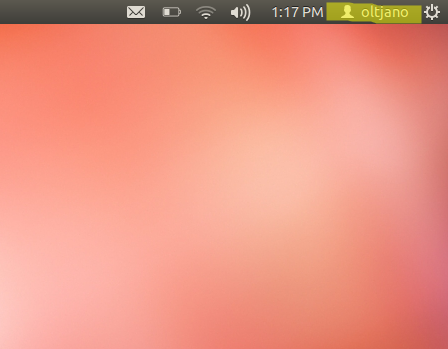
Here is the result after I highlighted something in my screenshot.
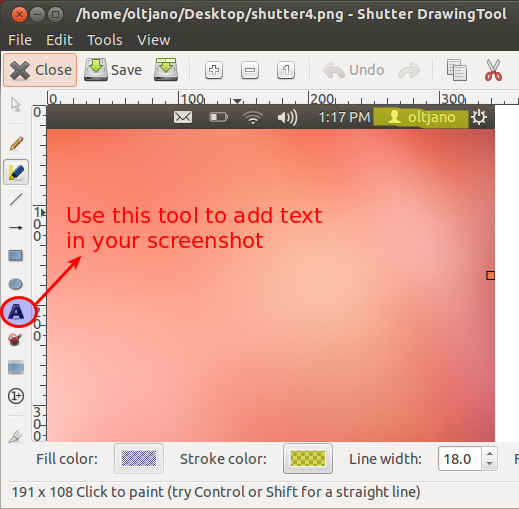
If you like to add text to your screenshot you can do it with the following tool.
The following picture shows the Censor tool in action. It is very useful when you want to hide your private data, such as usernames, passwords, names and email addresses.
Feel free to explore with other tools in the shutter’s Editor. It is very self explanatory and can be used even by novice users that have never heard about shutter before.


