
GNS3 is an open source, GUI Network Simulator. It can be used to simulate complex networks while being as close as possible from the way real networks perform, all of this without having dedicated network hardware such as routers and switches.
GNS3 provides an intuitive graphical user interface to design and configure virtual networks, it runs on traditional PC hardware and may be used on multiple operating systems, including Windows, Linux and MacOS X.
Who can use GNS3?
GNS3 will be used for network engineers, administrators and people who are preparing for certifications like Cisco CCNA, CCNP and CCIE and Juniper JNCIA, JNCIS and JNCIE. It can also be used to experiment features or to check configurations that need to be deployed later on real devices.
GNS3 includes exciting features, for instance connection of your virtual network to real ones or packet captures using Wireshark. Also VirtualBox support is included in GNS3 so that system administrators and engineers can take advantage of GNS3 to make labs, test network features and study for Redhat (RHCE, RHCT) and Microsoft (MCSE, MCSA) certifications etc.
How do i use GNS3?
To use GNS3, you must provide your own licensed images. Download the IOS images from the respective vendor site, upload it to GNS3 and start learning. You can find the complete list of emulated hardware devices by GNS3. Alternatively you can download and use non-copyrighted appliances provided by GNS3 team. Just download the appliances and import them to Qemu/VirtualBox/Vmware and start learning! You can’t use these appliances on any copyrighted platforms such as Windows or Mac OS X.
Install GNS3 On Ubuntu 13.04
GNSs is available in default Ubuntu software center, but it may be a bit outdated. So grab the source files found here and compile and install it yourself. Alternatively GNS3 team has a Ubuntu PPA to make the installation pretty easy and straight forward.
Add the GNS3 PPA with command:
$ sudo add-apt-repository ppa:gns3/ppa
Update the packages list with command:
$ sudo apt-get update
Now install GNS using the following command:
$ sudo apt-get install dynamips gns3
Configure GNS3
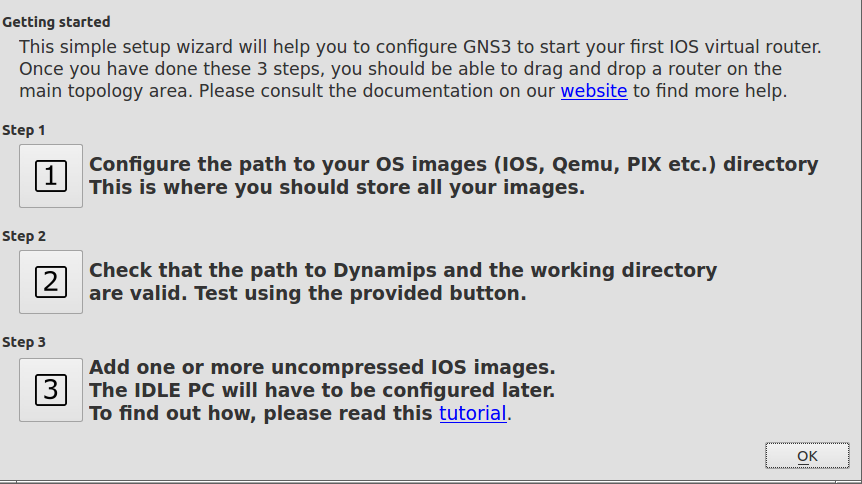
At the first time of GNS launch, a Setup Wizard will open. Click on the step 1(Number 1) to configure the path of network device images i.e IOS, Qemu, PIX etc. This is the path where you should store all your images.
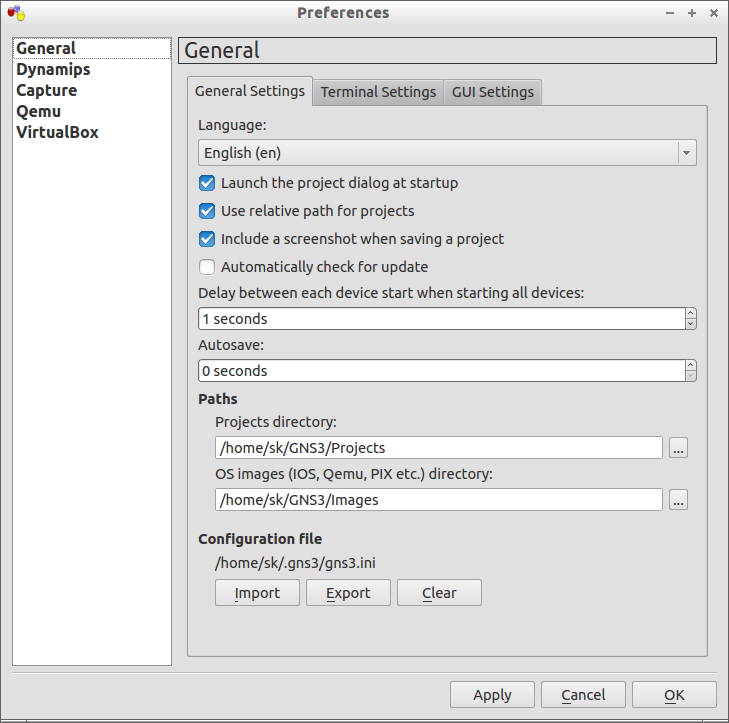
 Now the Preferences window will open. Define the path location of your images.
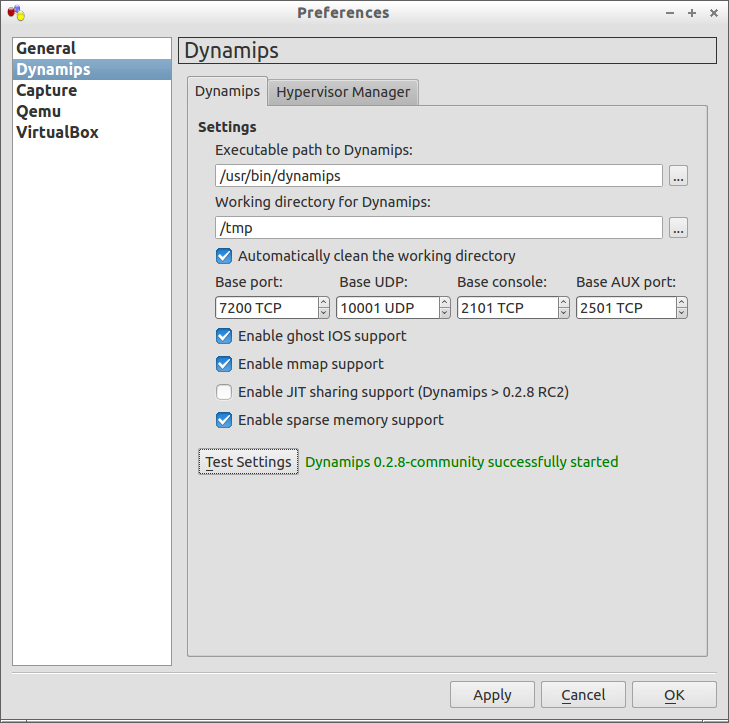
 Click Apply and Ok return to previous menu. Click on the Step 2(Number 2). Click on “Dynamips link”. Select the valid Dynamips path in the “executable path to Dynamips” box. Once you selected the path, click on the Test settings. If all seems ok, a green message will appear that shows “Dynamips successfully started”.
 Click on the Step 3(Number 3) to select the network switches/routers images.
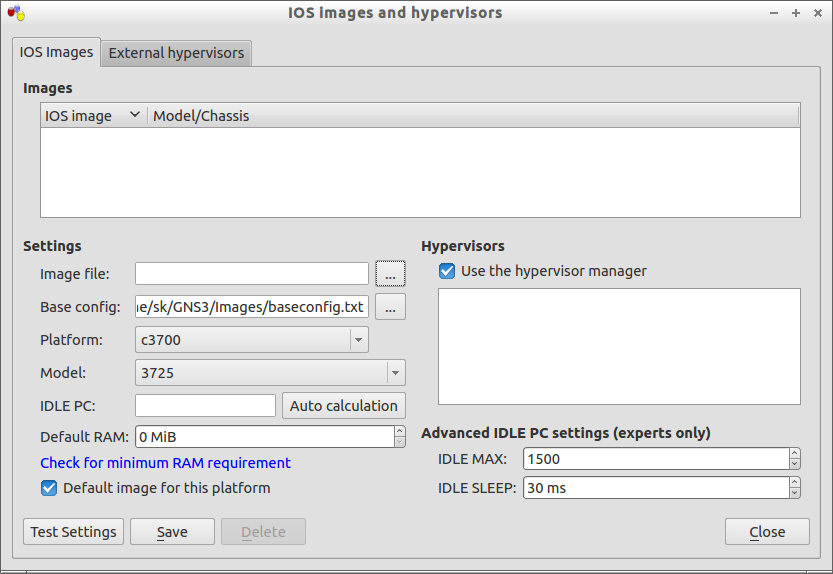 At the time of writing this, i don’t have any IOS images, so i left it blank. You should put your downloaded IOS, Qemu images in the folder that you have defined in the first step. Click Close to return back to previous window. Finally click Ok to close Setup Wizard.
This is how your GNS console looks.
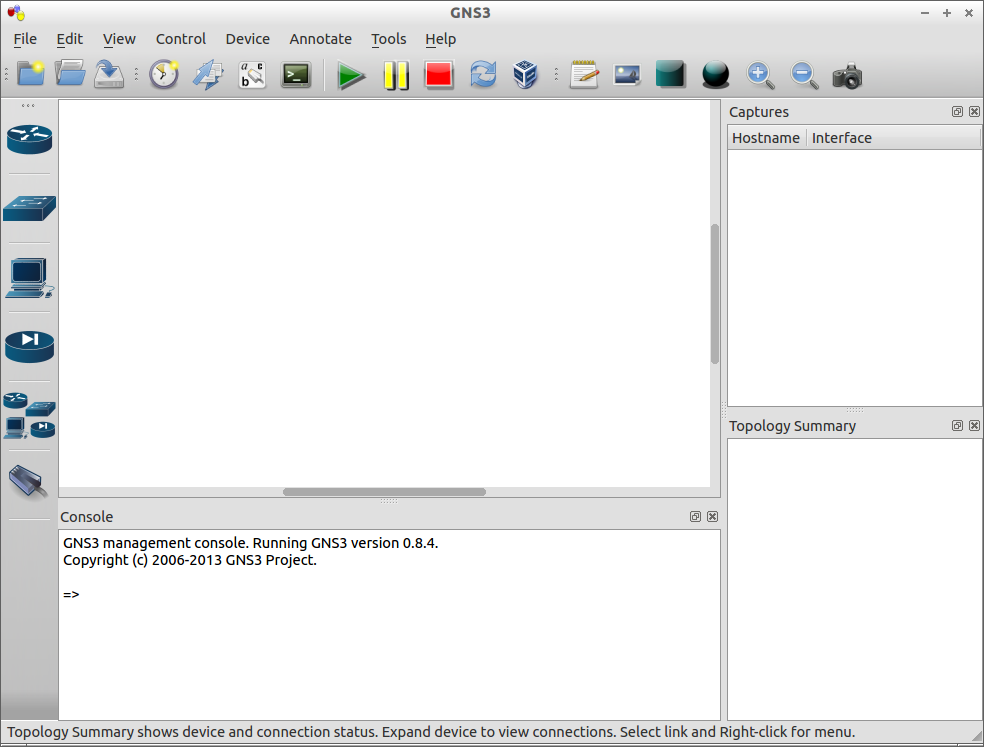 In the left pane, you will see list of available Routers/Switches. Click on the respective list and drag the devices to work space to start simulate.
Here is the sample setup of two switches and one hub which are connected each other.
 That’s it now you will be able to access and configure the virtual network devices as the way you perform on the physical devices. This how-to have covered only installation part and basic startup things. To learn more about GNS3, you might want to check out the documentation section or Video tutorials that describes how to use GNS3 effectively.


