
GestióIP is an automated, web-based IPv4/IPv6 Address Management (IPAM) software. It features powerful network discovery functions and offers search and filter functions for both networks and host, permitting Internet Search Engine equivalent expressions. This lets you find the information that administrators frequently need easily and quickly. GestioIP also incorporates an automated VLAN management system.
Install GestioIP on Ubuntu/Debian
Install the following prerequisites first:
sk@server1:~$ sudo apt-get install libapache2-mod-perl2 apache2 mysql-server
Download the latest version of GestioIP from www.sourceforge.net:
sk@server1:~$ wget http://sourceforge.net/projects/gestioip/files/gestioip/gestioip_3.0.tar.gz
Extract the zip file:
sk@server1:~$ tar zxvf gestioip_3.0.tar.gz
Change to gestioip directory:
sk@server1:~$ cd gestioip_3.0/
Install it using the command:
sk@server1:~/gestioip_3.0$ sudo ./setup_gestioip.sh
This script will fetch all the required packages from the internet and install them automatically. During installation the installer will ask you couple of questions regarding Apache user, Apache configuration file and Perl modules etc., just press ENTER or type Y to continue with the installation.
After a couple of minutes the installer will stop at one stage and ask you to enter the following commands in new shell:
+++++++++++++++++++++++++++++++++++++++++++++++++++
Now open a new shell and execute the following two
commands LIKE ROOT to create the GestioIP apache users:
+++++++++++++++++++++++++++++++++++++++++++++++++++

sudo /usr/bin/htpasswd -c /etc/apache2/users-gestioip gipoper
sudo /usr/bin/htpasswd /etc/apache2/users-gestioip gipadmin

After this press ENTER
Open new terminal by pressing SHIFT+CTRL+T. Execute the above two commands:
sk@server1:~$ sudo /usr/bin/htpasswd -c /etc/apache2/users-gestioip gipoper
New password:
Re-type new password:
Adding password for user gipoper

sk@server1:~$ sudo /usr/bin/htpasswd /etc/apache2/users-gestioip gipadmin
New password:
Re-type new password:
Adding password for user gipadmin
Now switch to installer terminal and press ENTER. Now, you will see an output like below.
Under which directory should GestioIP's script files be installed [/usr/share/gestioip]?
OK, using script base directory /usr/share/gestioip

+-------------------------------------------------------+
|                                                       |
|    Installation of GestioIP successfully finished!    |
|                                                       |
|   Please, review /etc/apache2/conf.d/gestioip.conf
|            to ensure all is good and                  |
|                                                       |
|              RESTART Apache daemon!                   |
|                                                       |
|            Then, point your browser to                |
|                                                       |
|           http://server/gestioip/install
|                                                       |
|          to configure the database server.            |
|         Access with user "gipadmin" and the
|        the password which you created before          |
|                                                       |
+-------------------------------------------------------+
Restart your Apache server now:
sk@server1:~/gestioip_3.0$ sudo /etc/init.d/apache2 restart
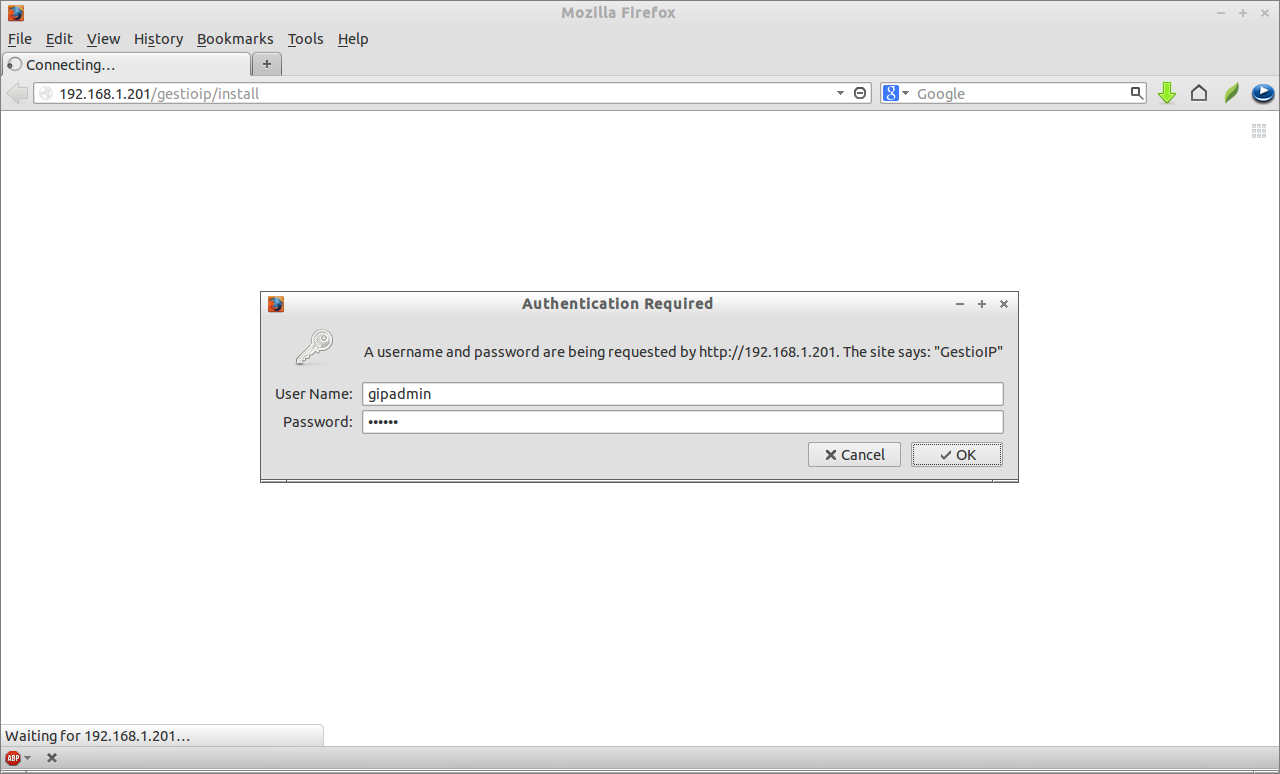
Now navigate to http://ip-address/gestioip/install from your web browser and follow the on-screen instructions.
Enter the username as gipadmin and the password which you created earlier.
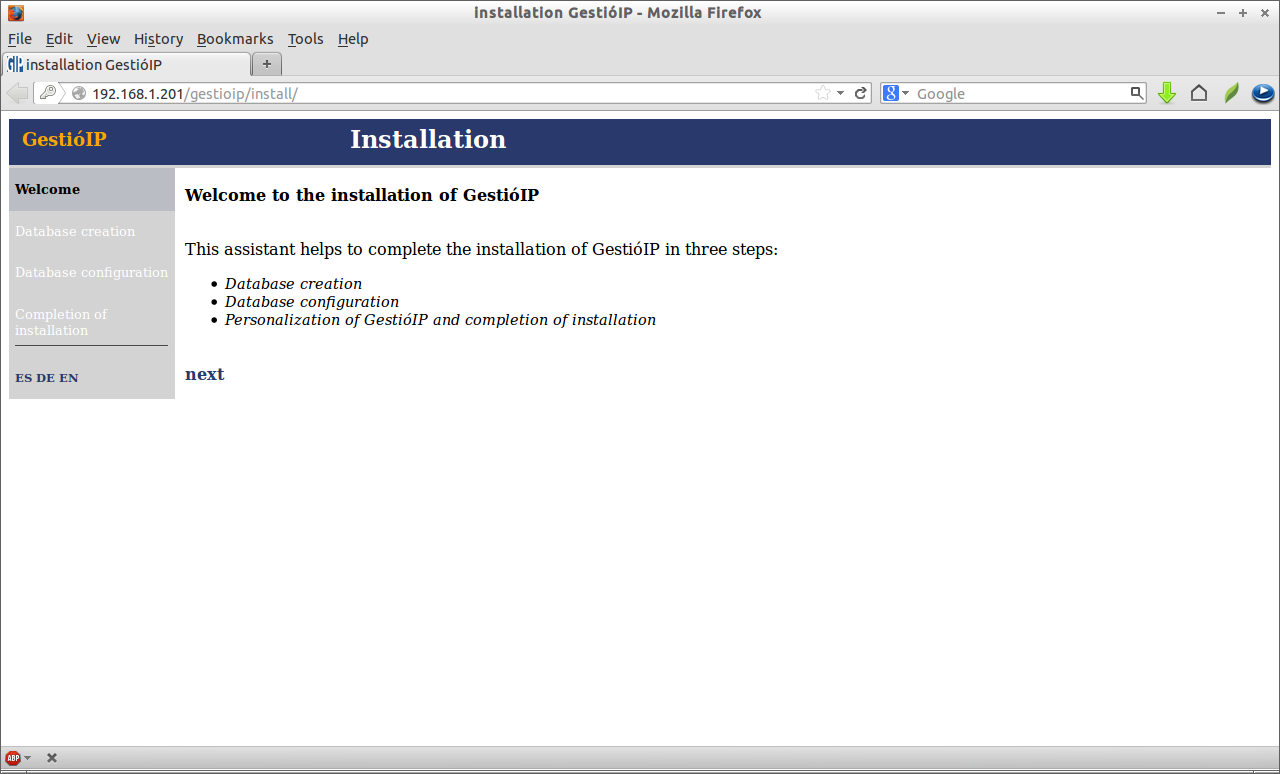
 Click Next to create and configure database for Gestioip.
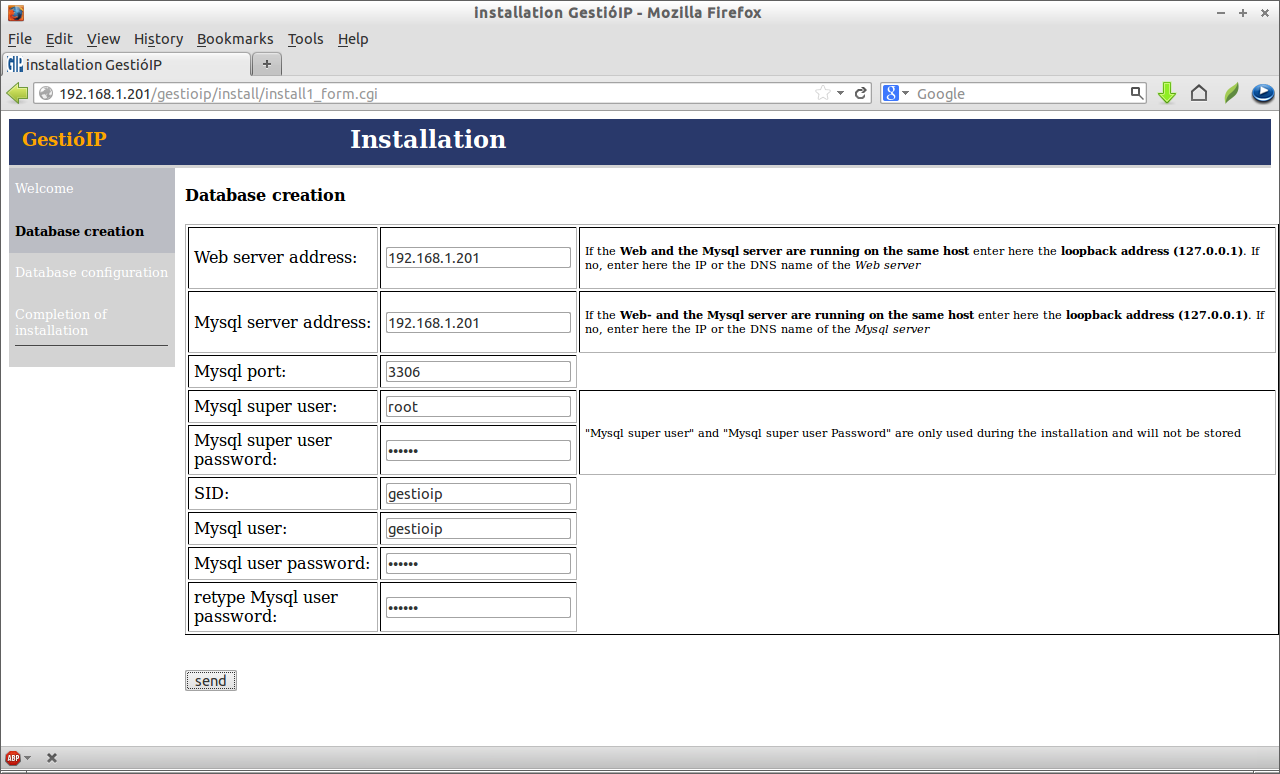
 Fill up the database and user details. Click Send.
 This will create the necessary database and tables for GestioIP. Click Next page to continue. Enter the sites and category details. For example if you have managing your IT infrastructure on various location, enter the locations in the Sites box.
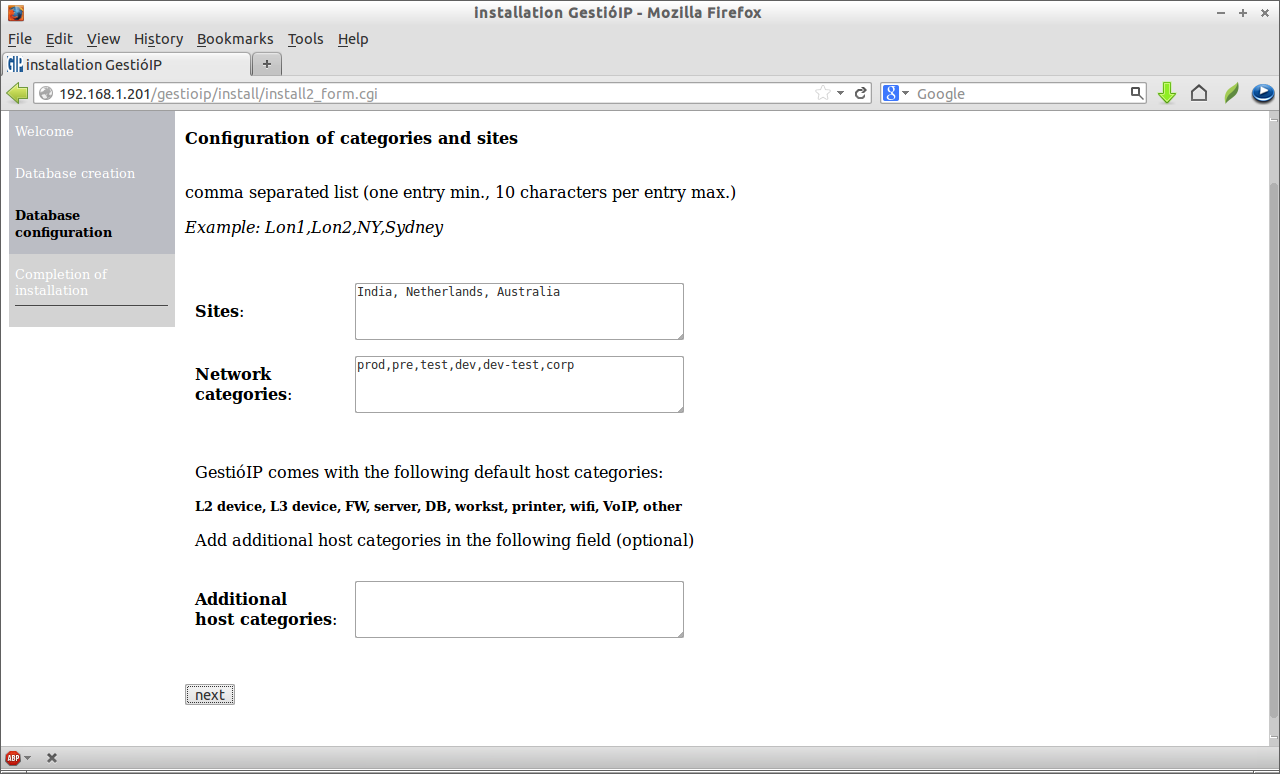 This will create the sites and category. Click Next page to continue. Now GestioIP has been successfully installed.
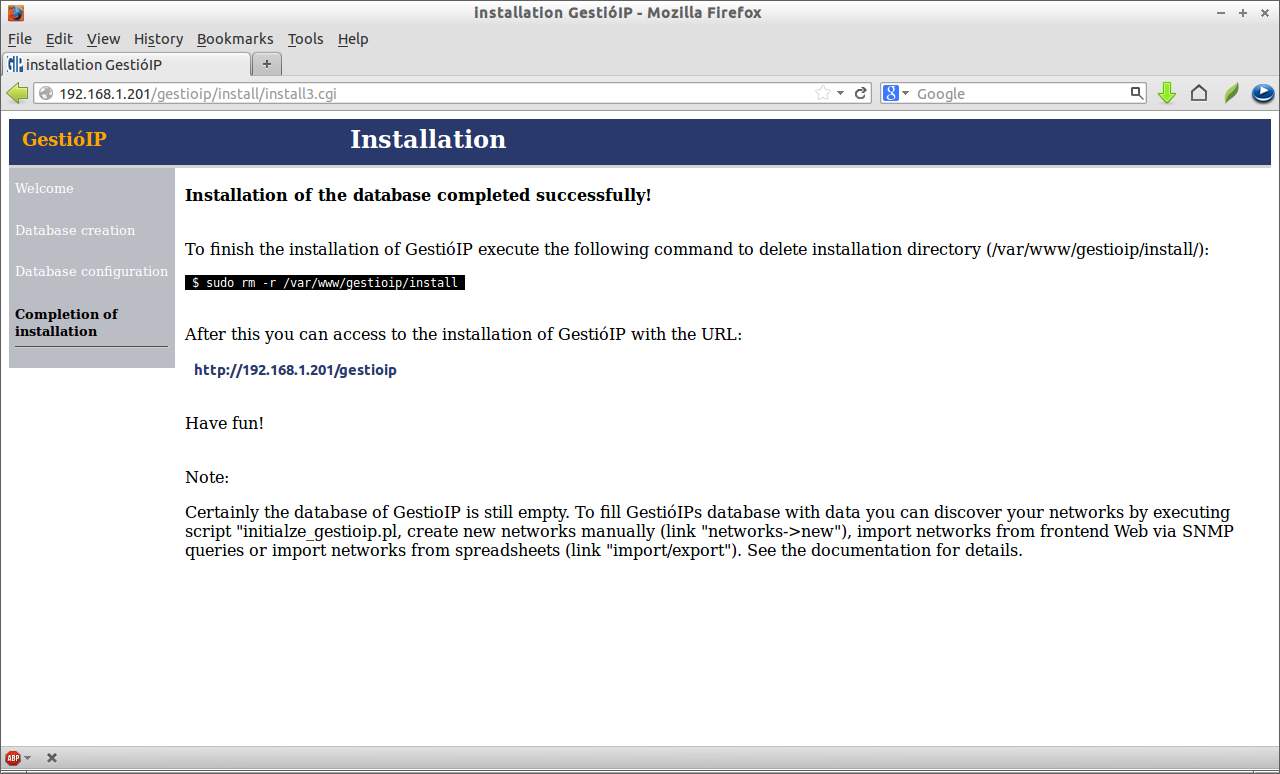 Enter the following command to delete the installation directory (/var/www/gestioip/install):
sk@server1:~/gestioip_3.0$ sudo rm -r /var/www/gestioip/install
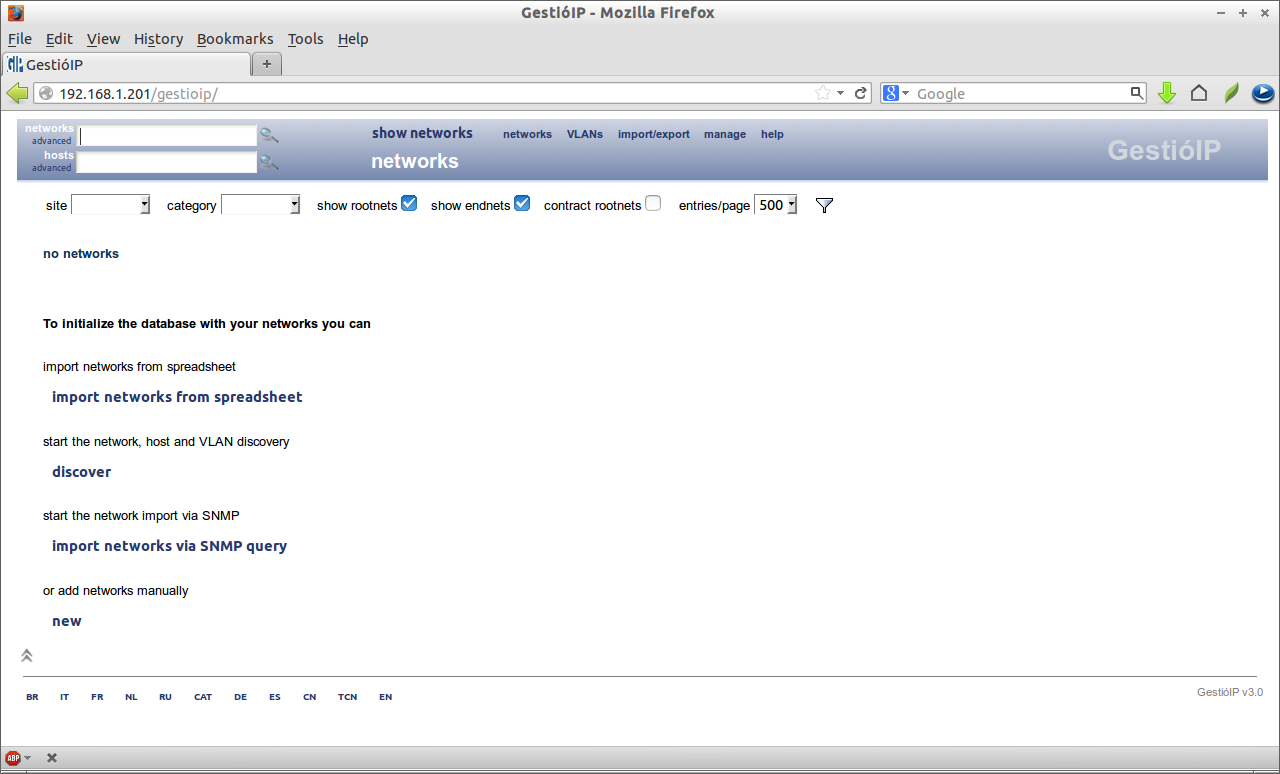
Now navigate to http://ip-address/gestioip from your browser and start managing IP addresses.
 That’s it.
This tool will be quite useful for Network Administrators and System Administrators one who maintain large number of networks. From here you can create new networks, VLANS and manage networks and so forth. For more information about GestioIP usage and configuration please refer the GestioIP documentation page.


 software.)